Note: This Ragic feature is implemented using AWS SES. If you are using on-premises servers, you will need to purchase your own domain and AWS SES service to enable this feature.
In addition to using the Customer Service Tickets Template, you can also create entries from received emails in existing sheets.
Follow these two steps:
1. Confirm the Corresponding Email Address for the Sheet
Example:
Database account: testing123
Sheet URL: www.ragic.com/testing123/forms1/1
Corresponding email address: testing123.forms1.1@tickets.ragic.com
2. Set the Corresponding Email Address as the Recipient
Once you have the corresponding email address for the sheet, you can set up automatic email forwarding or add it to your company’s email group (or mailing list). Emails sent to this address will automatically generate new entries in the sheet.
Once an entry is created, users can view the email history by clicking the Email icon in the bottom right corner of the Form Page. They can also reply to emails directly from the sheet.
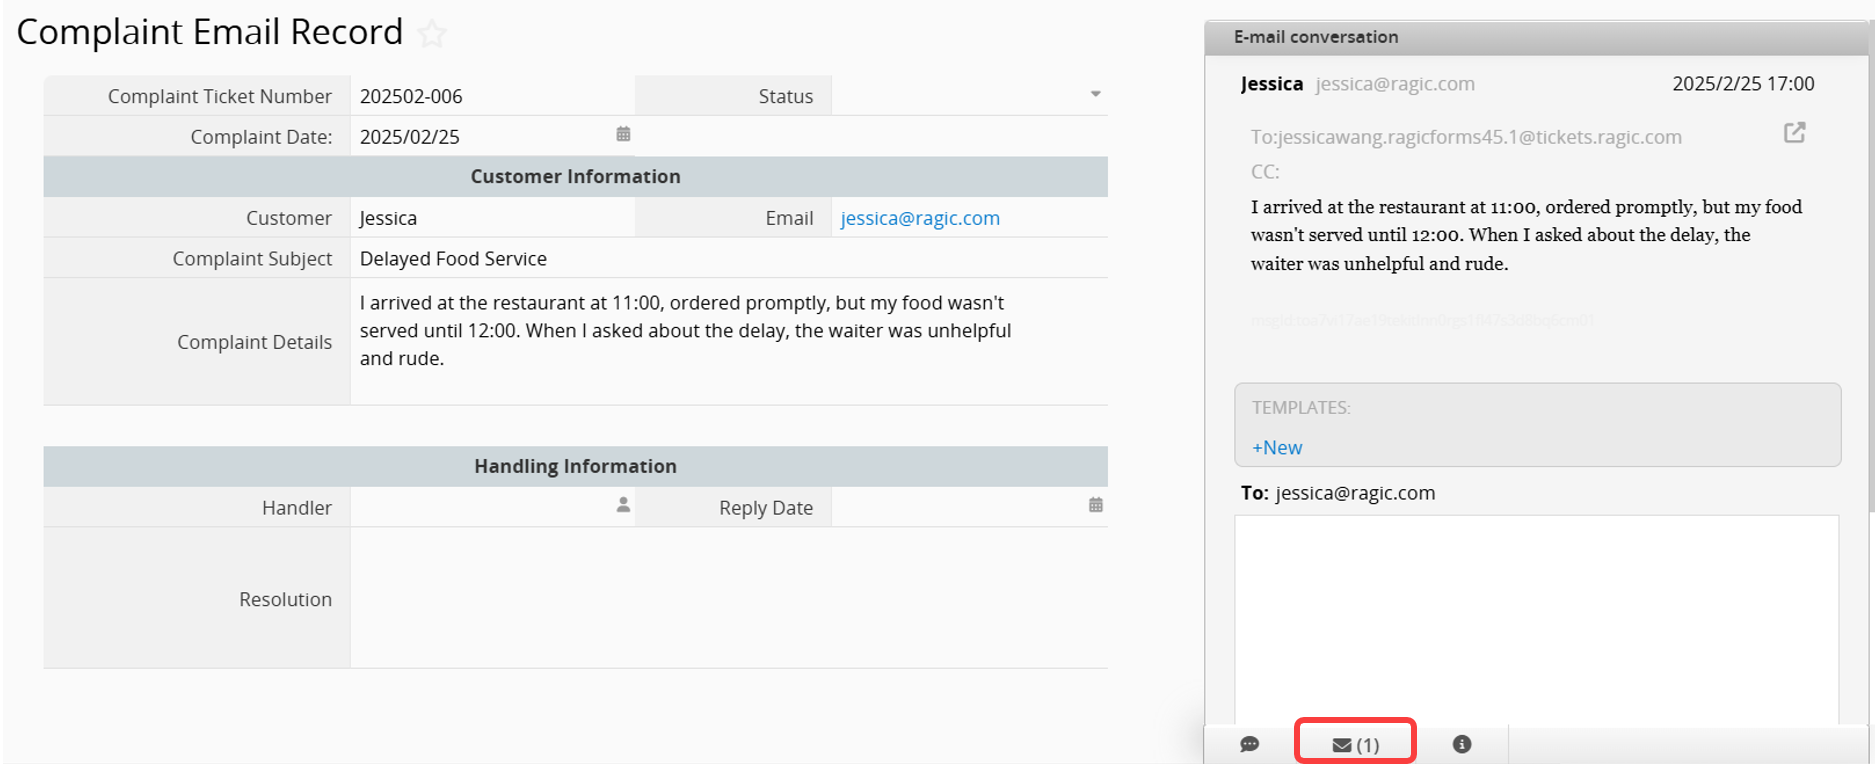
In the Form Page fields, you can use the Manual Attributes settings with parameters to automatically populate corresponding fields with relevant email information (such as sender, subject, content, etc.) when the system receives an email and creates an entry.
The table below lists the currently supported parameters:
| Parameter | Value | Description |
|---|---|---|
| email_subject | 1 | Email Subject |
| email_content | 1 | Email Content |
| email_updateDate | 1 | Entry Last Modified Date |
| email_fromAddress | 1 | Sender's Email |
| email_fromPersonal | 1 | Sender's Name |
| email_updateEmail | 1 | Last Updated By Email |
| email_toAddress | 1 | Recipient's Email |
| email_toPersonal | 1 | Recipient's Name |
| email_ccAddress | 1 | CC Email |
| email_ccPersonal | 1 | CC Name |
| email_needAction | 1 | Display If Email Requires Action (Y/N) |
| email_upload | 1 | Email Attachment (Requires File Upload field) |
After setting up, it is recommended to send a test email to verify the configuration.
 Thank you for your valuable feedback!
