Tip: This application involves integration with the Google Maps platform and uses Directions API, which may incur certain costs. You can refer to Make's official documentation and Google's pricing for more details.
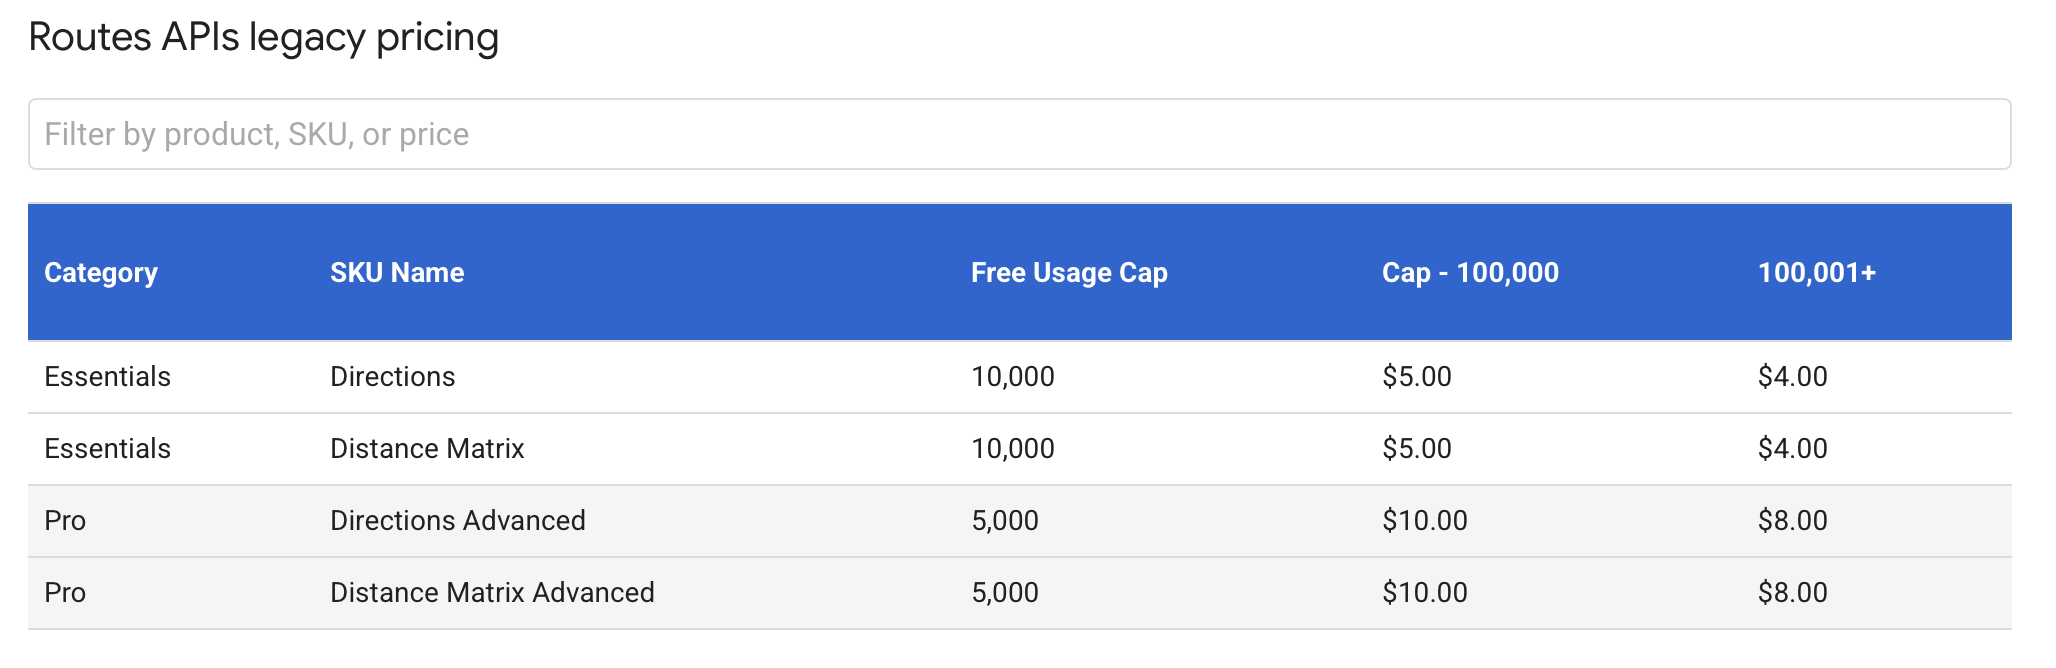
You can also refer to this document to learn how to view your API usage and billing.
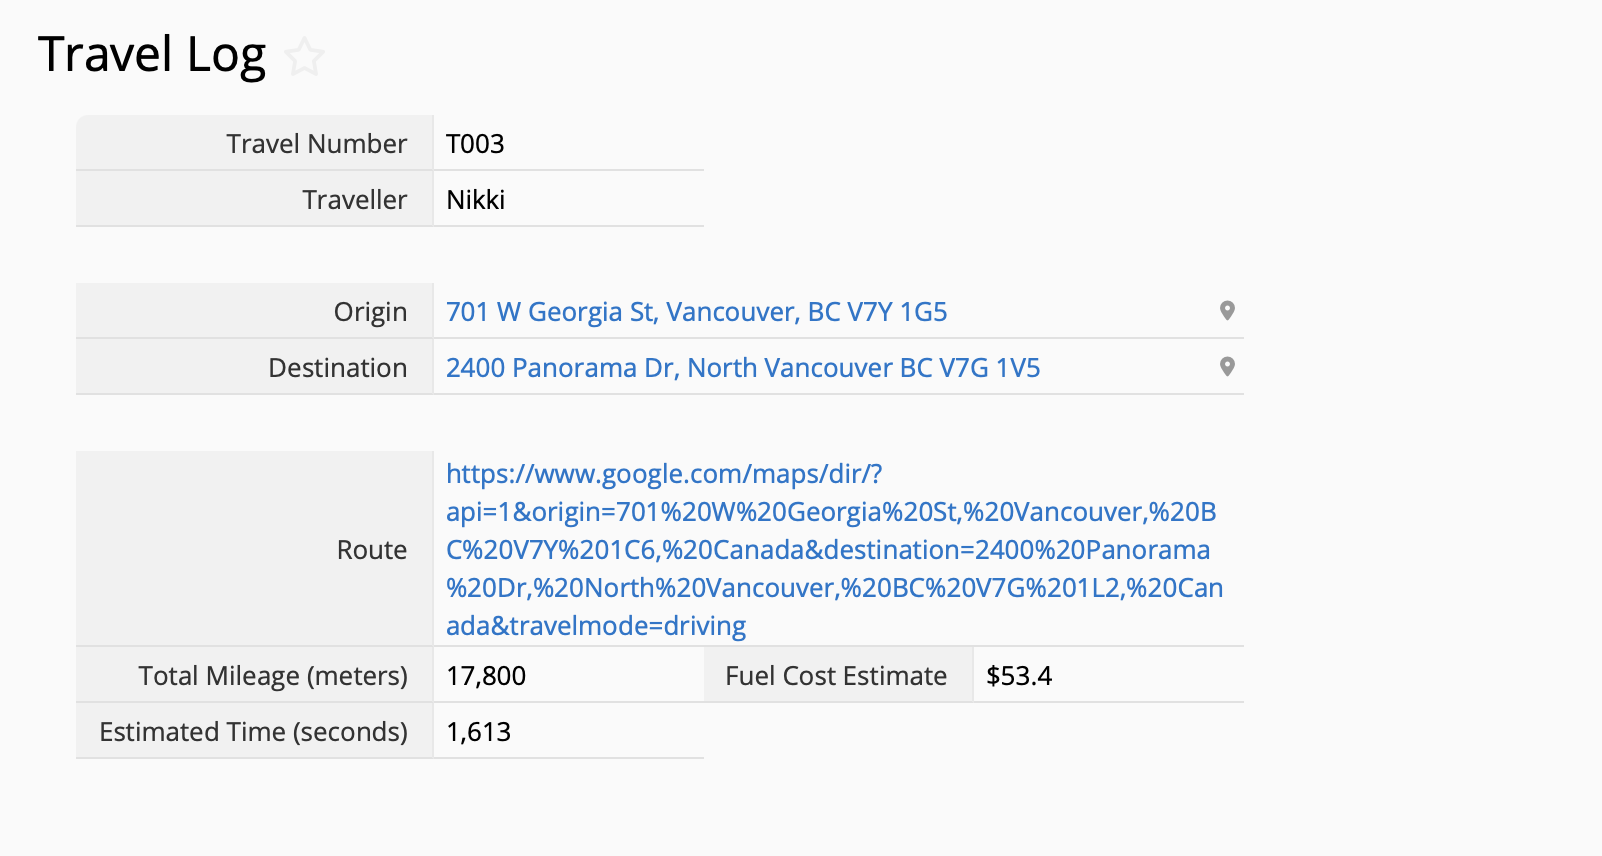
If you are a traffic or transportation operator, or if you often travel outside for business, you will often need to estimate your travel time and calculate fuel costs. For example, maybe you have a sheet like this:
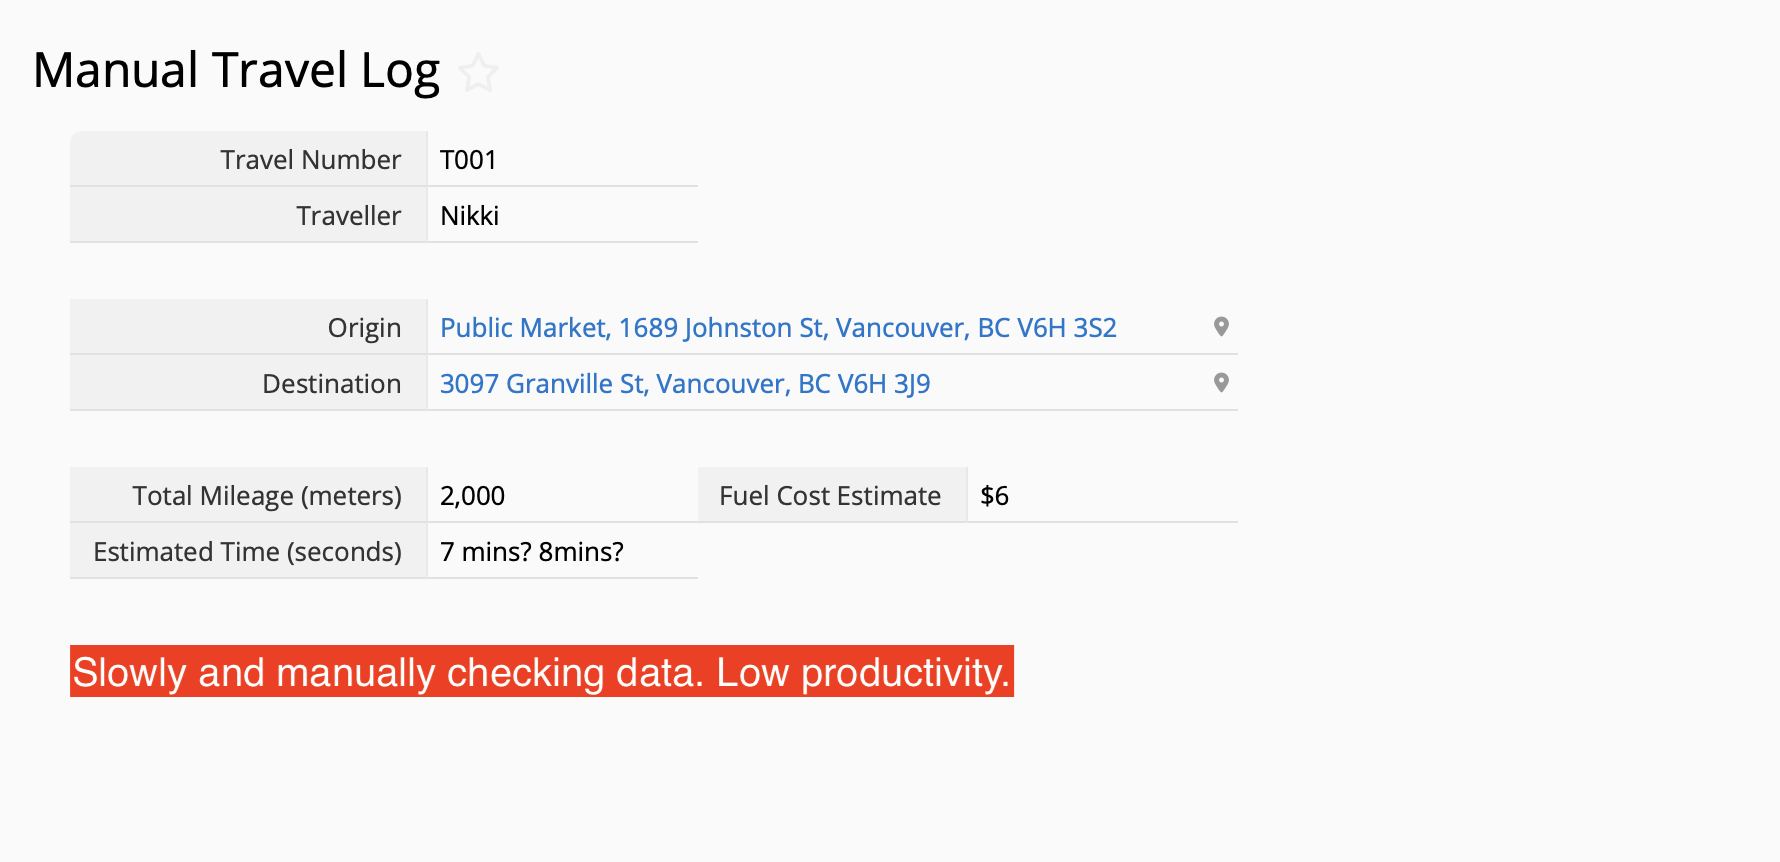
However, it can be troublesome to manually record mileage and time. As people are prone to forget minute details, you may not be able to accurately input the information.
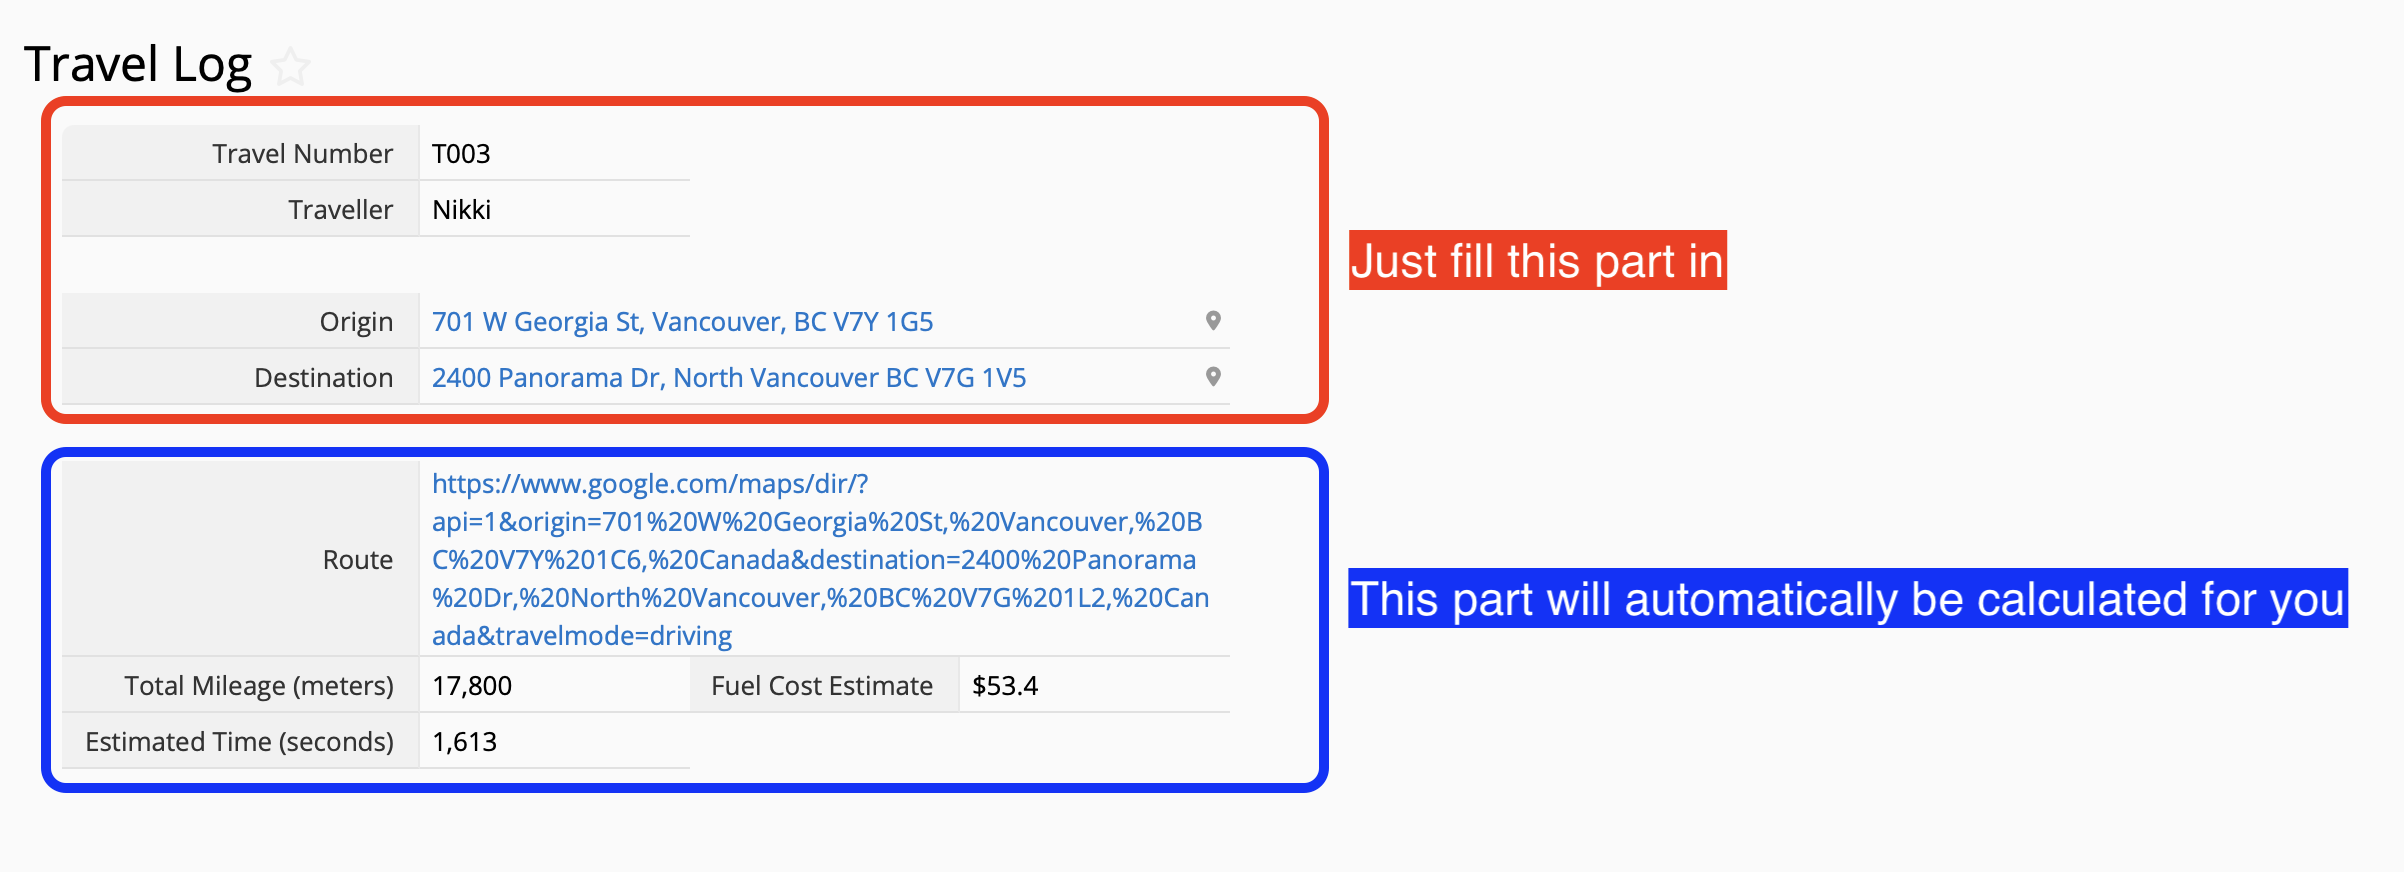
Google Maps is often used for navigation when on the road, and it can help you calculate the estimated driving time and mileage. Think about it— If you only need to fill in your origin point and destination points in the Ragic sheet and let the computer do the rest in filling in the route, time, and mileage calculated by Google Maps— wouldn't that save you a lot of tedious manual work?
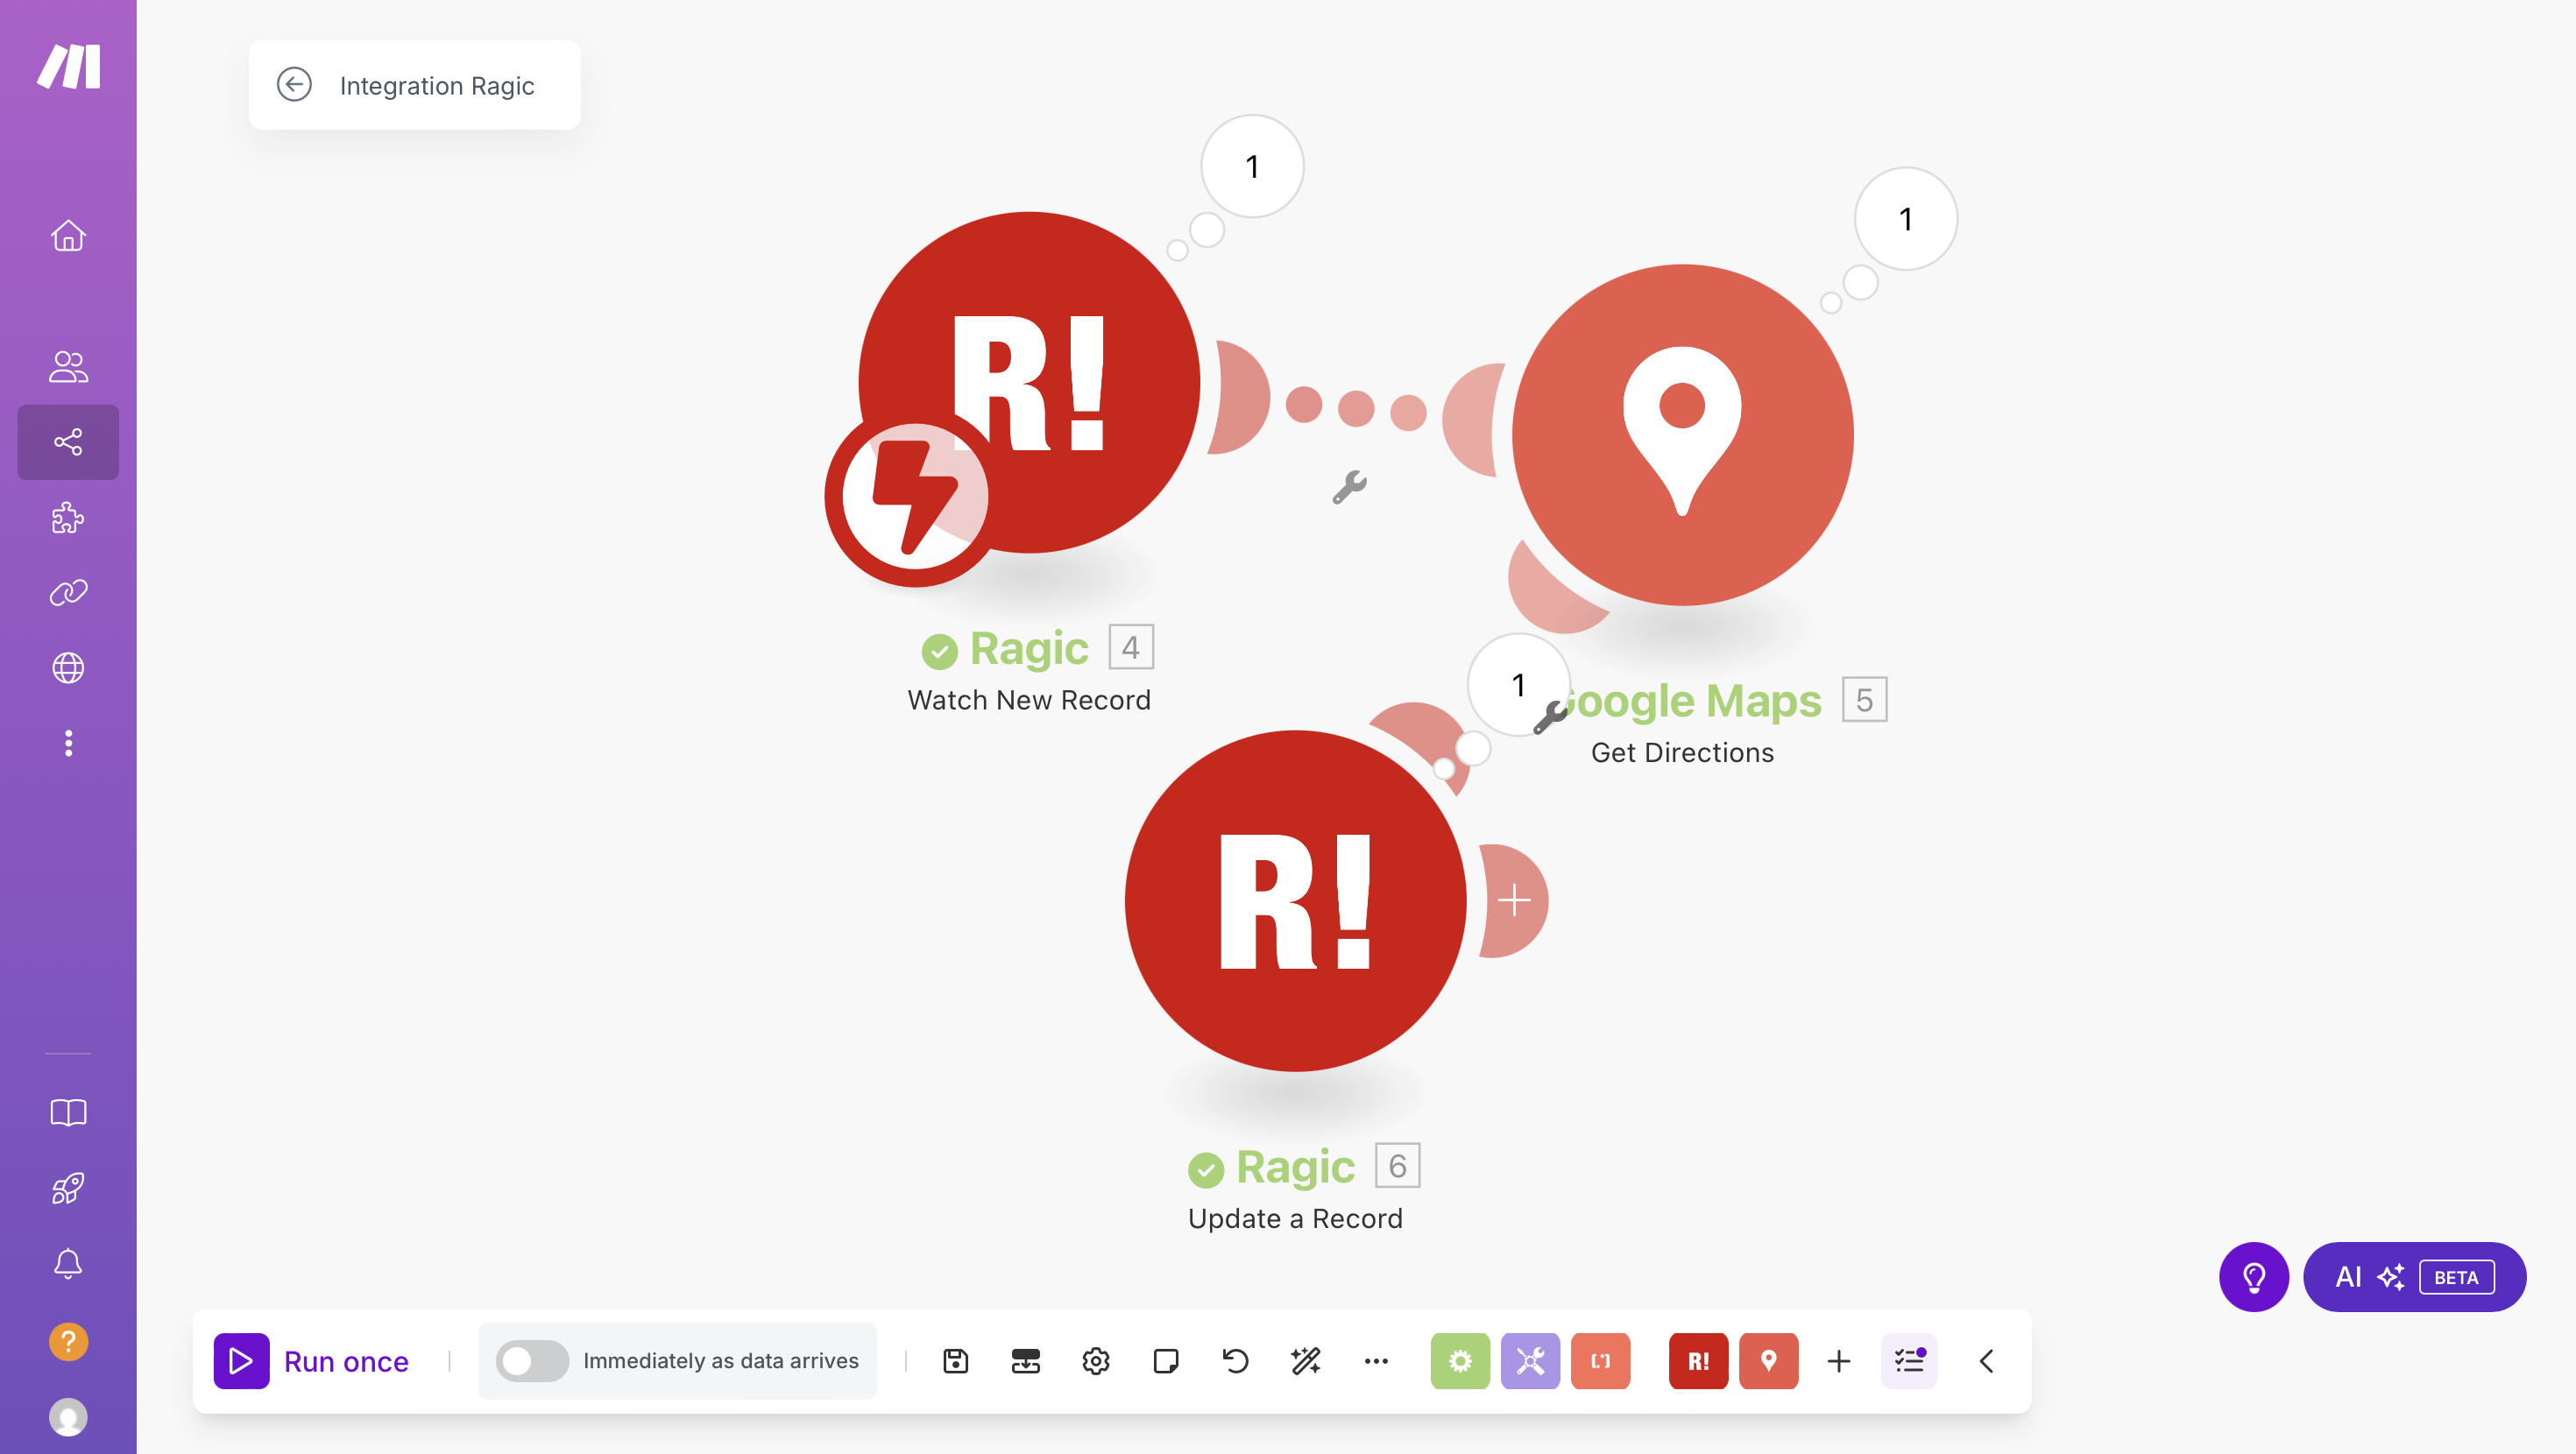
To do this, you can use Make (formerly Integromat) to design a set of integrations as follows:
When you input the origin and destination points of your trip in Ragic, Google Maps will automatically calculate the route and send back the information to Ragic.
Next, we will introduce two different design methods. The first is a relatively simple calculation of the journey between two points, and the second is a calculation involving multiple stops, which is more suitable for logistics and transportation companies:
You can click on the above hyperlinks and jump to the paragraph that better suites your needs.
If you occasionally run trips and go out to run errands, you most likely will be traveling back and forth between your company and your destination. In this case, the simpler method might work for you.
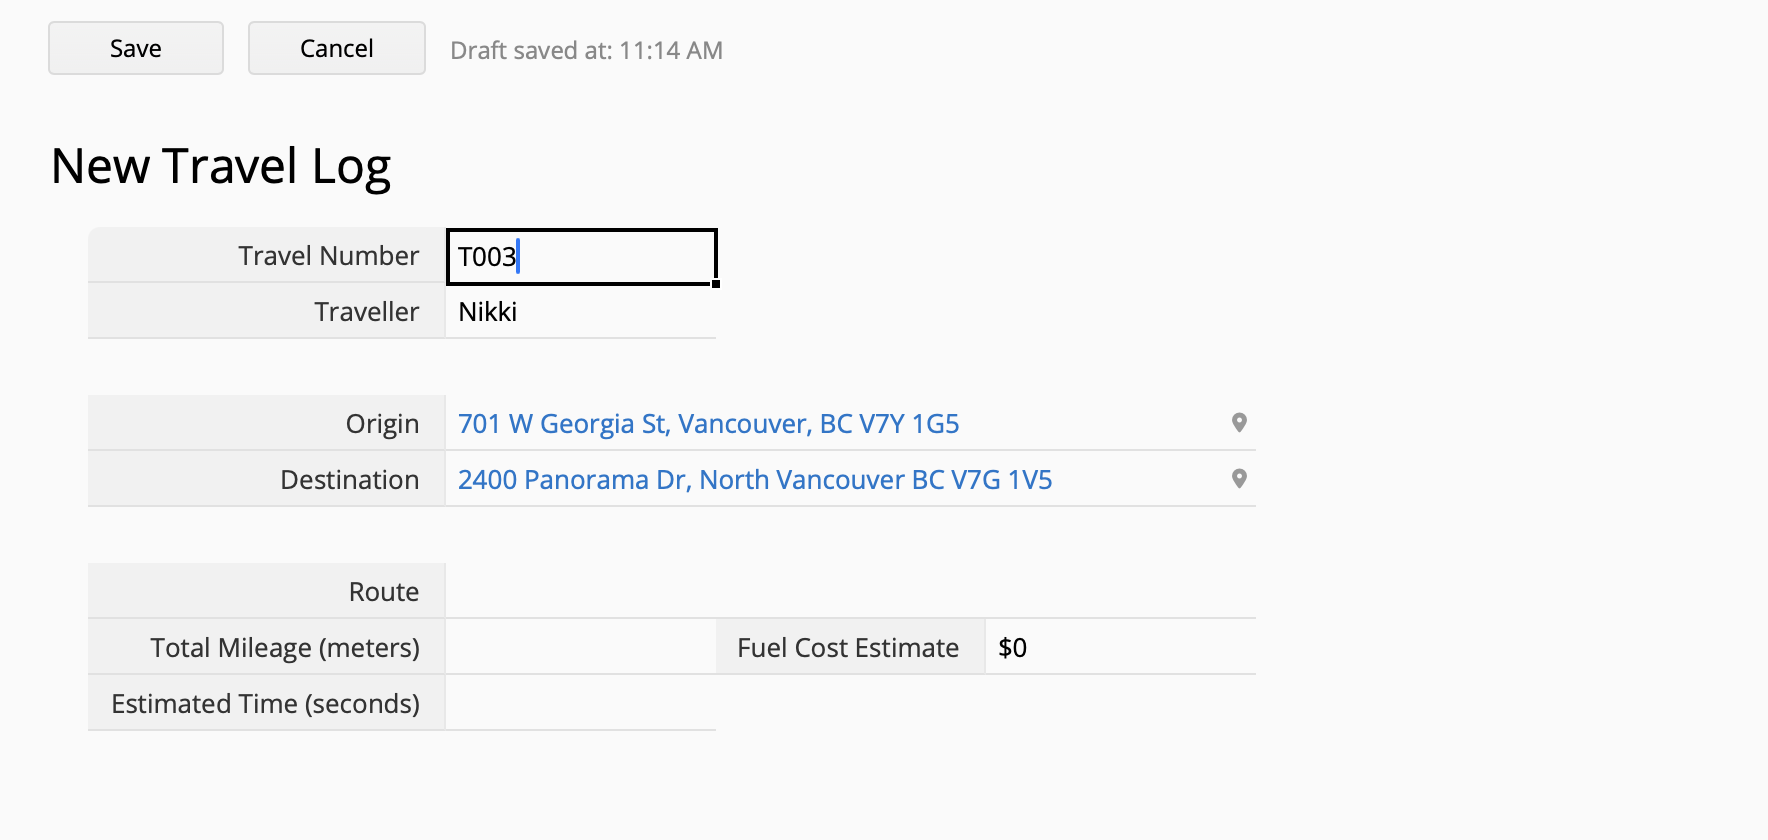
To start recording your travel information, you can create a "Travel Log" sheet like this:
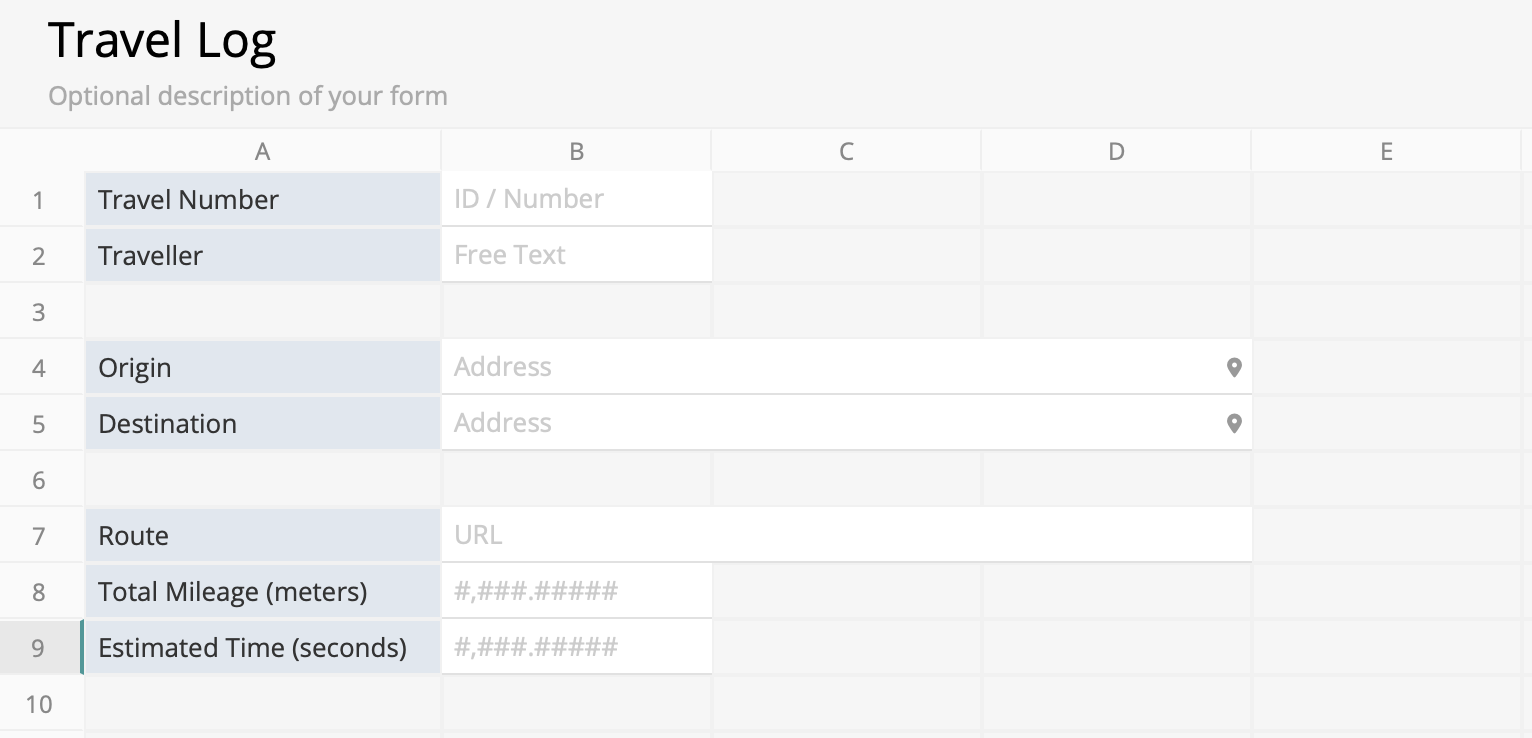
Tip: Google Maps calculate the time and distance in seconds and meters respectively. It is recommended to make a note in the field names to avoid confusion.
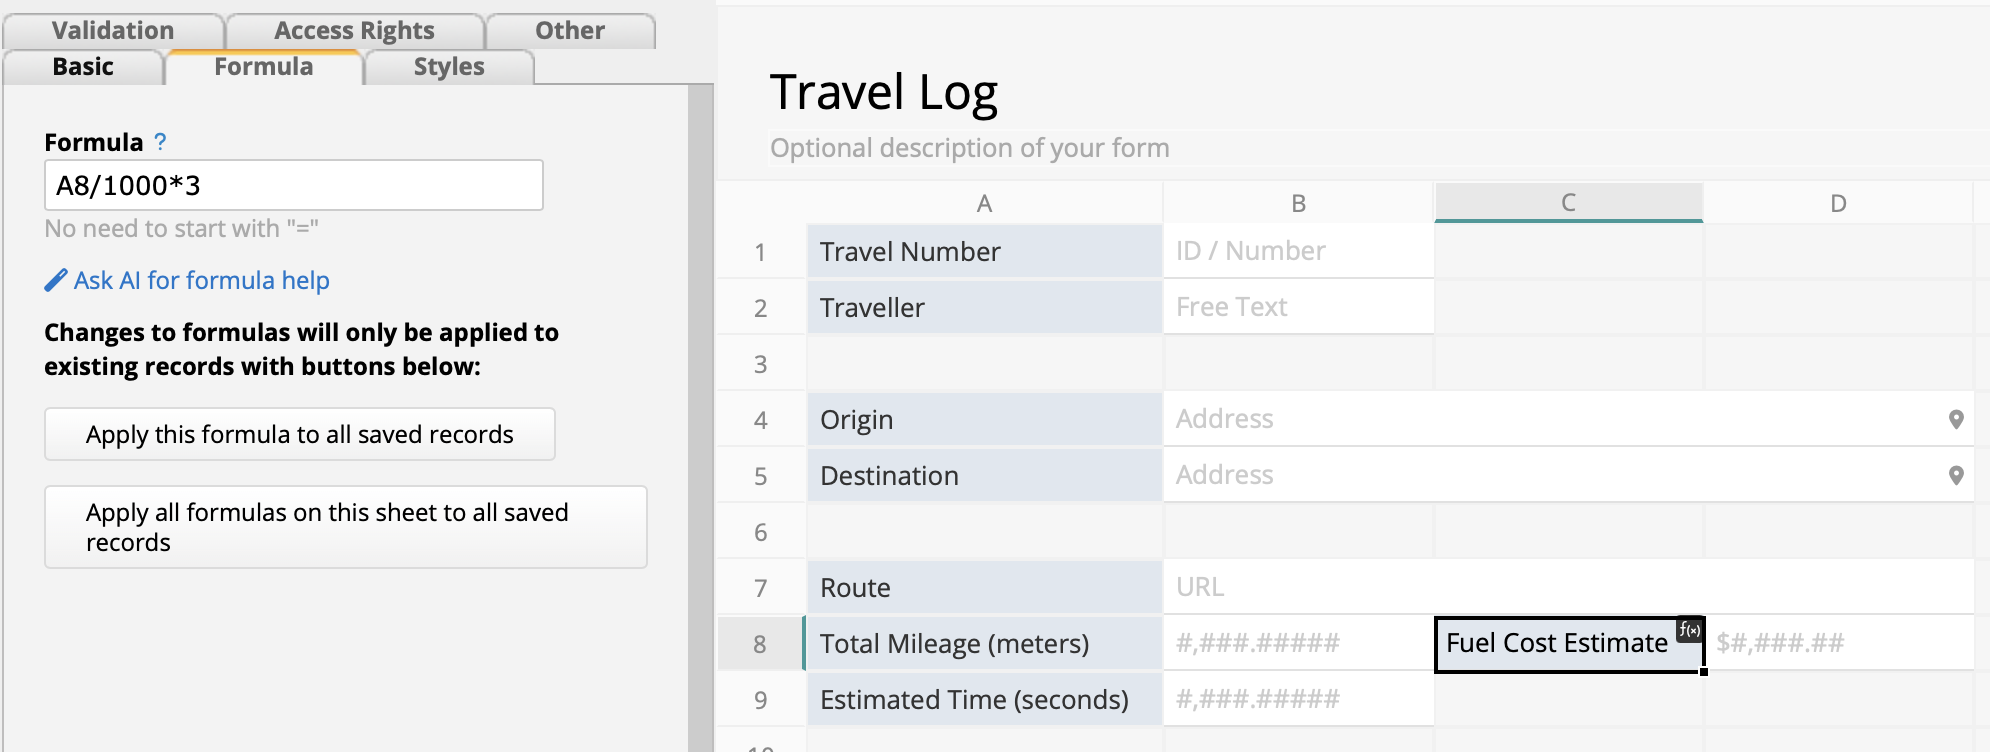
If your company provides fuel subsidy based on mileage, you can also add a "Fuel Cost Estimate" field and set a formula according to your needs.
For example, if the company provides a subsidy of $3 per kilometer, the formula can be designed as follows:
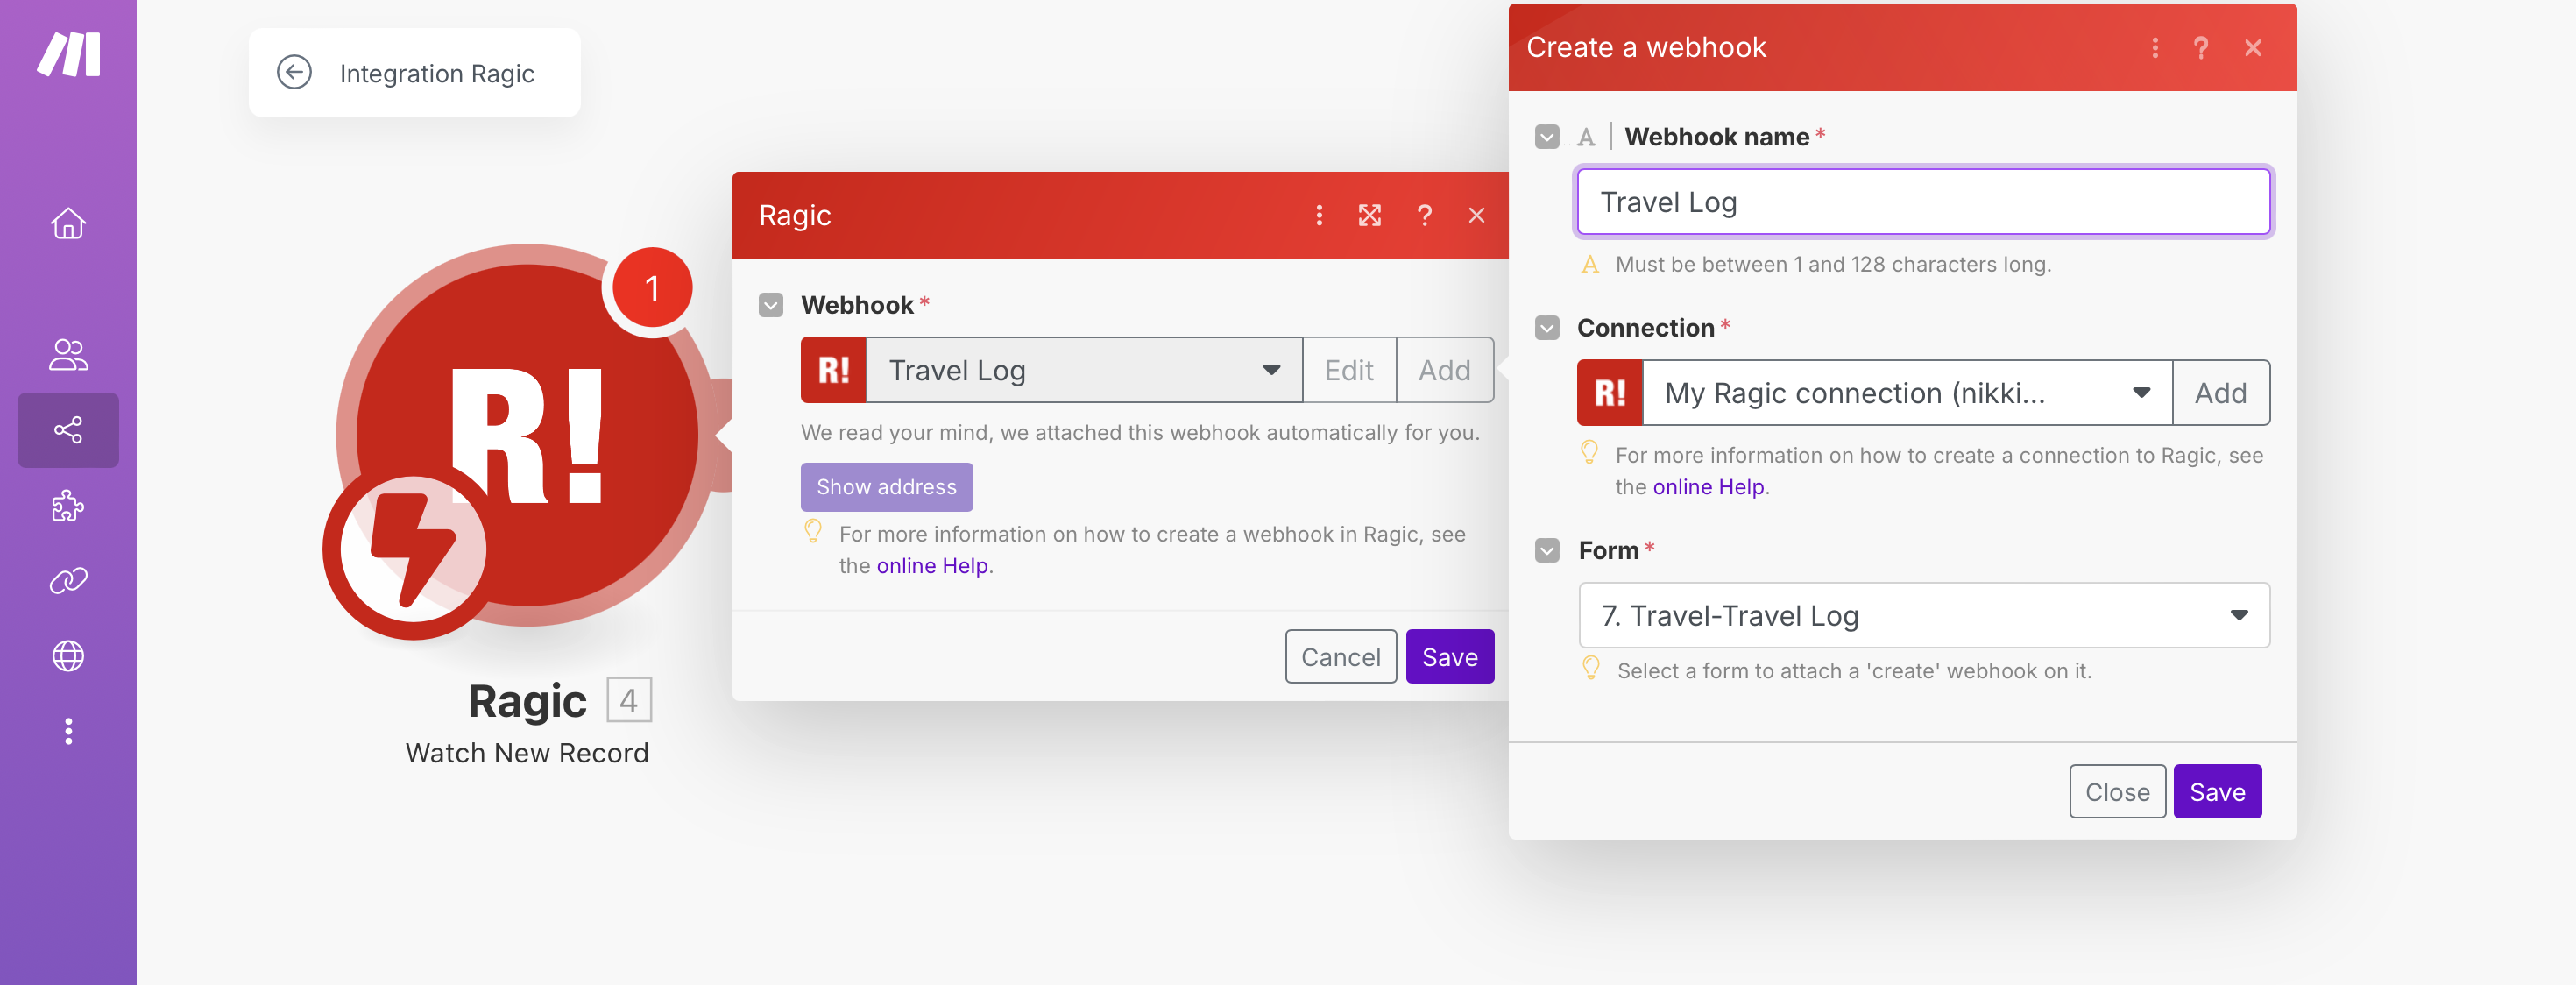
After creating the sheet, you can open Make and connect your sheet.
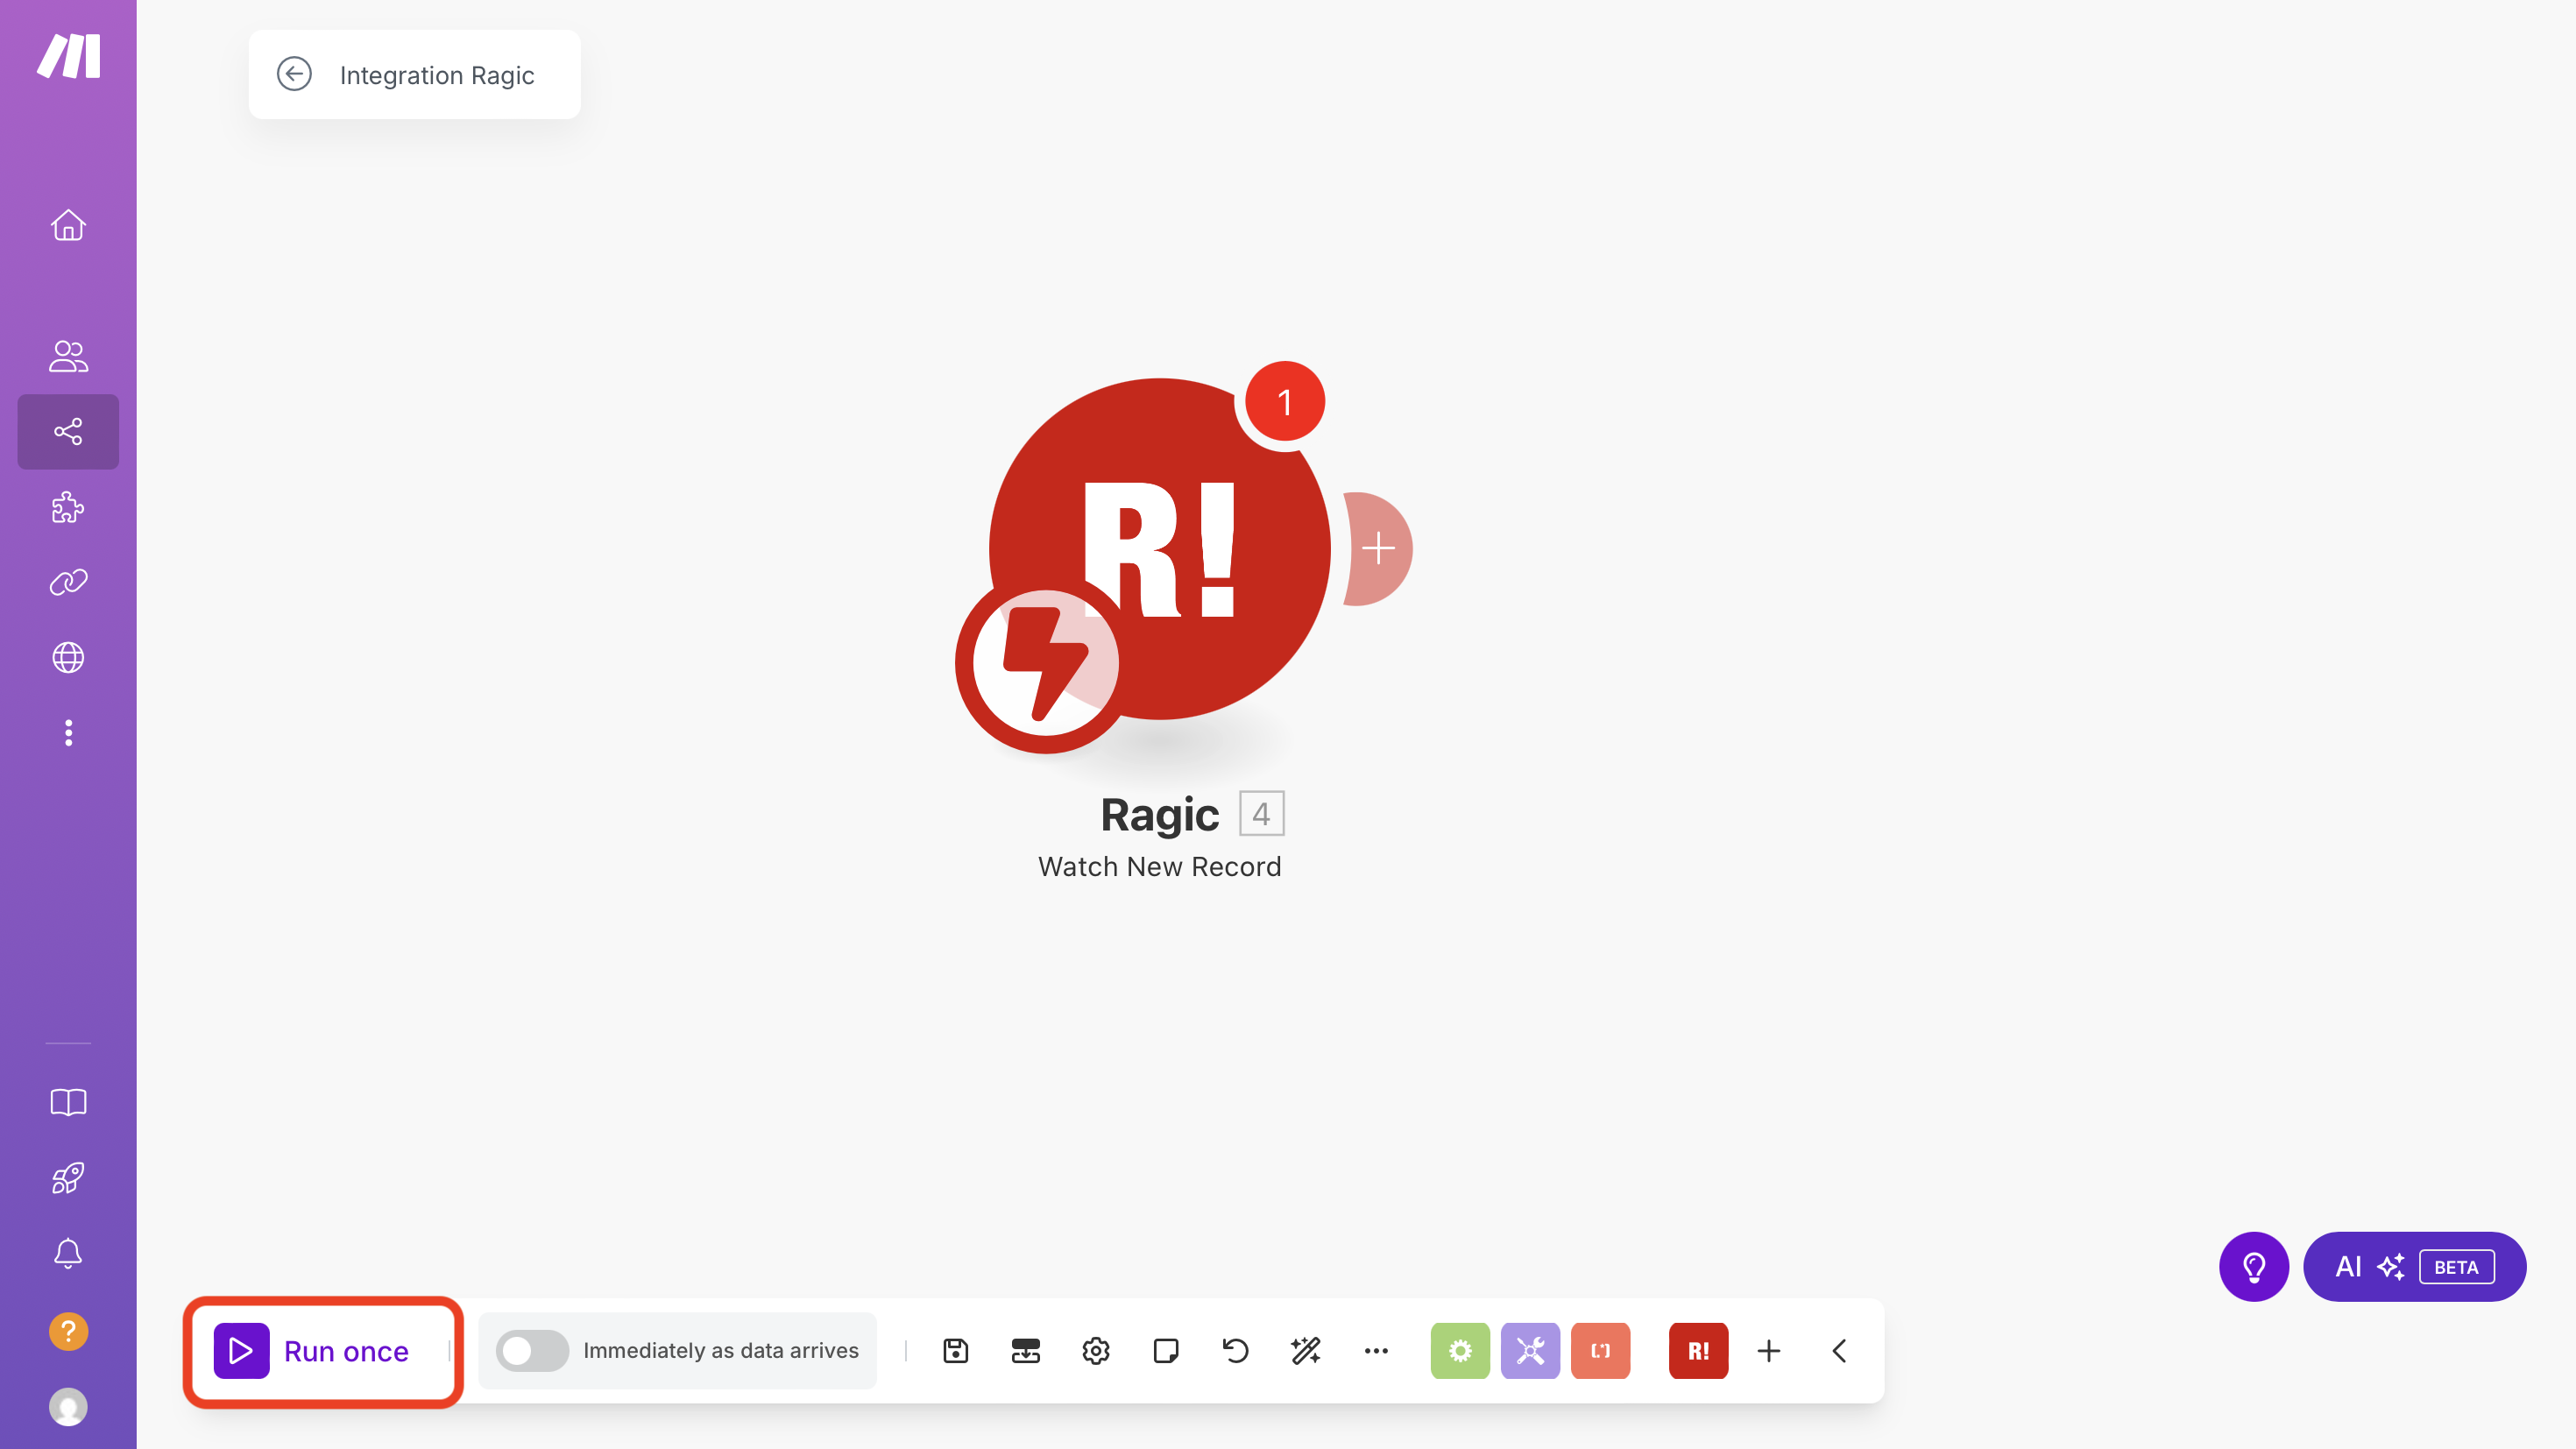
We recommend clicking "Run Once" in the lower left corner and creating a simulation data for testing, so that Make can obtain the form fields and test the connection:
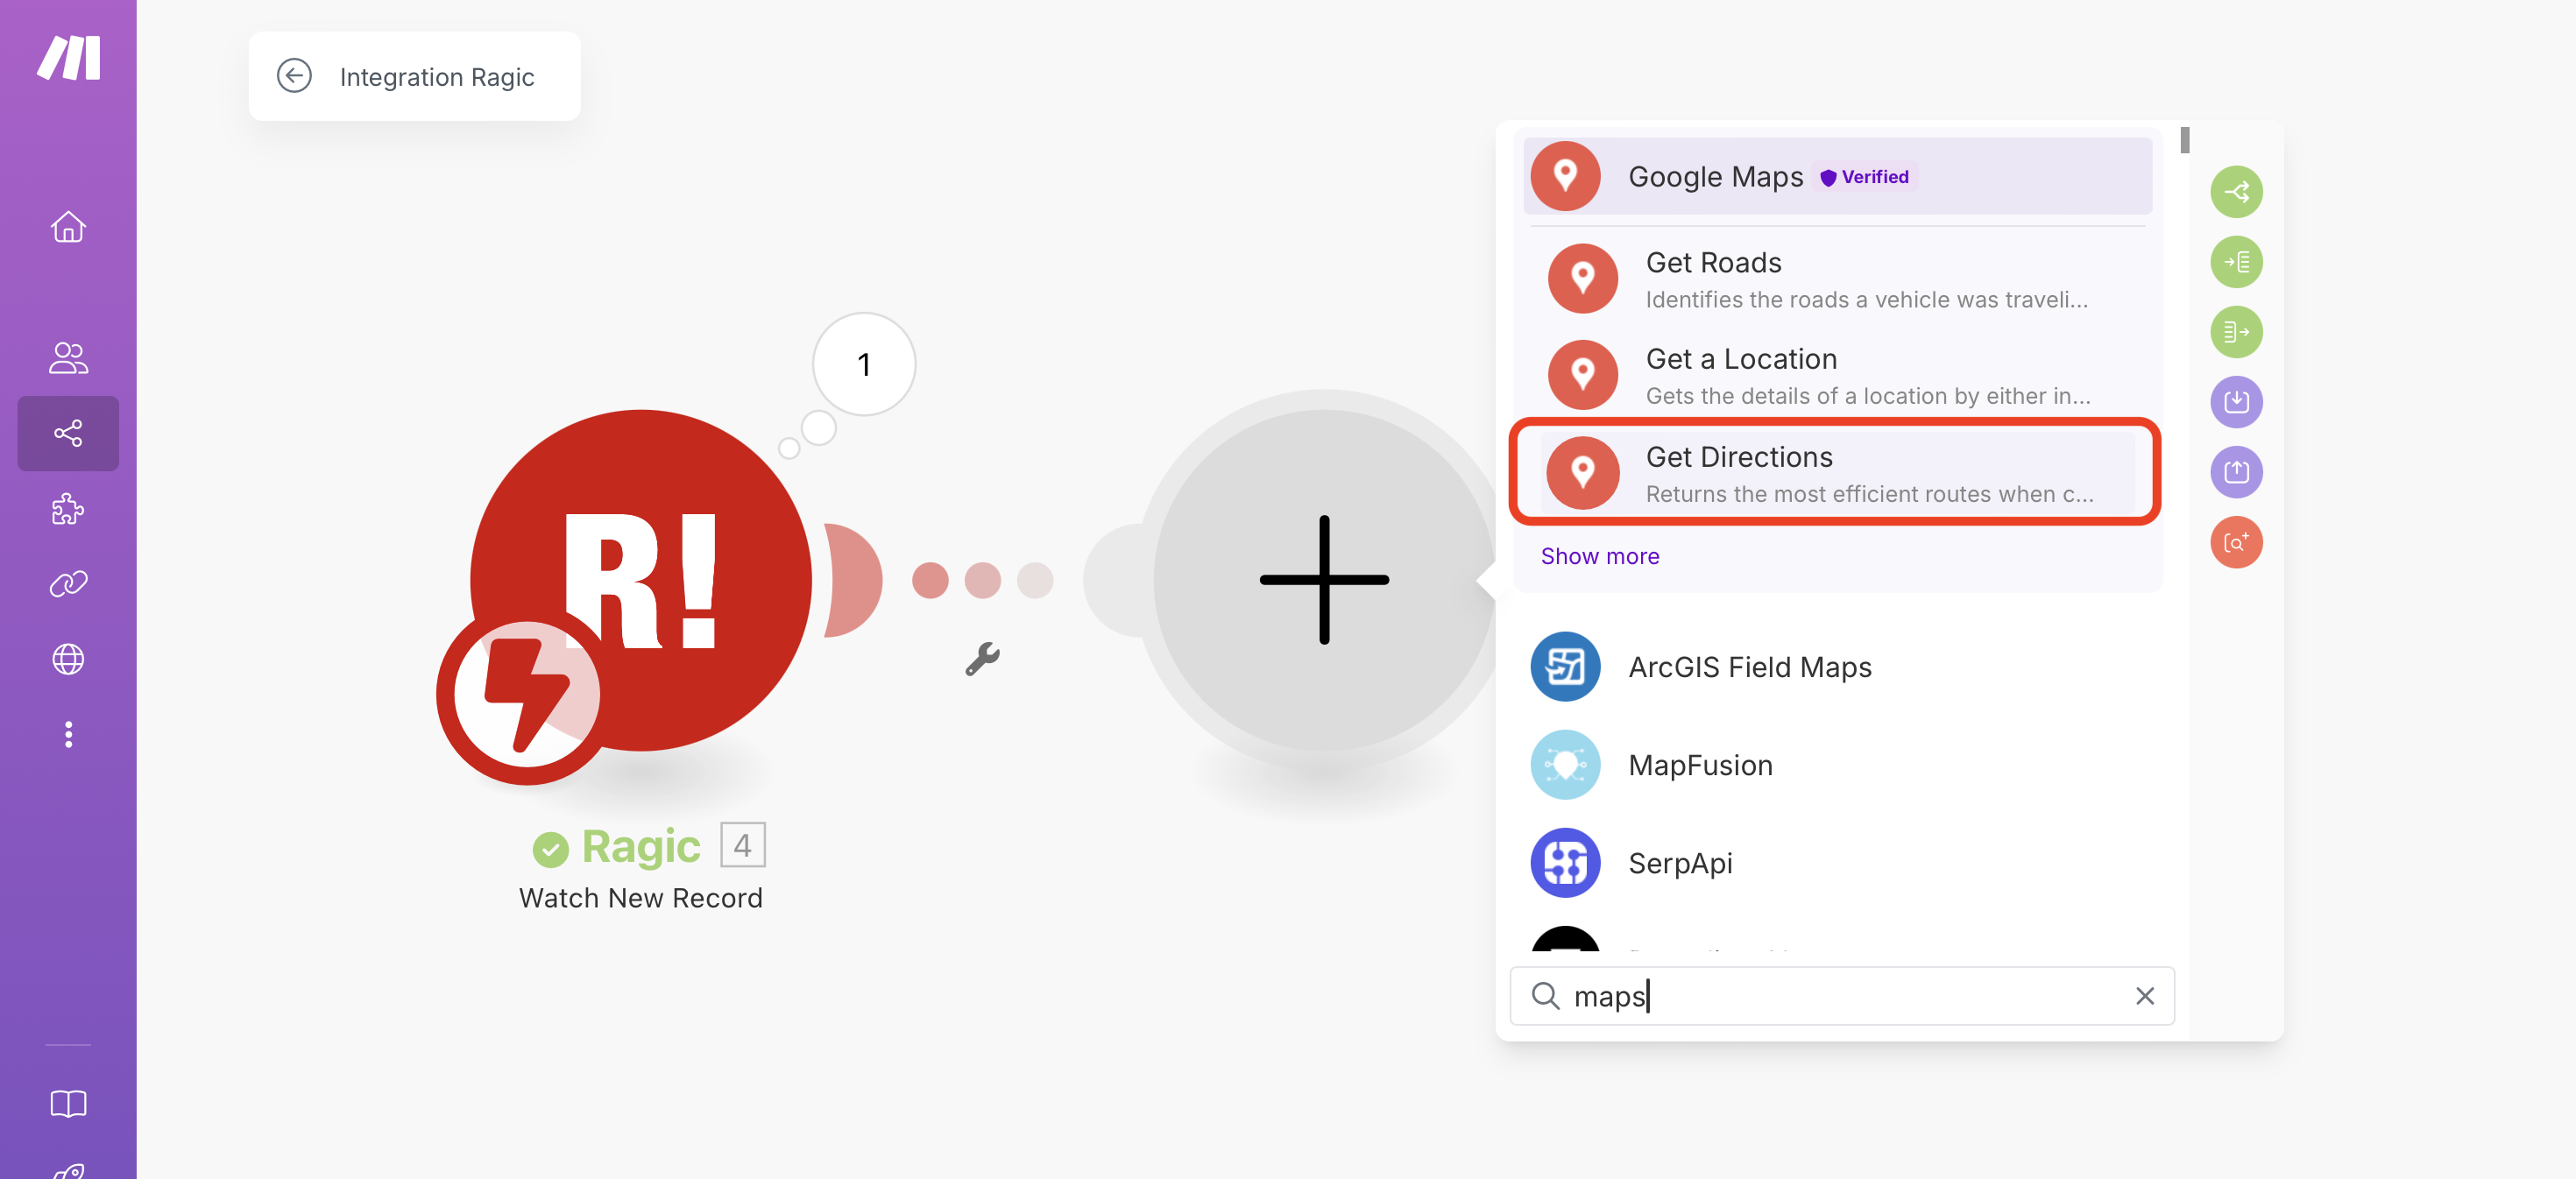
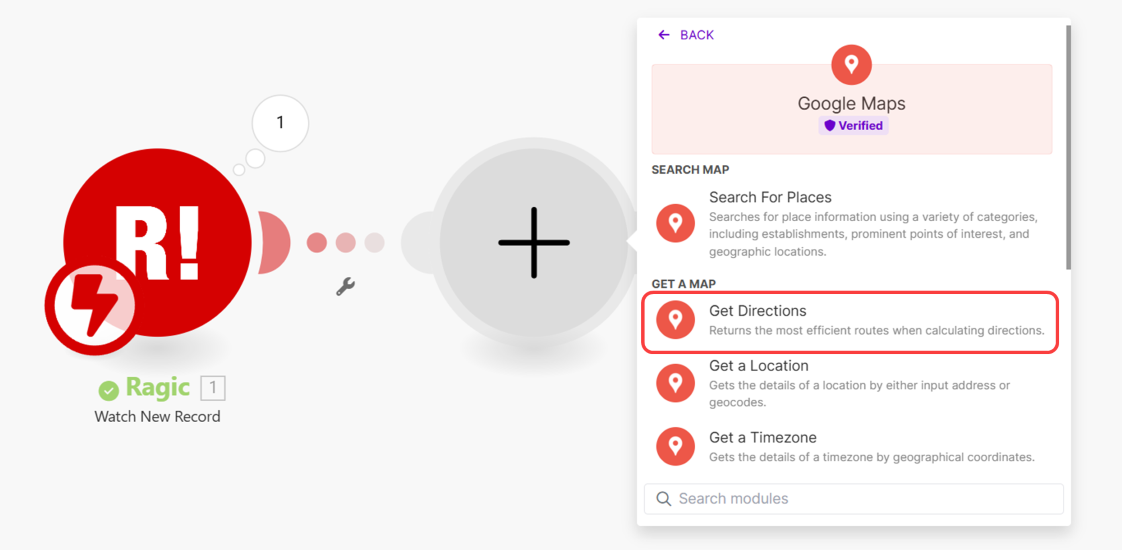
You then need to add a Google Maps action to Make. Since we need to calculate the best route and obtain the mileage and time of the route, we need to select the "Get Directions" action:
If this is your first time using Make to connect to Google Maps, you will need to use an API Key to connect. To do this, you need to obtain an API Key from the Google Cloud Platform. The steps are as follows:
1. First, click here and log in to the Cloud Platform with your Google account
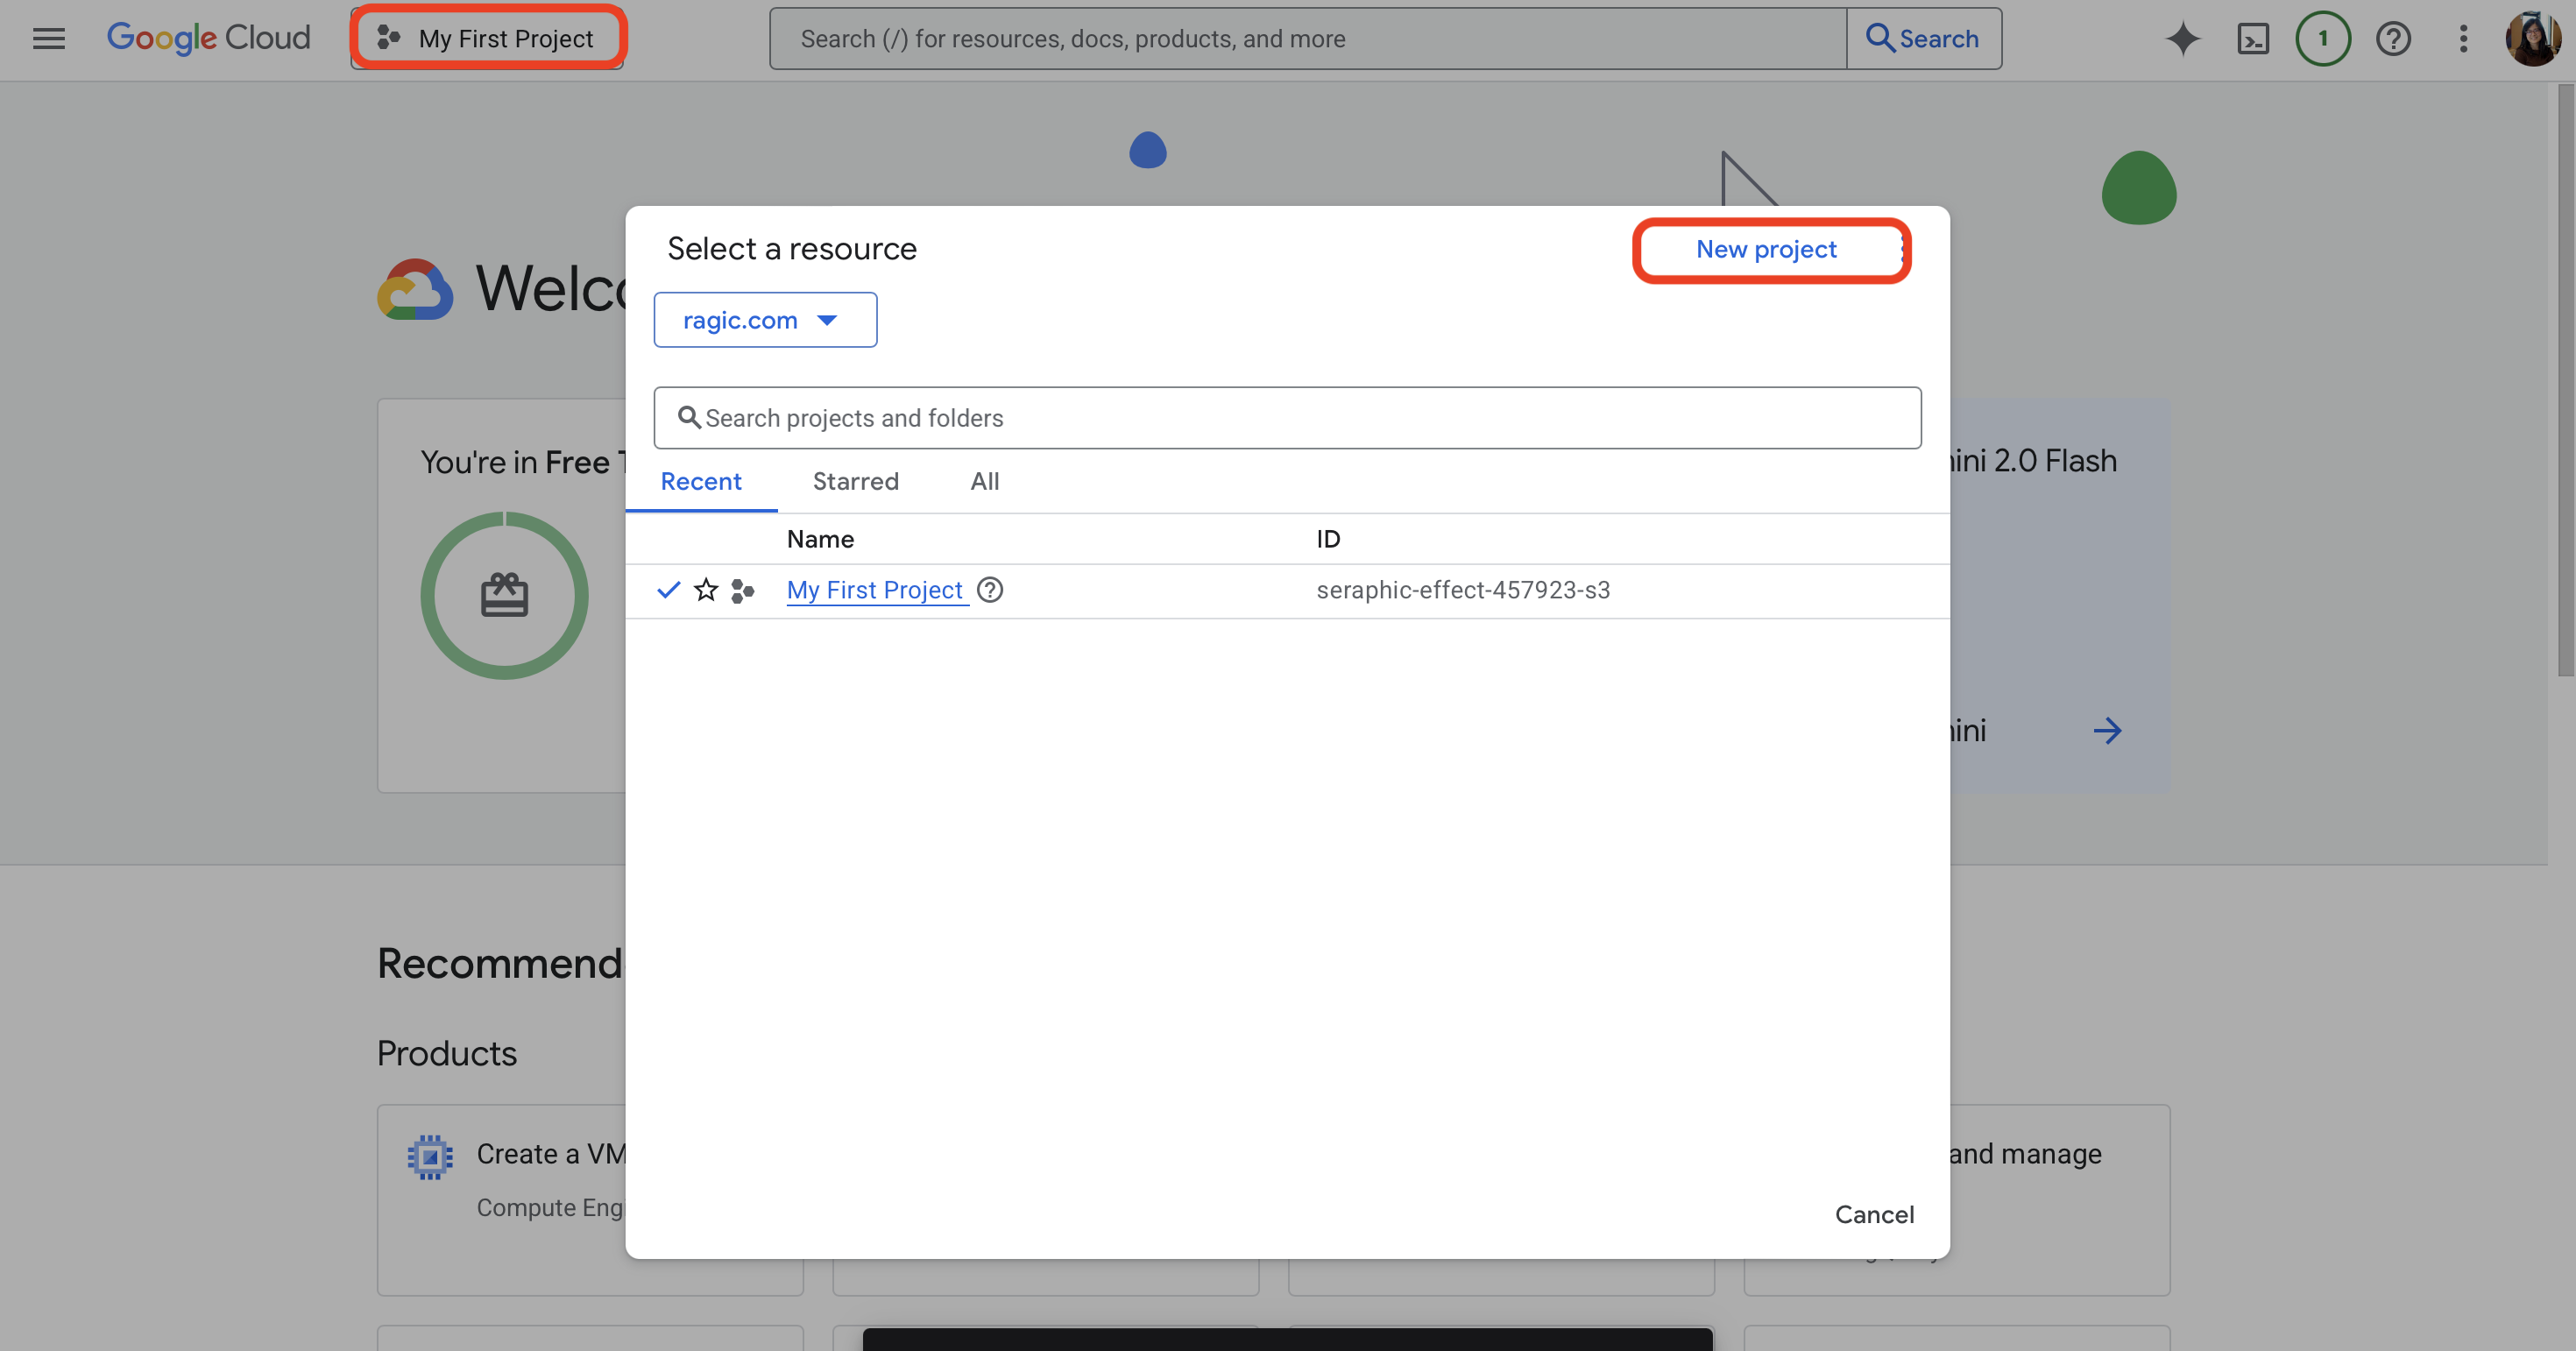
2. Click "Select a Project" at the top and select a project or add a new project in the pop-up window
(If you have created a project before, you can skip step 3)
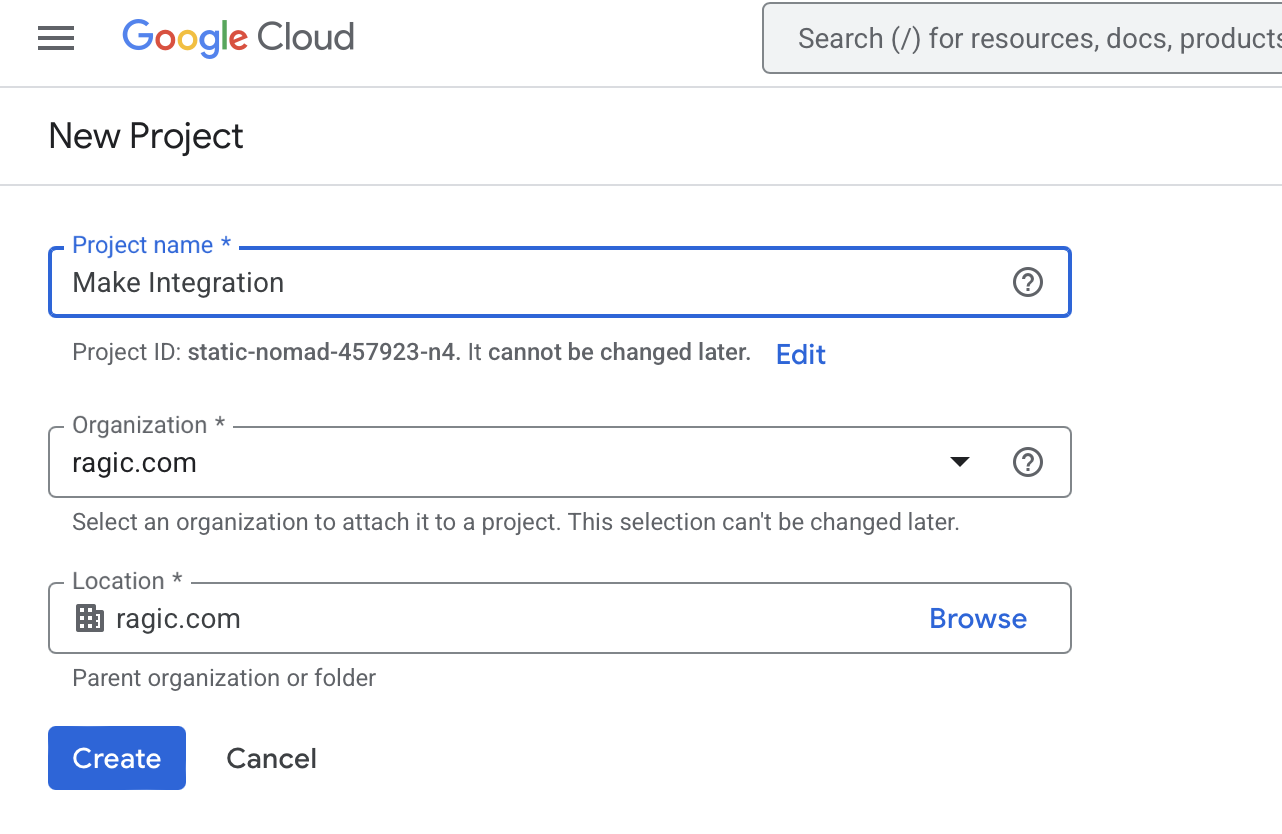
3. Enter the project information and click "Create"
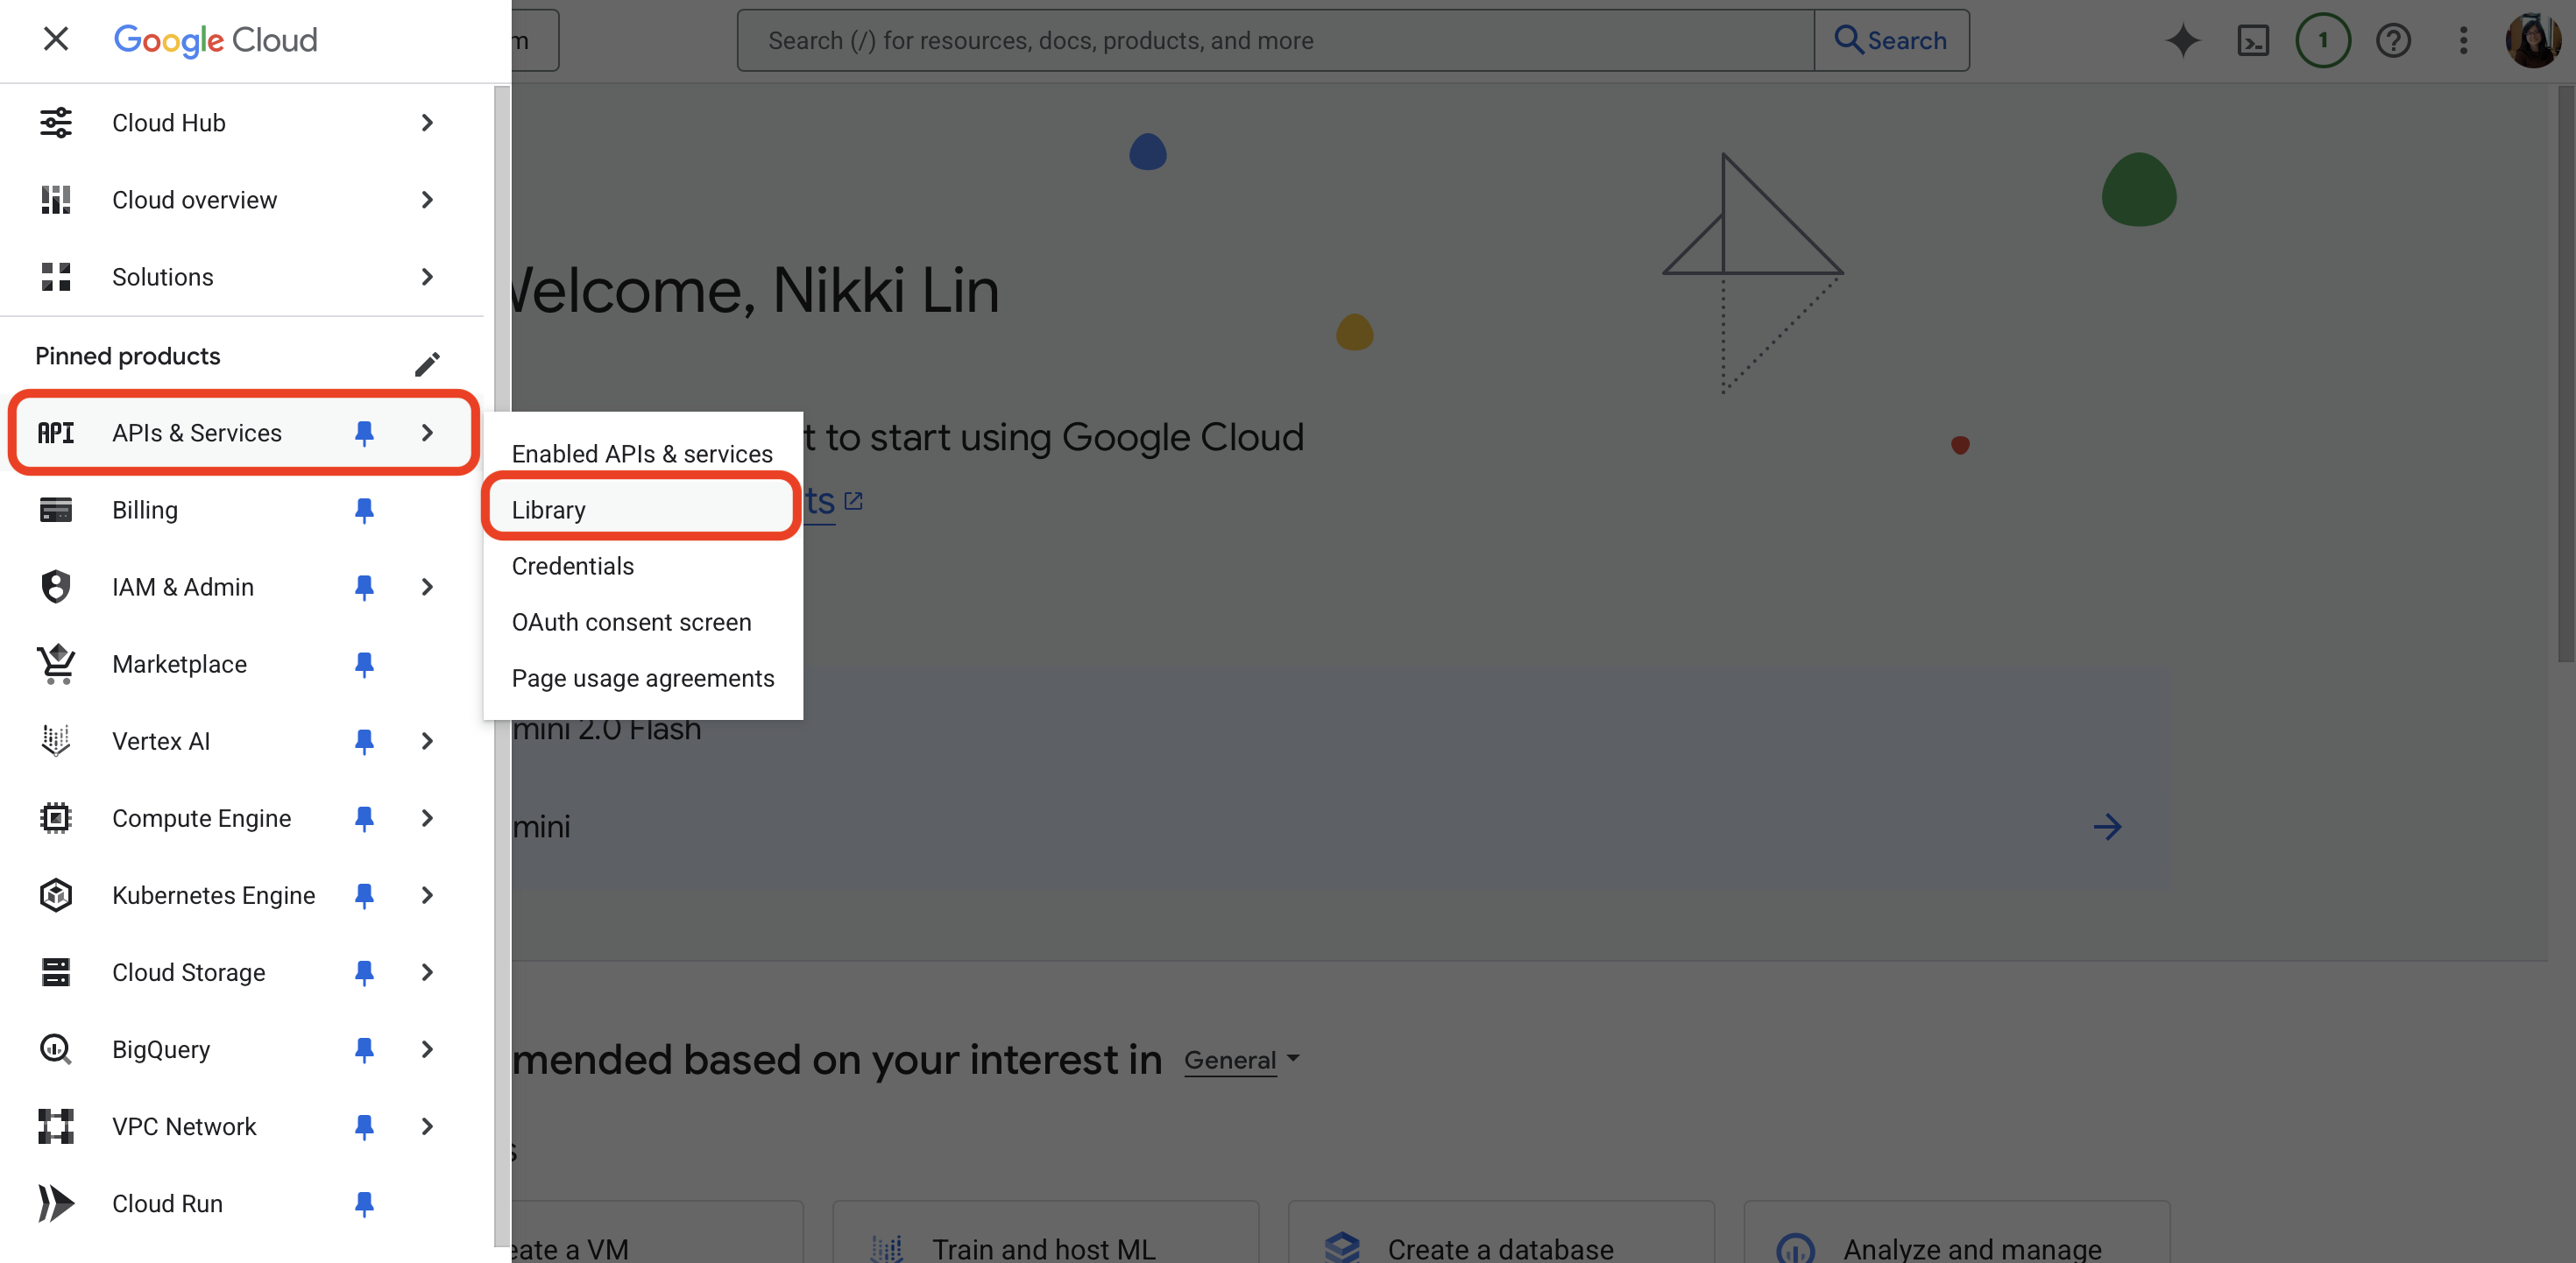
4. Click the hamburger menu at the top and click "APIs & Services" → "Library"
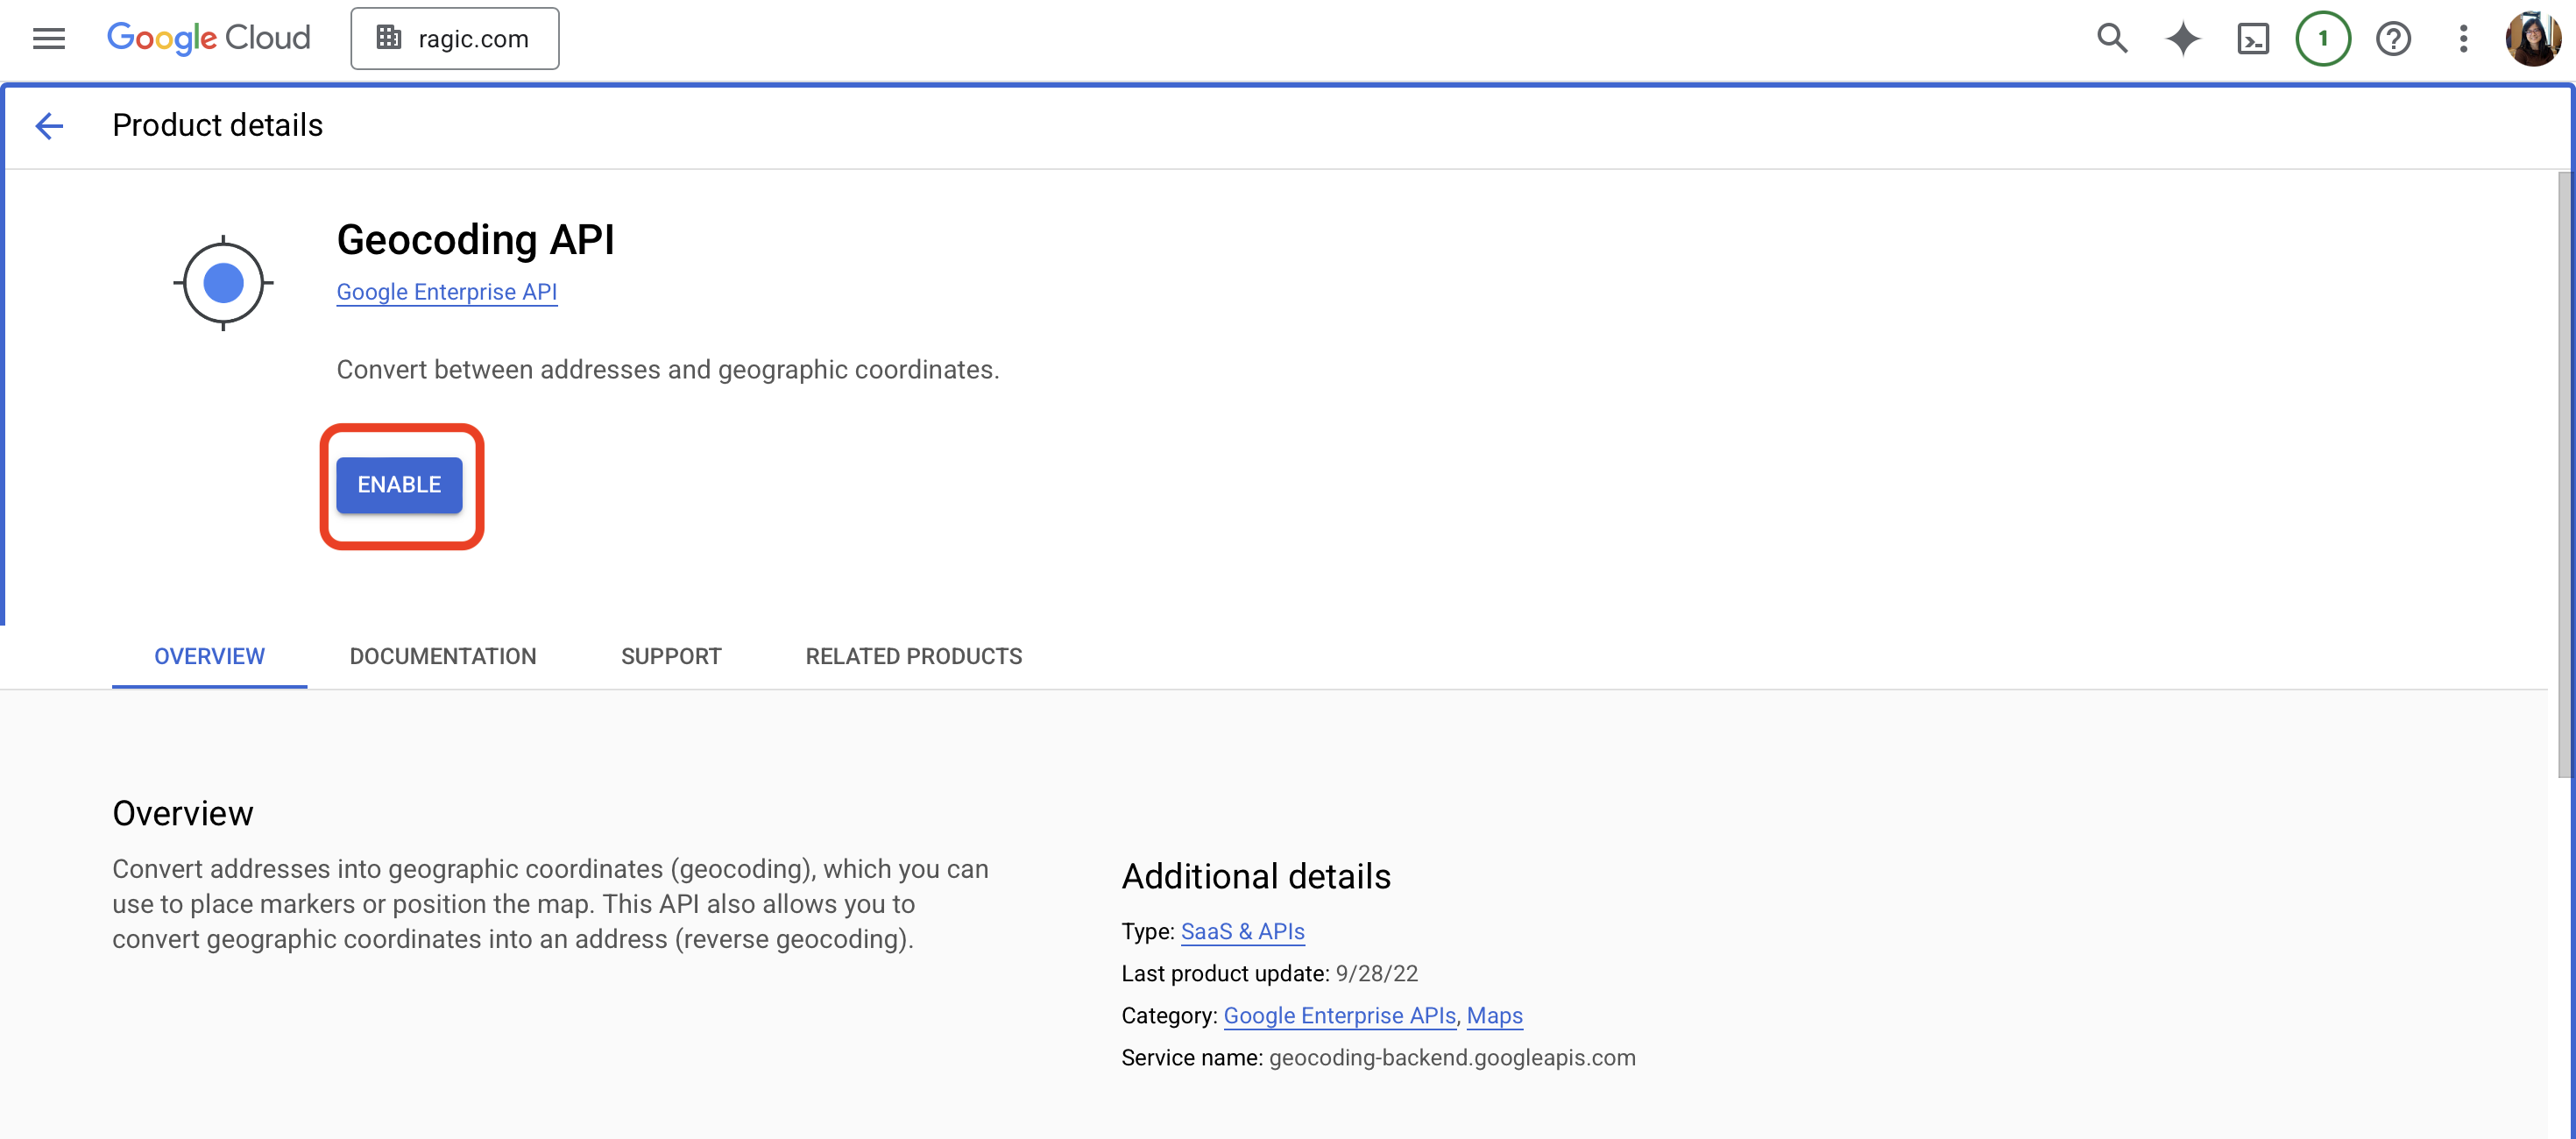
5. Search for the following APIs and enable them one by one according to the following :
.Geocoding API
.Maps Elevation API
.Time Zone API
.Directions API
.Distance Matrix API
.Maps Static API
.Places API
.Geolocation API
.Roads API
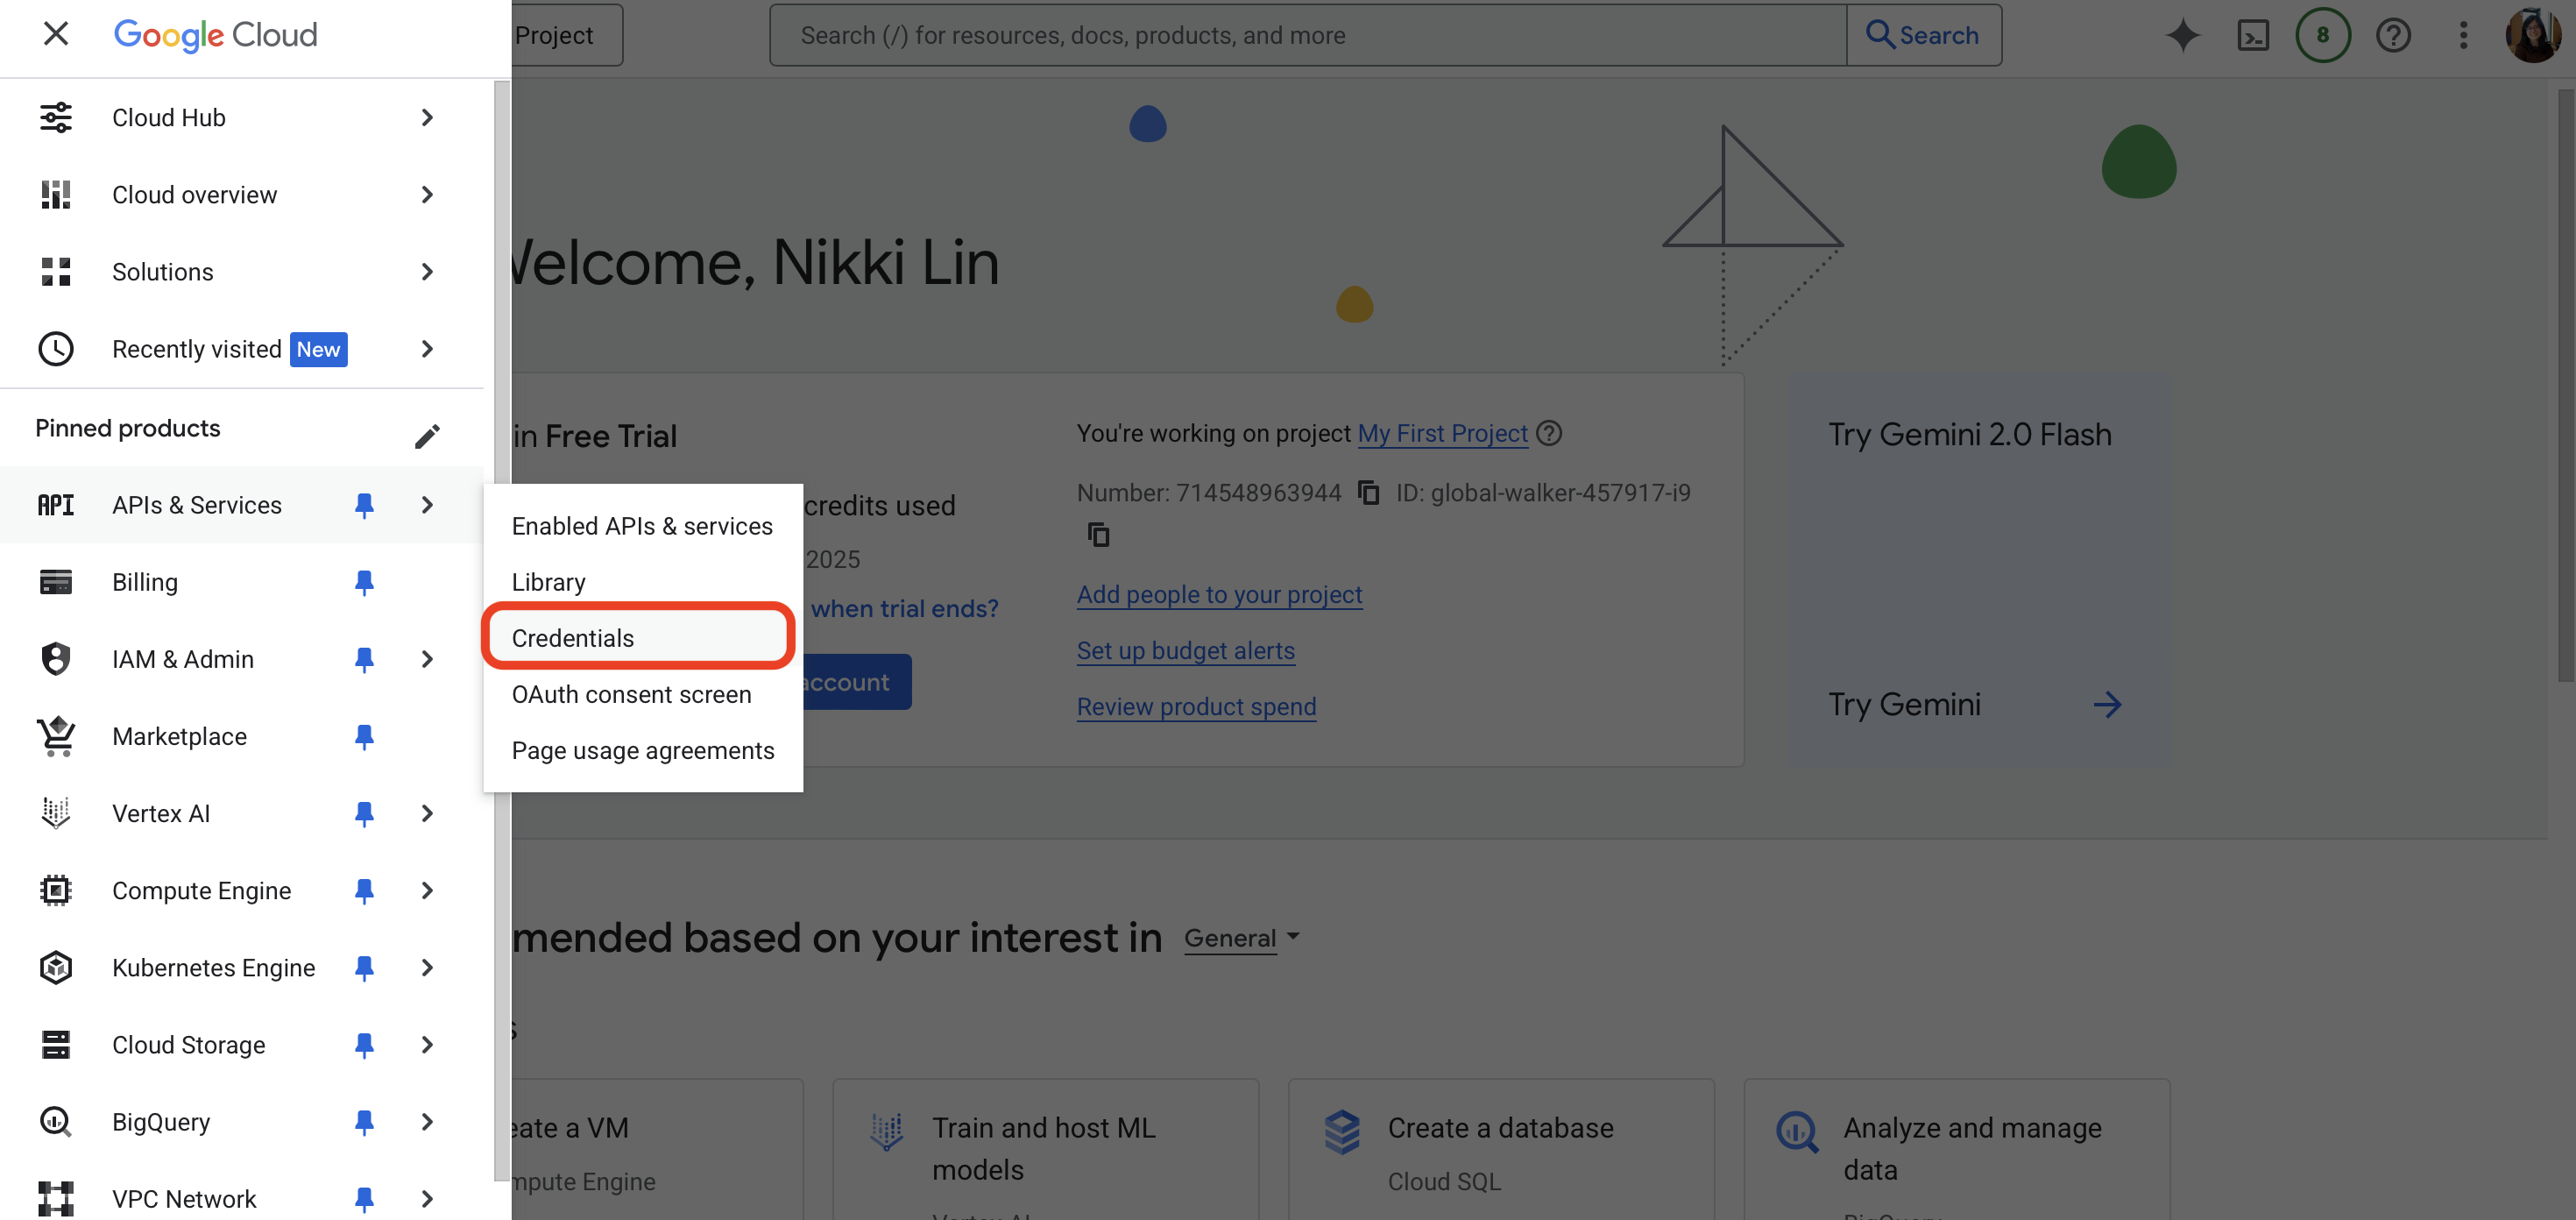
6. Expand the hamburger menu again and select "Credentials" under "APIs & Services"
7. Click "Show Key" next to the API Key
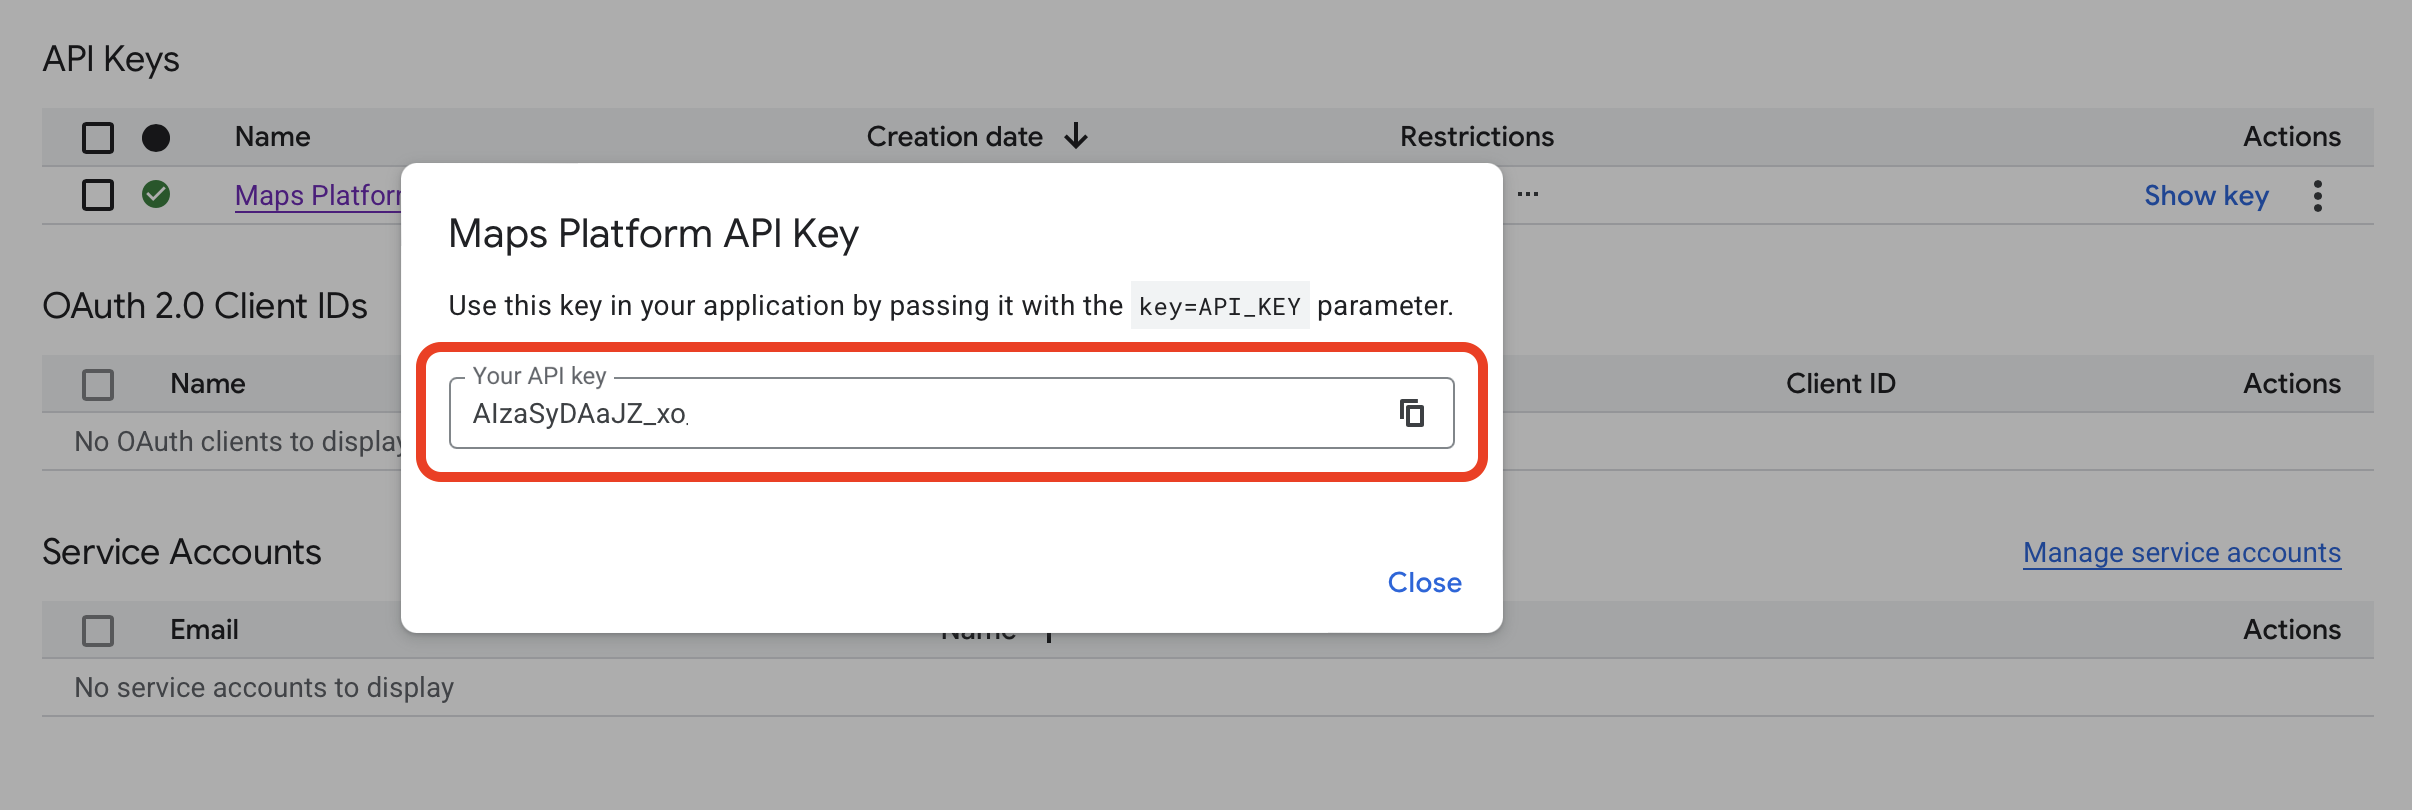
After copying the API Key, you can then paste it on Make to complete the account connection!
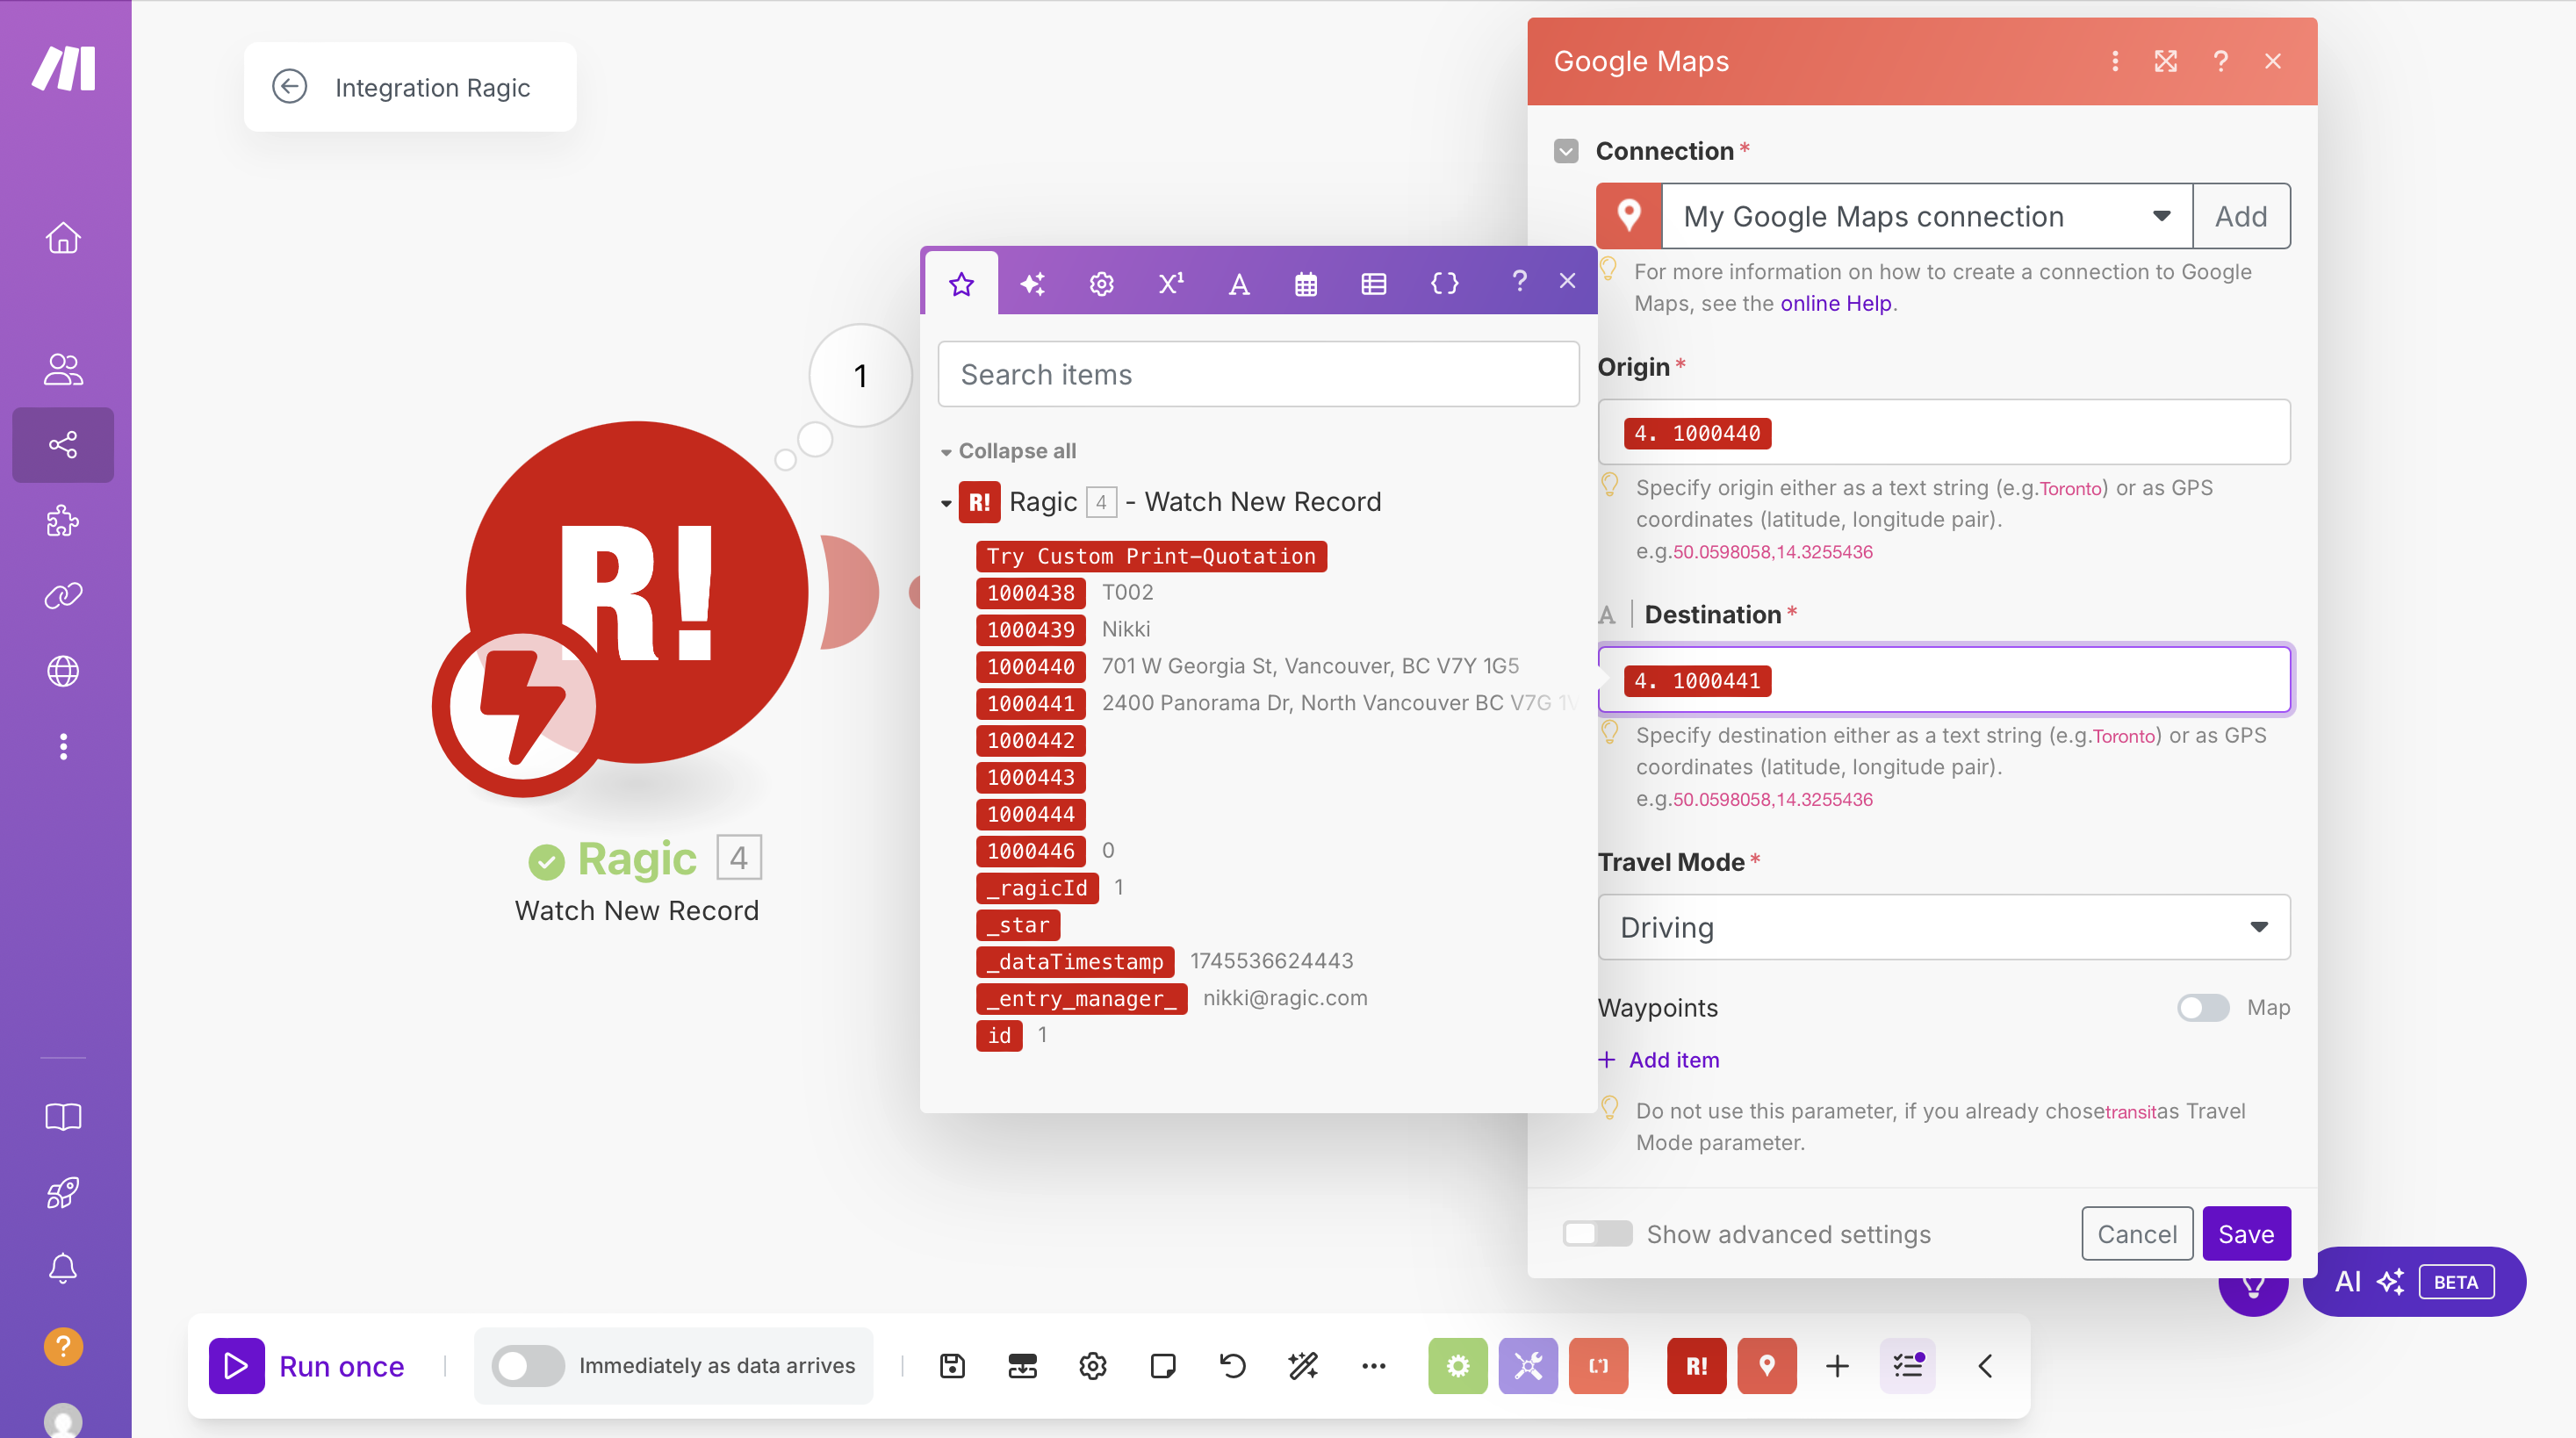
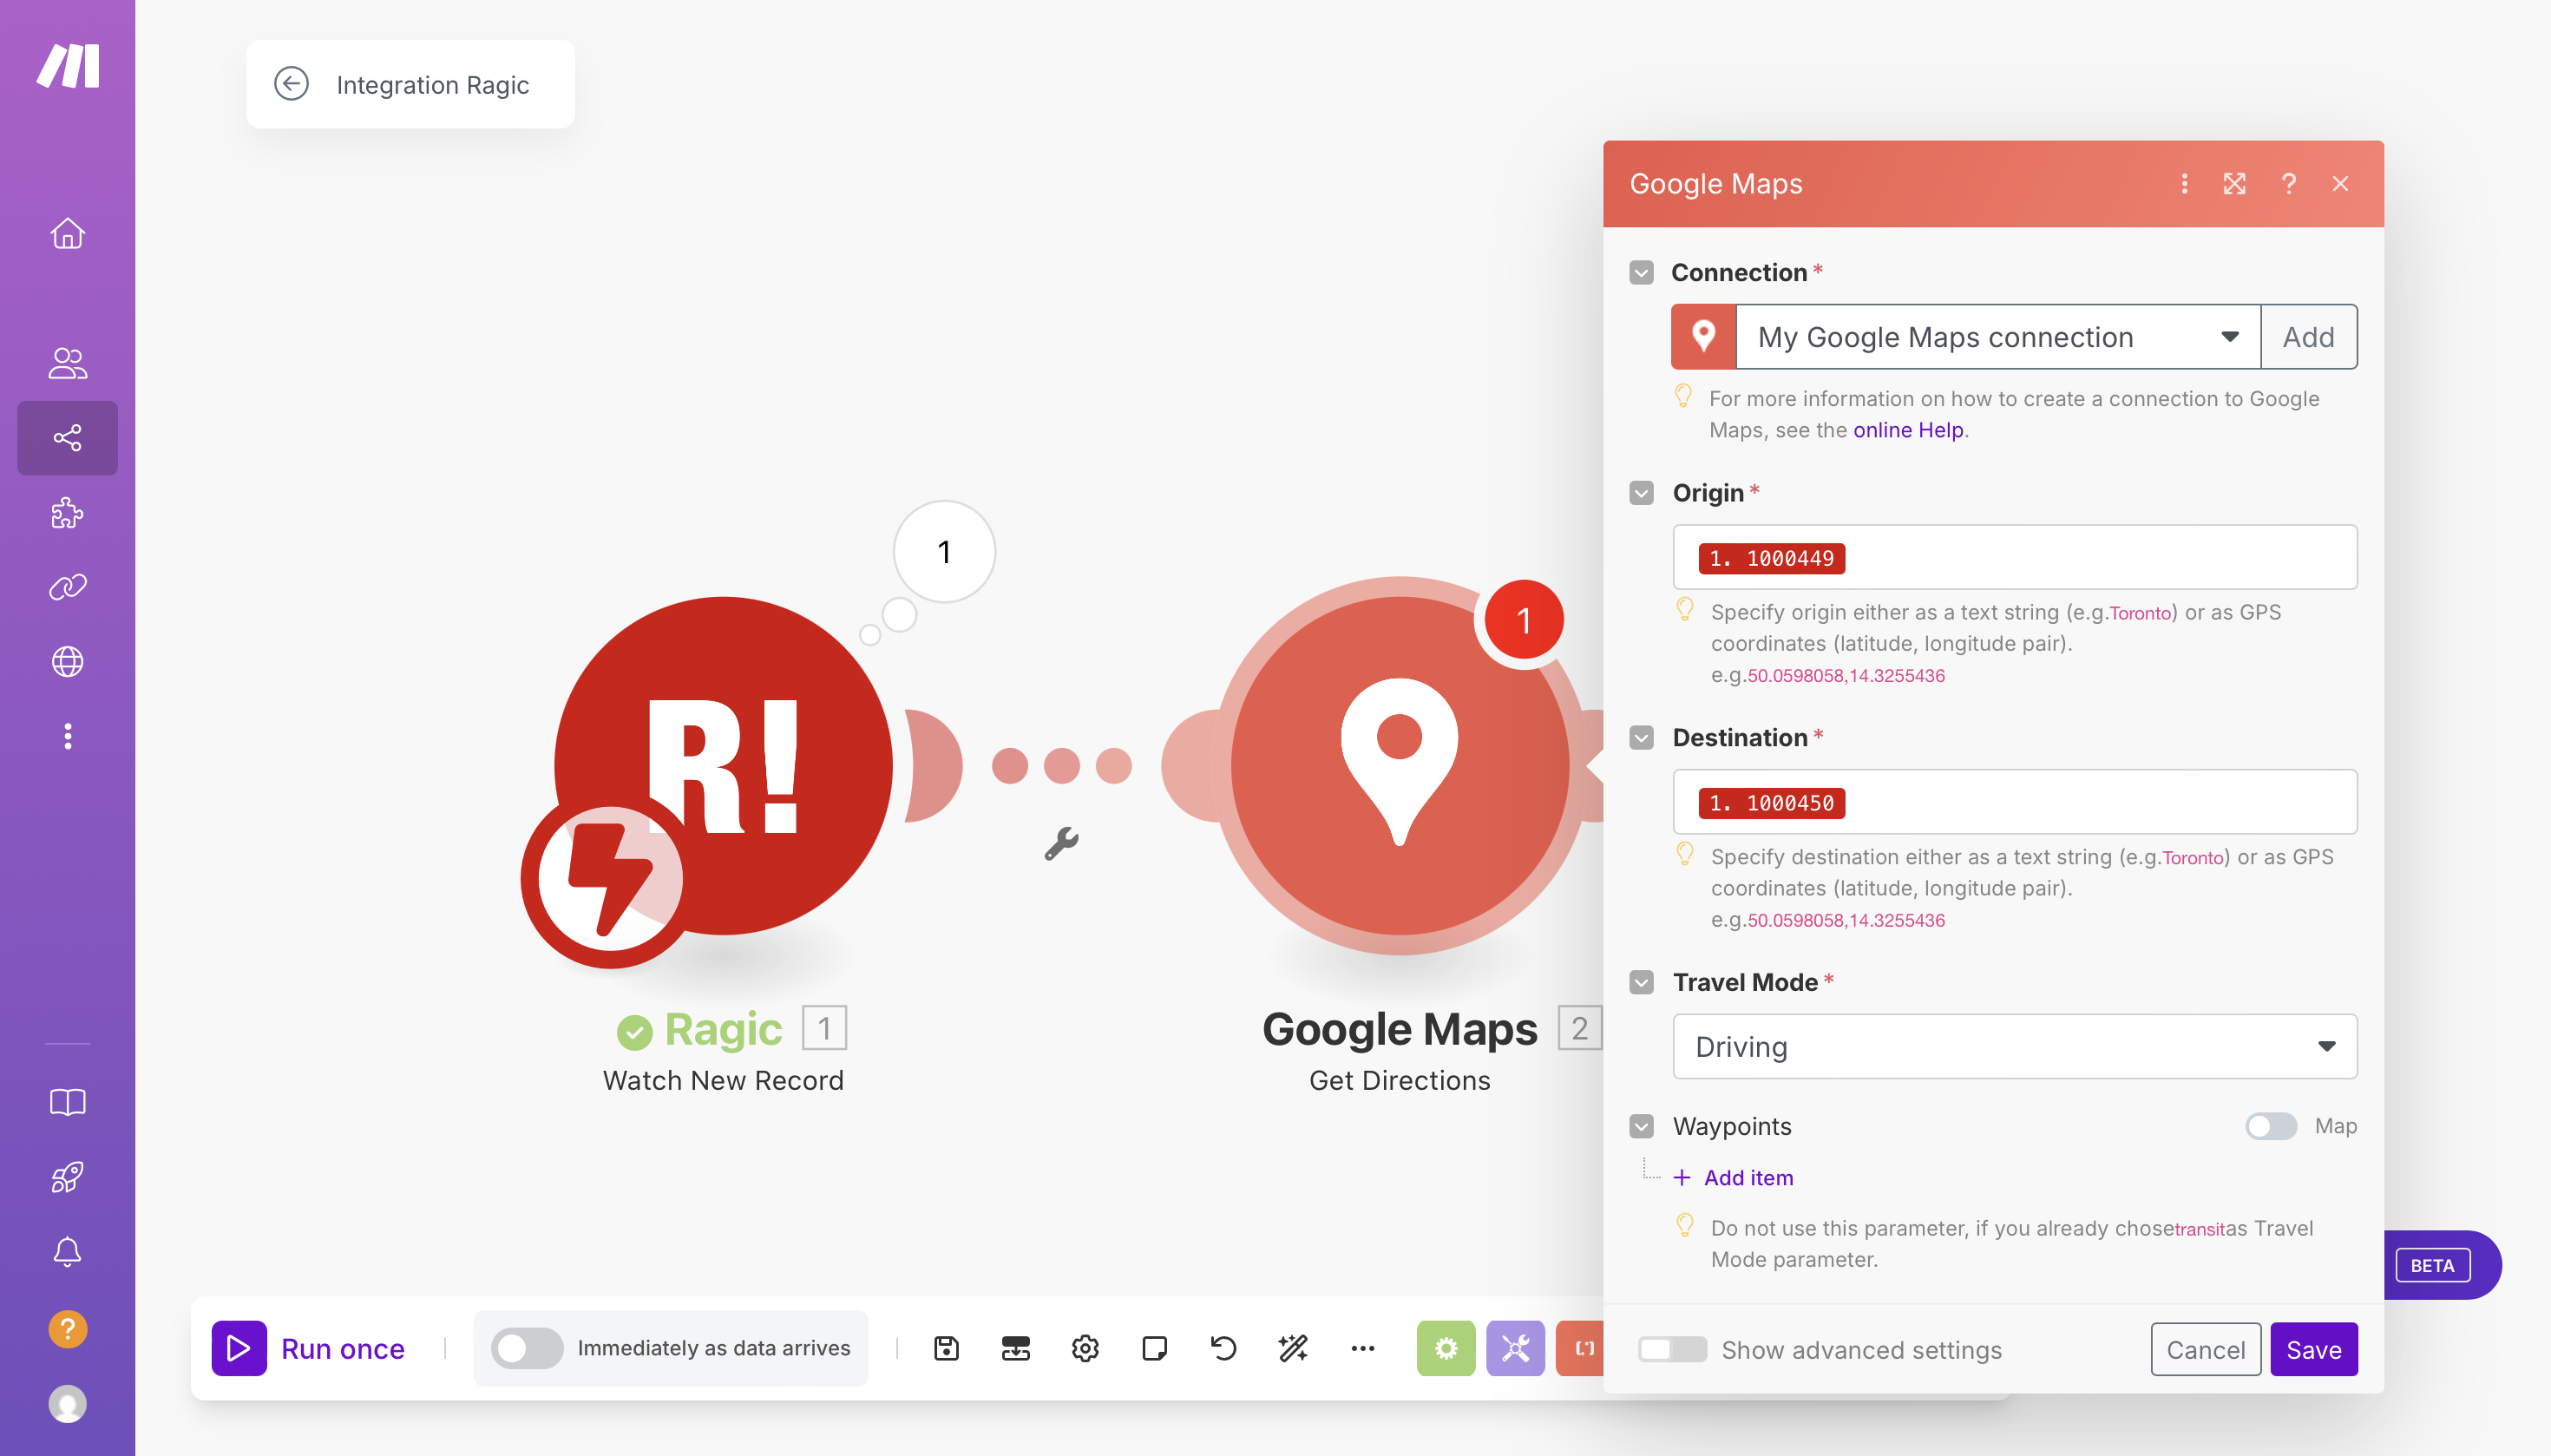
Next, set the origin and destination by selecting the Ragic Field ID corresponding to the origin and destination points fields. Since we have added addresses to our test data before, it's easier to identify which Ragic Field ID corresponds to the fields we're looking for.
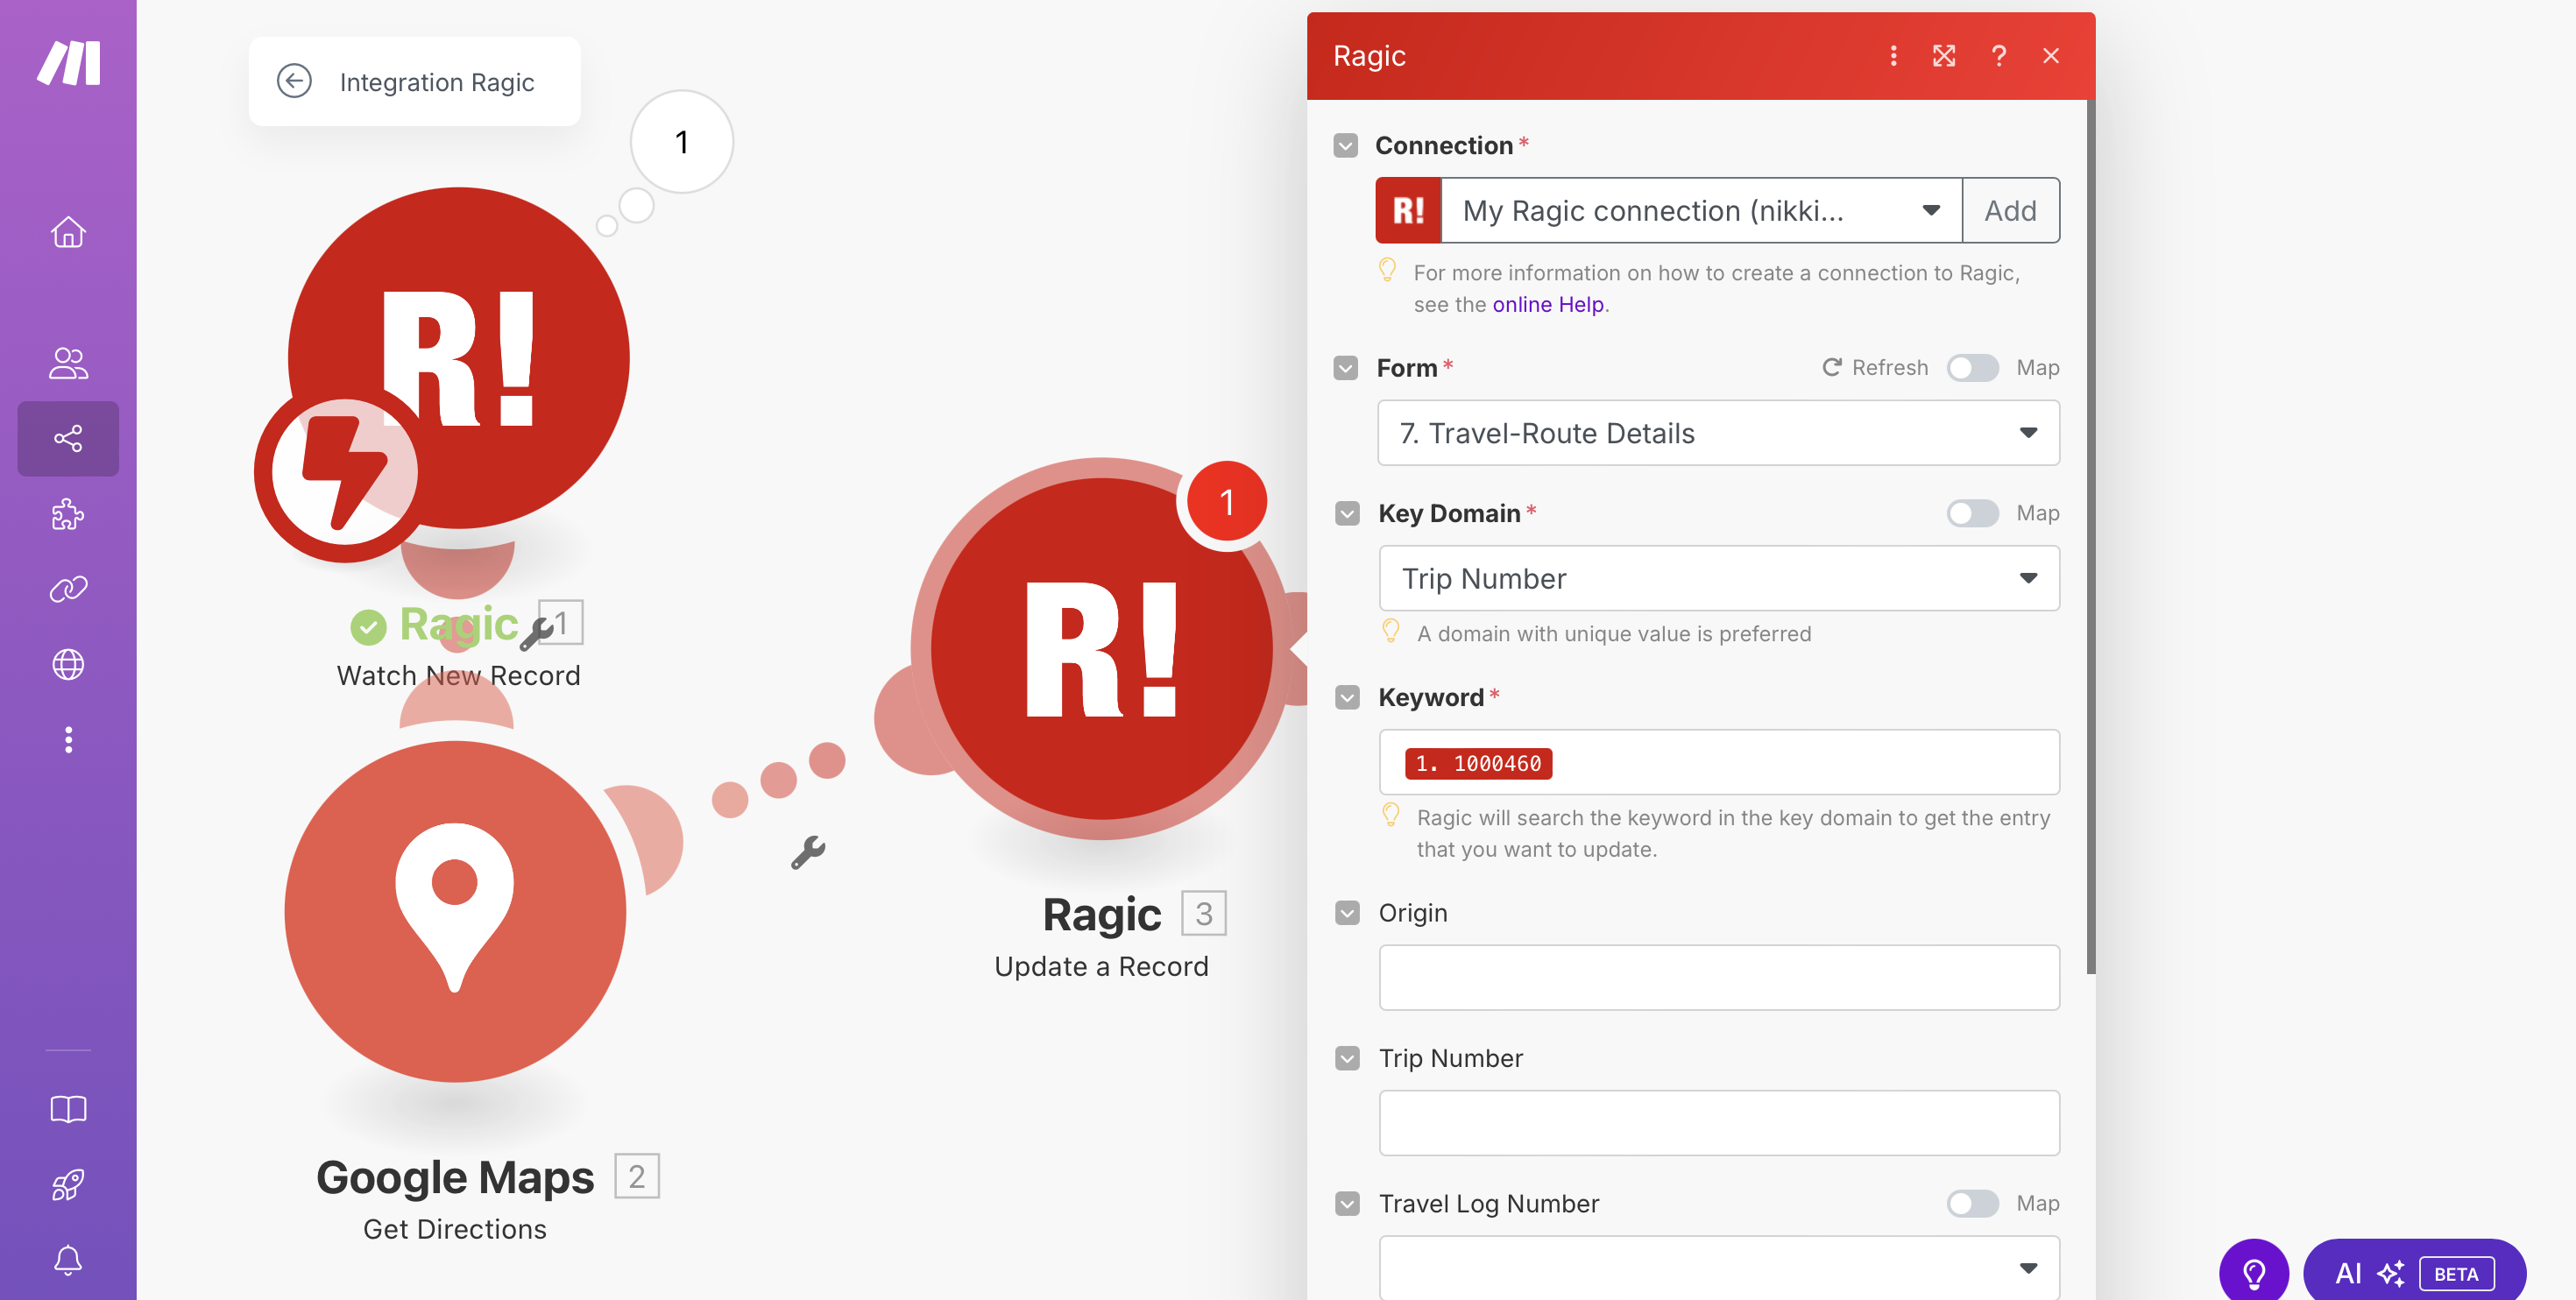
Since we want the results generated by Google Maps to return back to Ragic, we need to create another Ragic "Update a Record" action to update the data back to the Travel Log sheet.
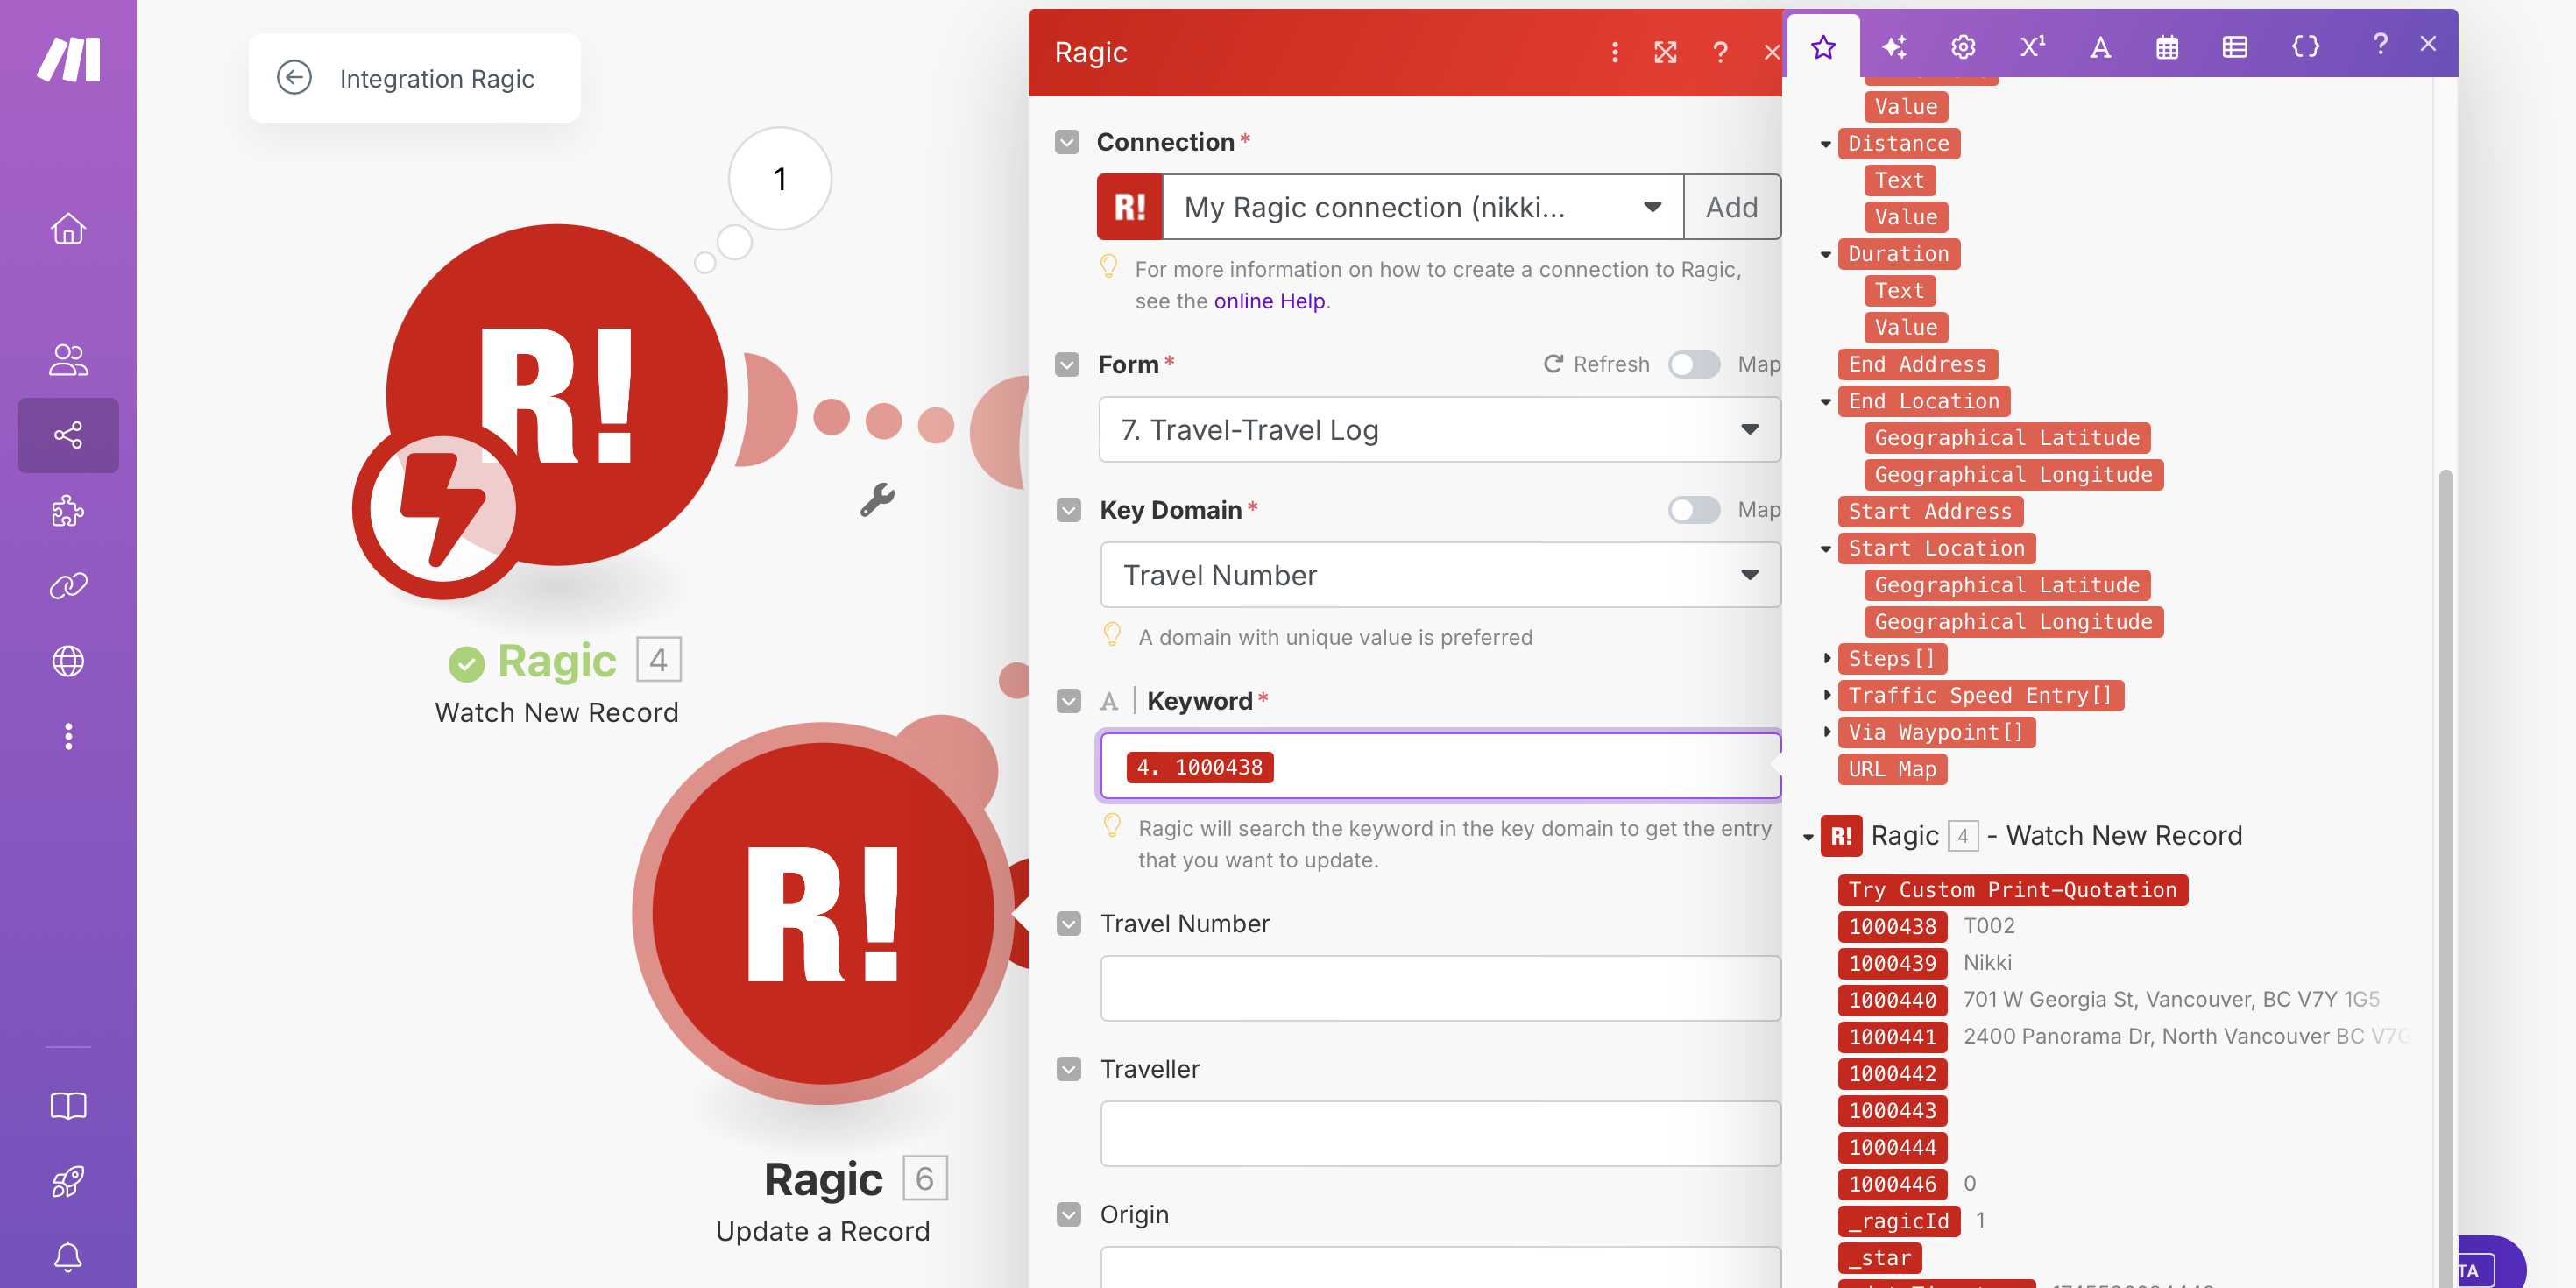
In order to let Make know which data to update, you need to first select the "Unique Value" field we've designed on Ragic onto the "Key Domain" field on Make. In this case, our unique value field is "Travel Number." Fill the Keyword field with the triggering Ragic field.
Next, you can specify what data you want to obtain from Google Maps. Since we want Google Maps to help us calculate the best route between two points and get the mileage and time of this route, you can refer to the figure below and fill in these three fields:
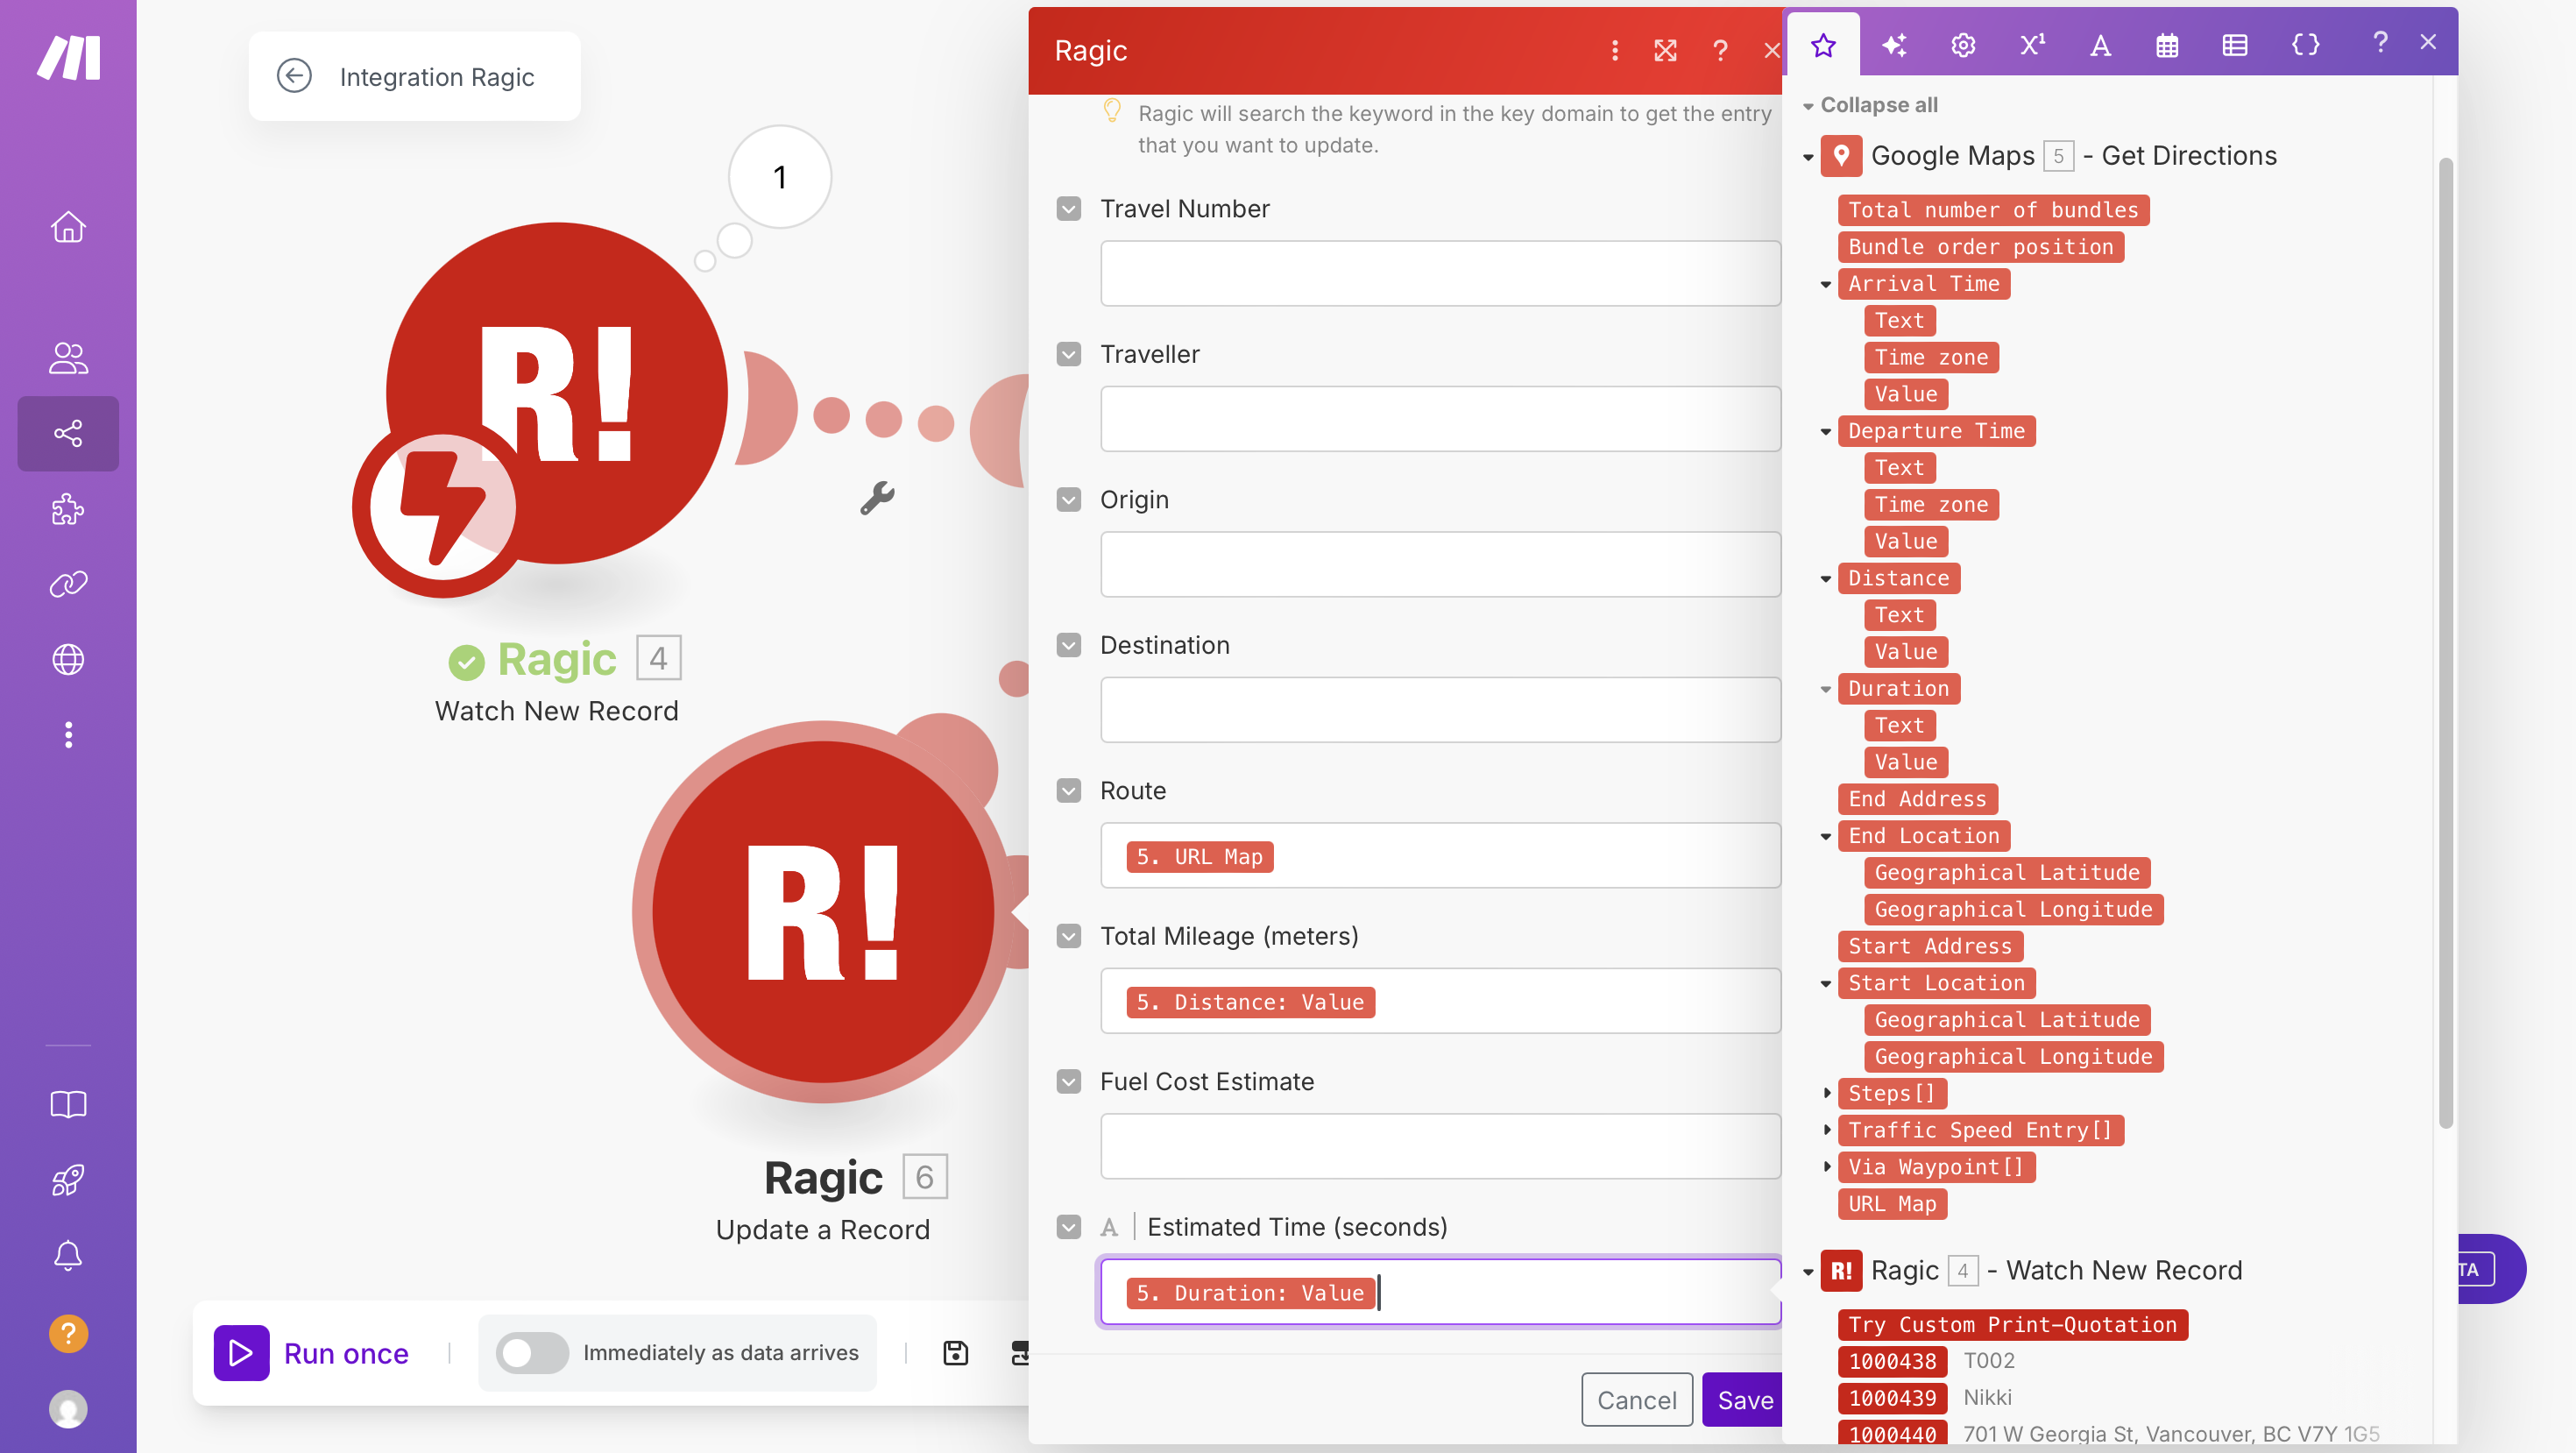
Note that the Distance and Duration provided by Google Maps are divided into "Text" and "Value." You can refer to the details below for your information:
Distance: The unit of "Value" is in meter. If the value is 1941, it will be shown as 1.9km in "Text."
Duration: The unit of "Value" is in seconds. If the value is 263, it will be shown as 4 minutes in "Text."
In order to calculate the value more flexibly and accurately, we recommend selecting "Value" over "Text."
The other fields can be left blank. Make sure to click "Save" after.
After completing the design, click "Run Once" on the lower-left corner of the screen to test the connection again and make sure it works correctly!
You can directly clone the test data you have created on Ragic.
After pressing Save, return to Make and you should see that the process has been triggered once.
Refresh the data in Ragic, and you will see that the fields you left blank are now filled in and the fuel cost estimate field has also been calculated!
If you have multiple stops in a single trip, which is the usual case for transport operators, the previous simple method may not be suitable for you.
In order to make your travel log more complete and convenient, we suggest adjusting the design as follows:
1. Create a Travel Log that covers your entire day
2. Build a subtable to record the multiple stops in a travel log
3. After creating a new sheet using this subtable, set it up using the simple method above.
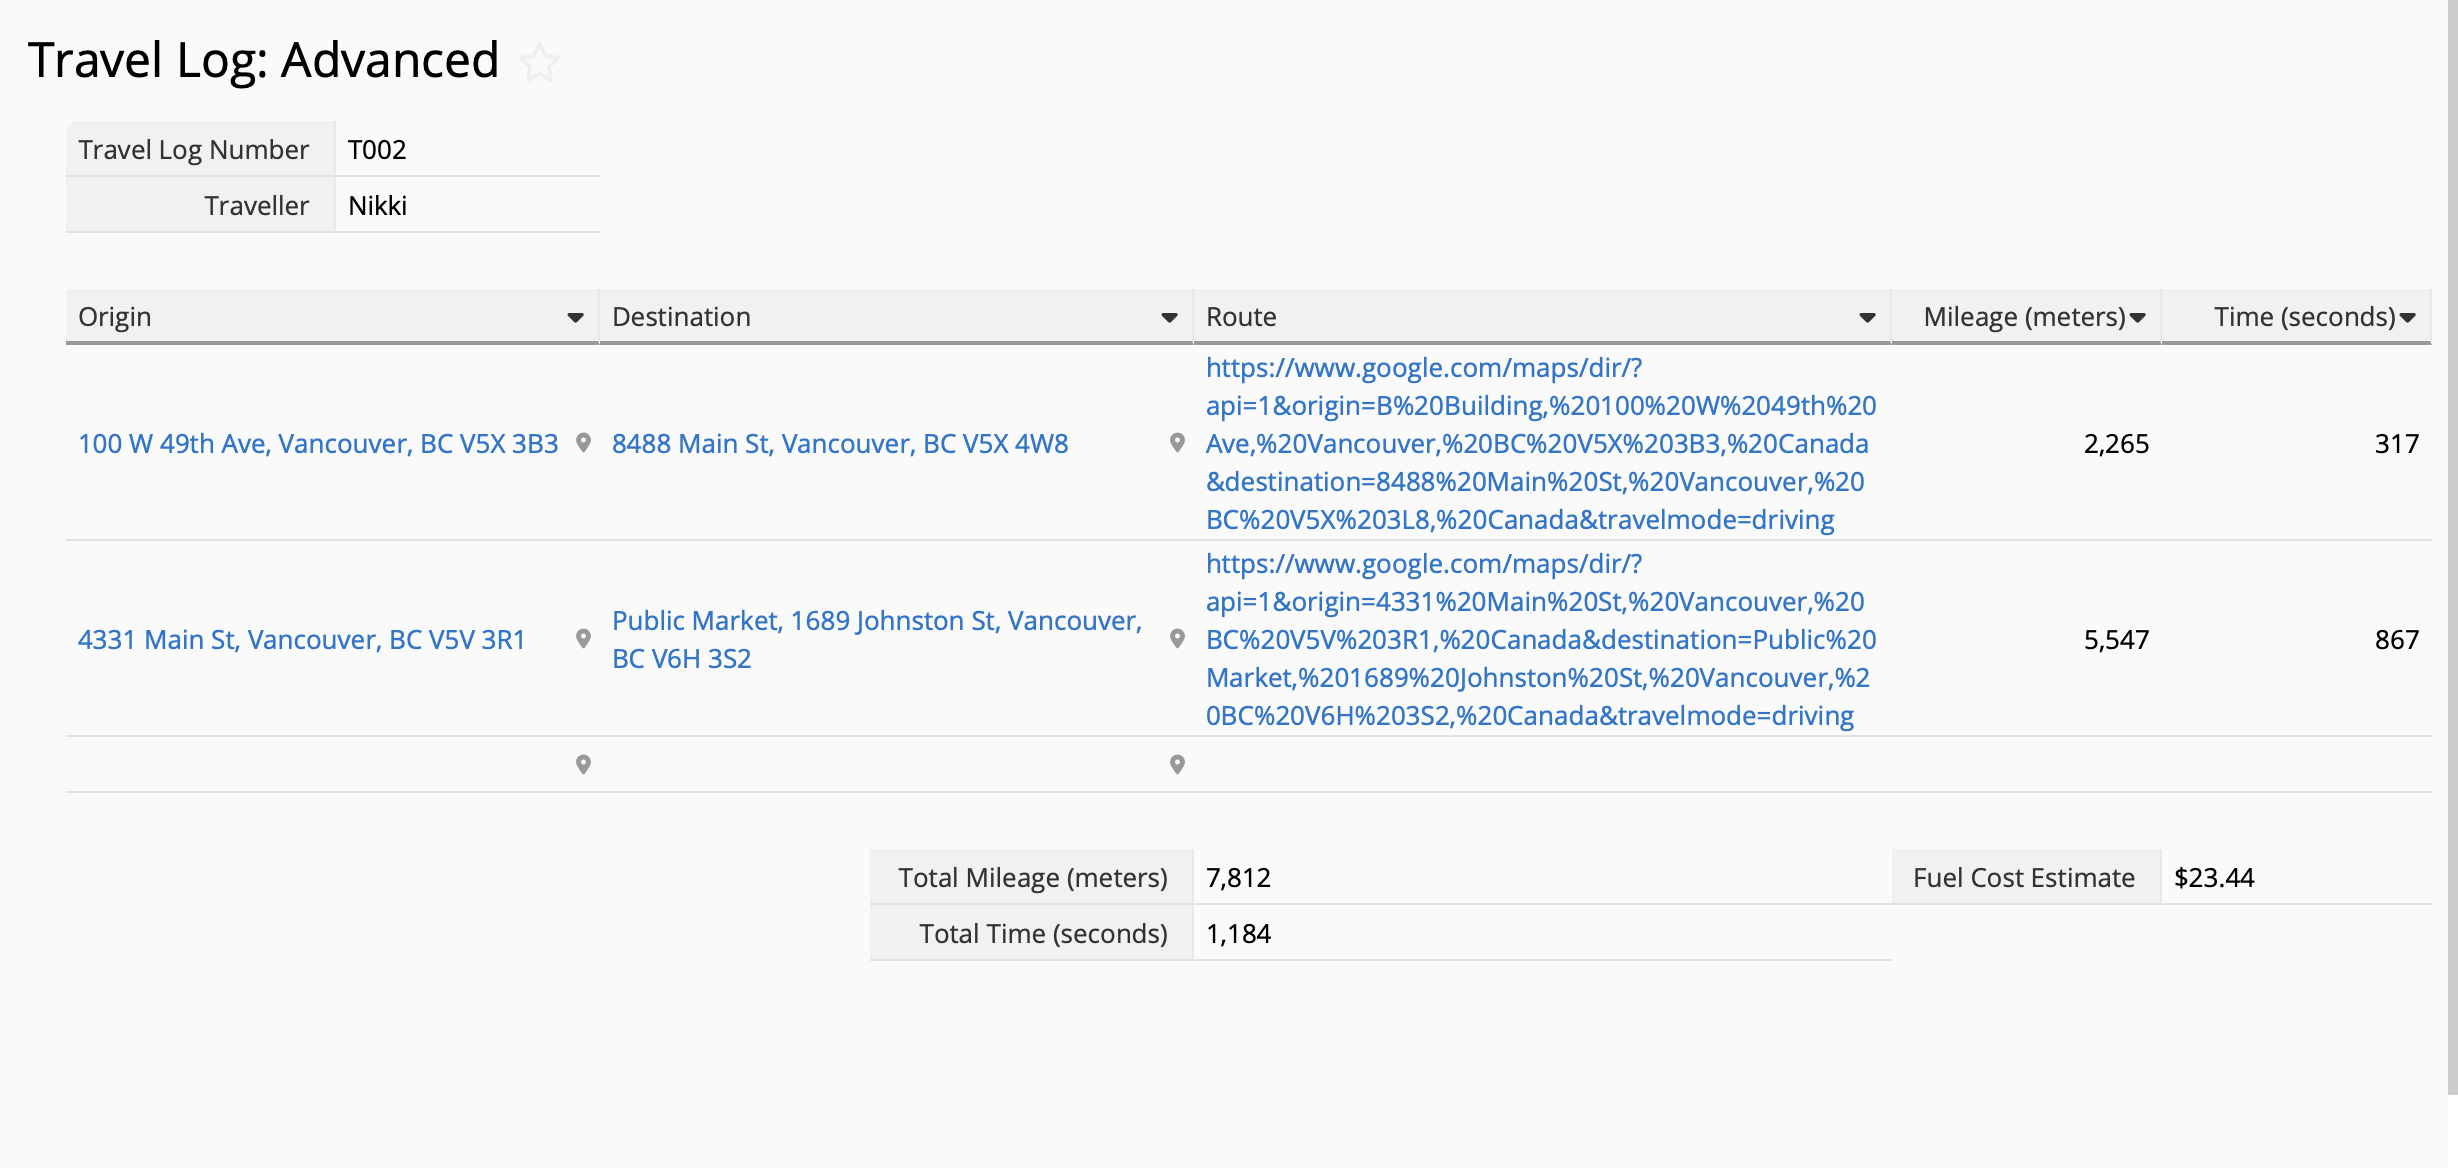
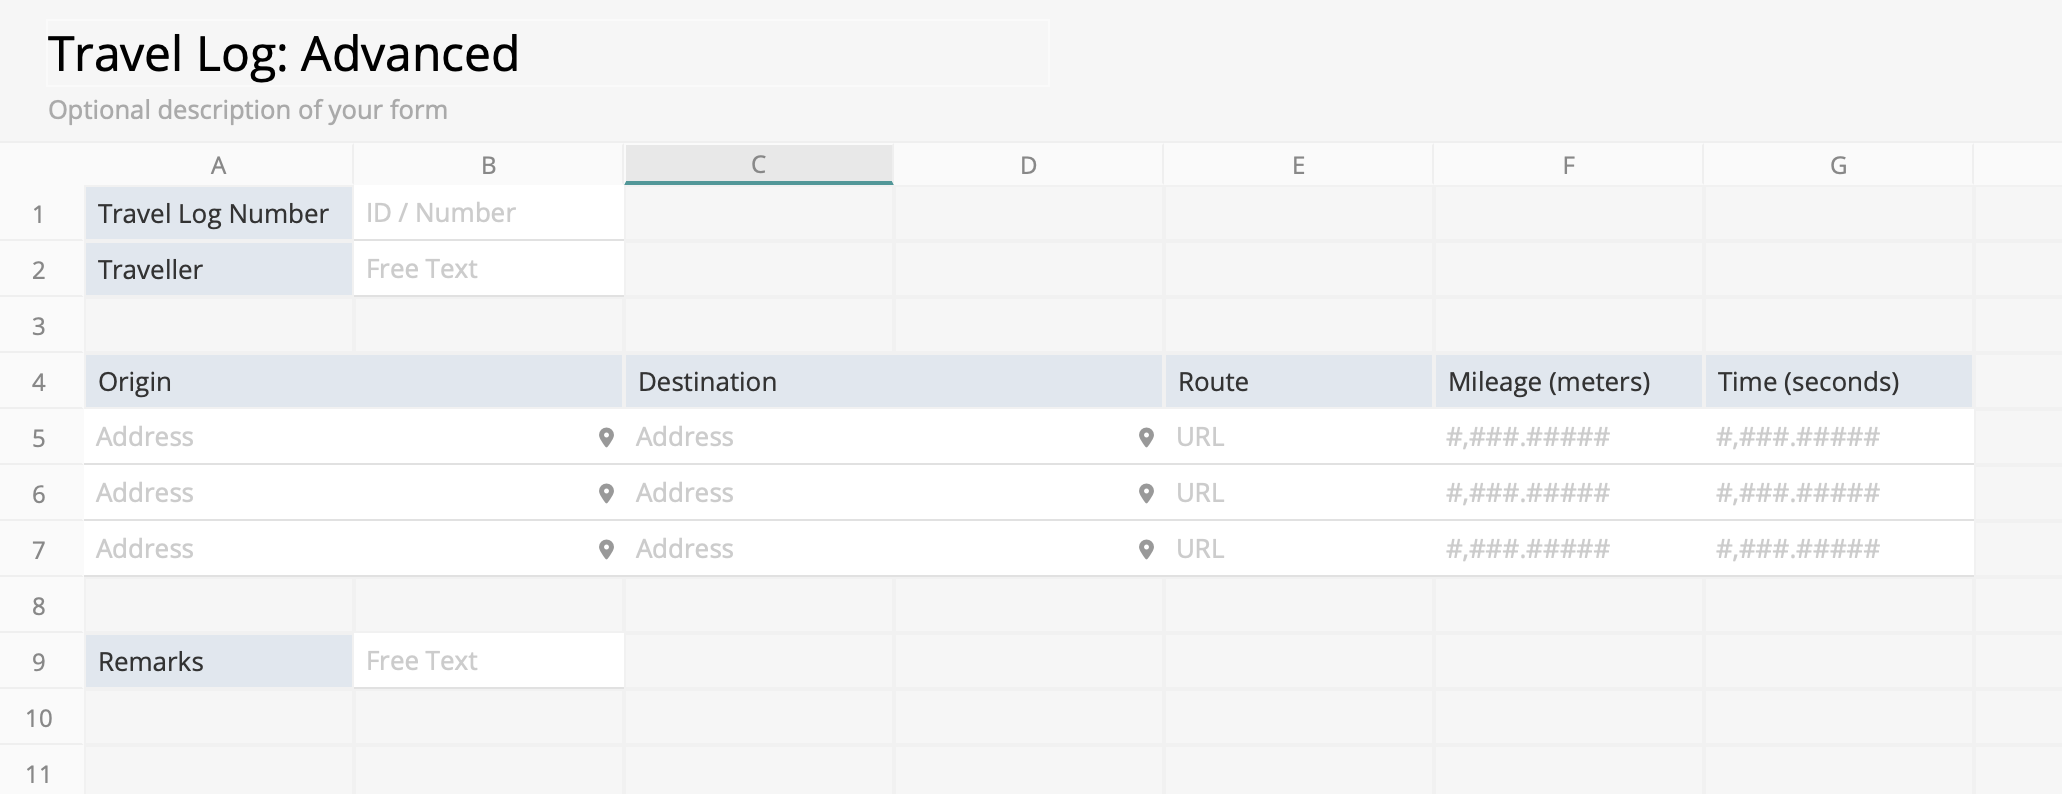
You can easily create a summary of your trip. In addition to basic information, we can place the location information in a subtable, since multiple stops are involved. The fields may be configured as follows:
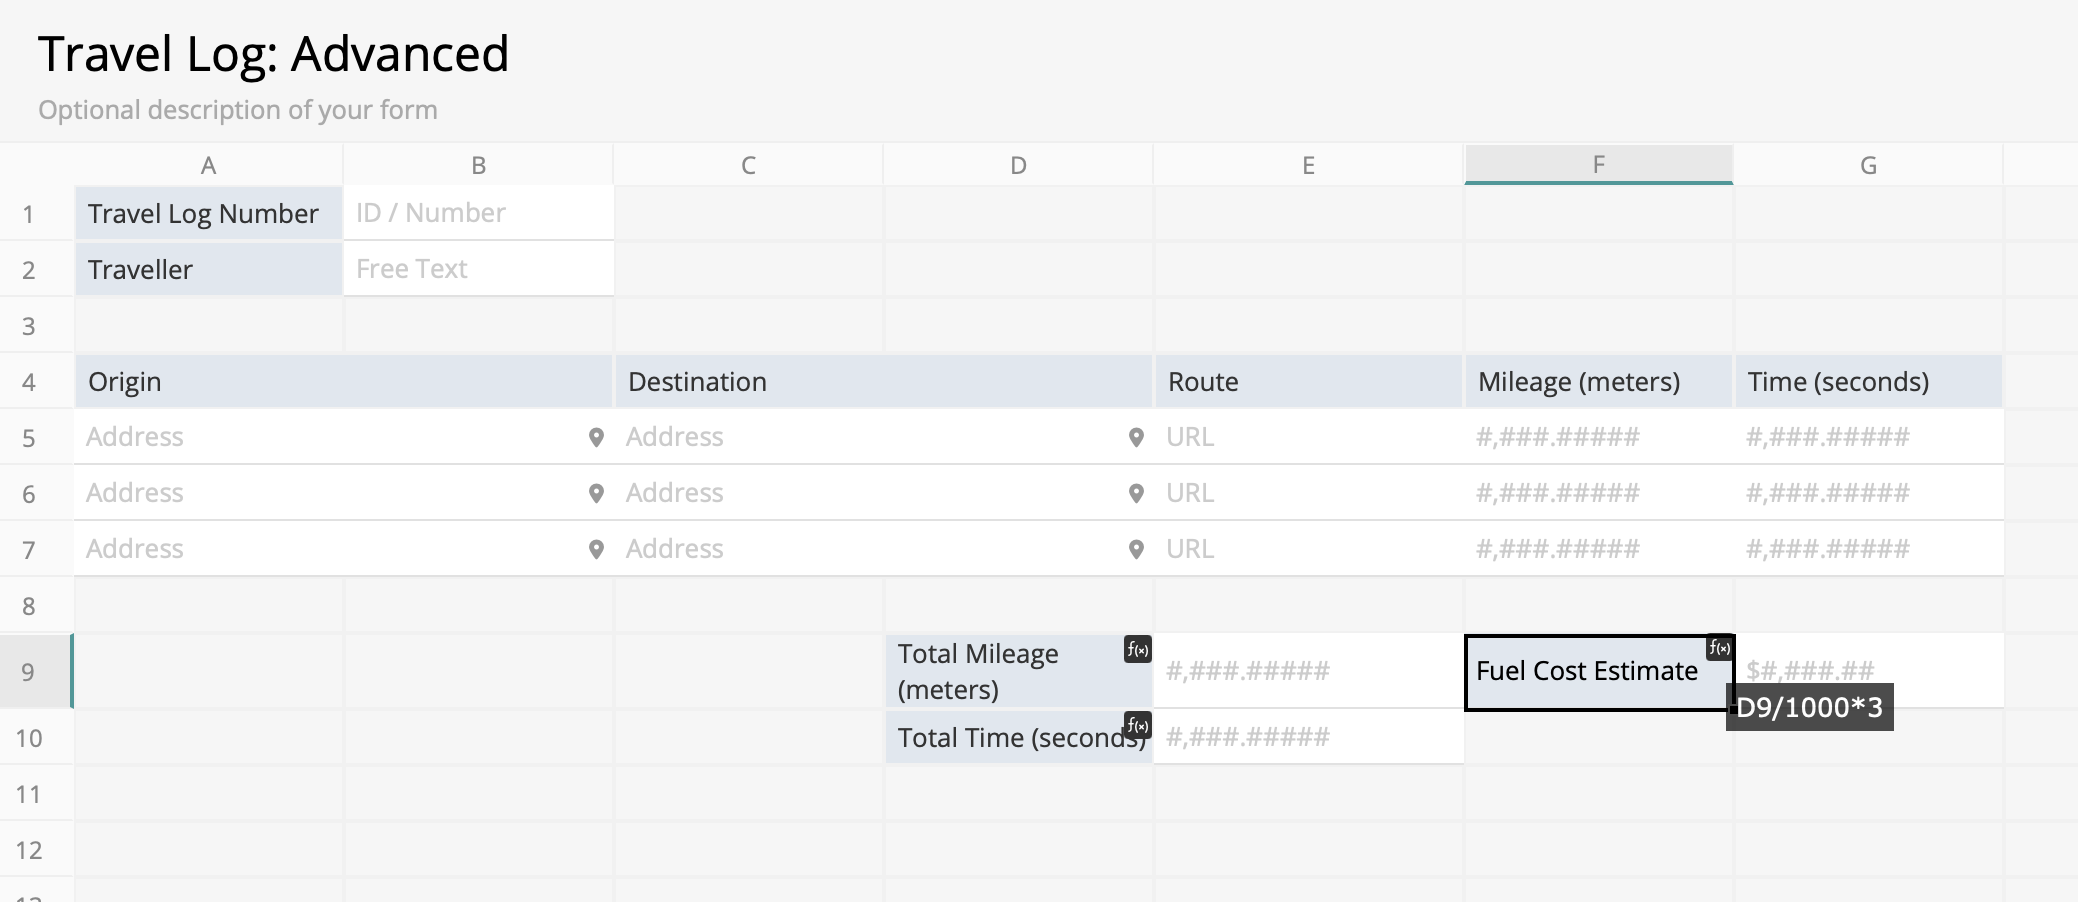
If you want to better organize the data, you can also use the SUM formula to add up the mileage and time:

Tip: Google Maps calculate the time and distance in seconds and meters respectively. It is recommended to make a note in the field names to avoid confusion.
If your company provides fuel subsidy based on mileage, you can also add a "Fuel Cost Estimate" field and set a formula according to your needs.
For example, if the company provides a subsidy of $3 per kilometer, the formula can be designed as follows:
We list the location information of the trip into the subtable. However, the subtable is not an independent data, so we need to create a new sheet from the subtable to convert these trips into independent pieces of data.
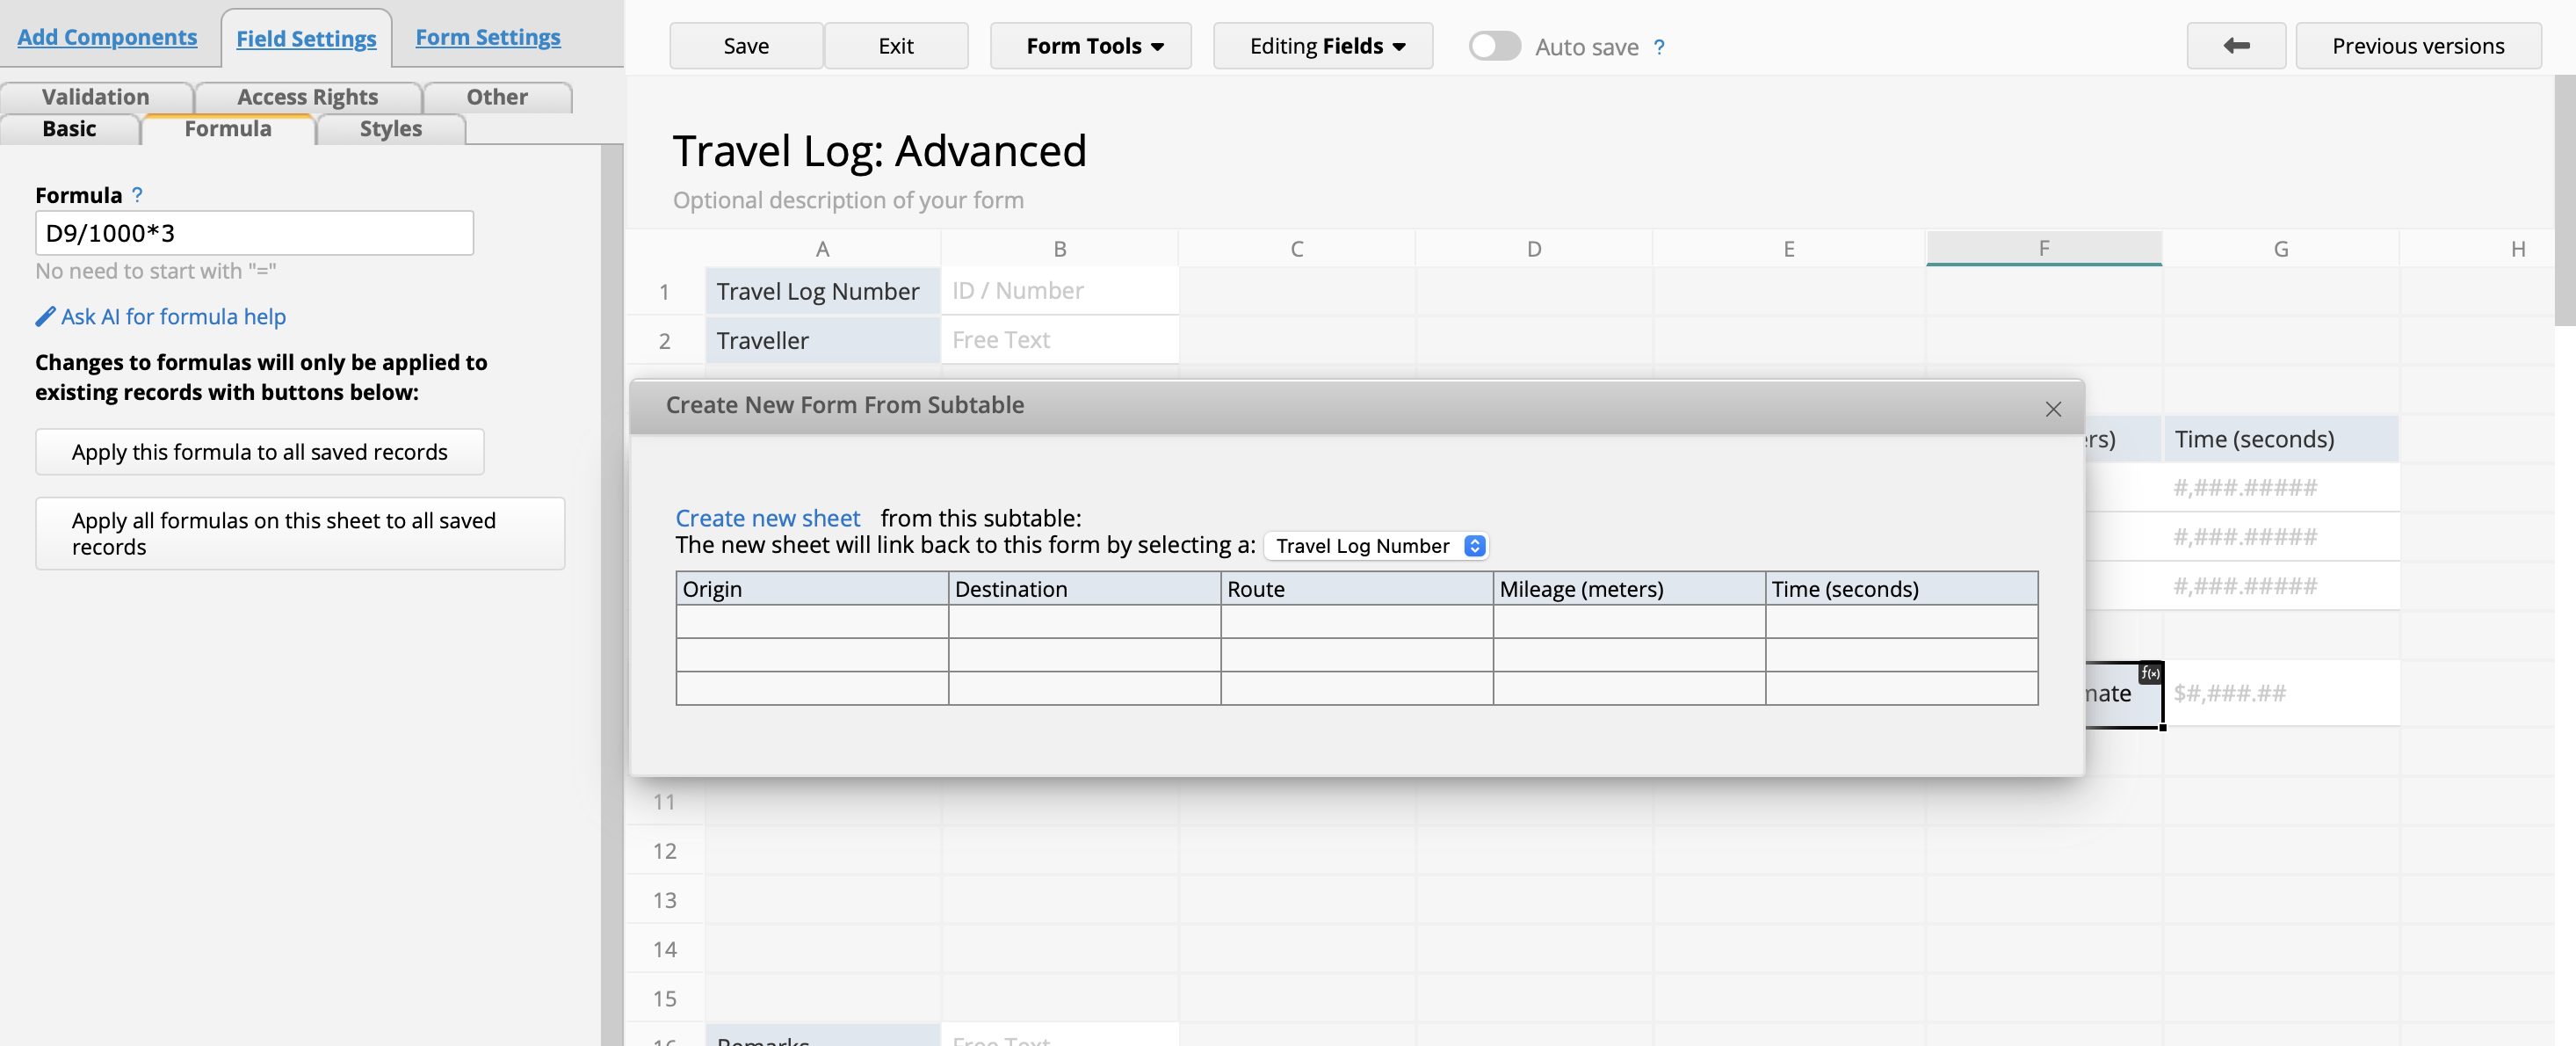
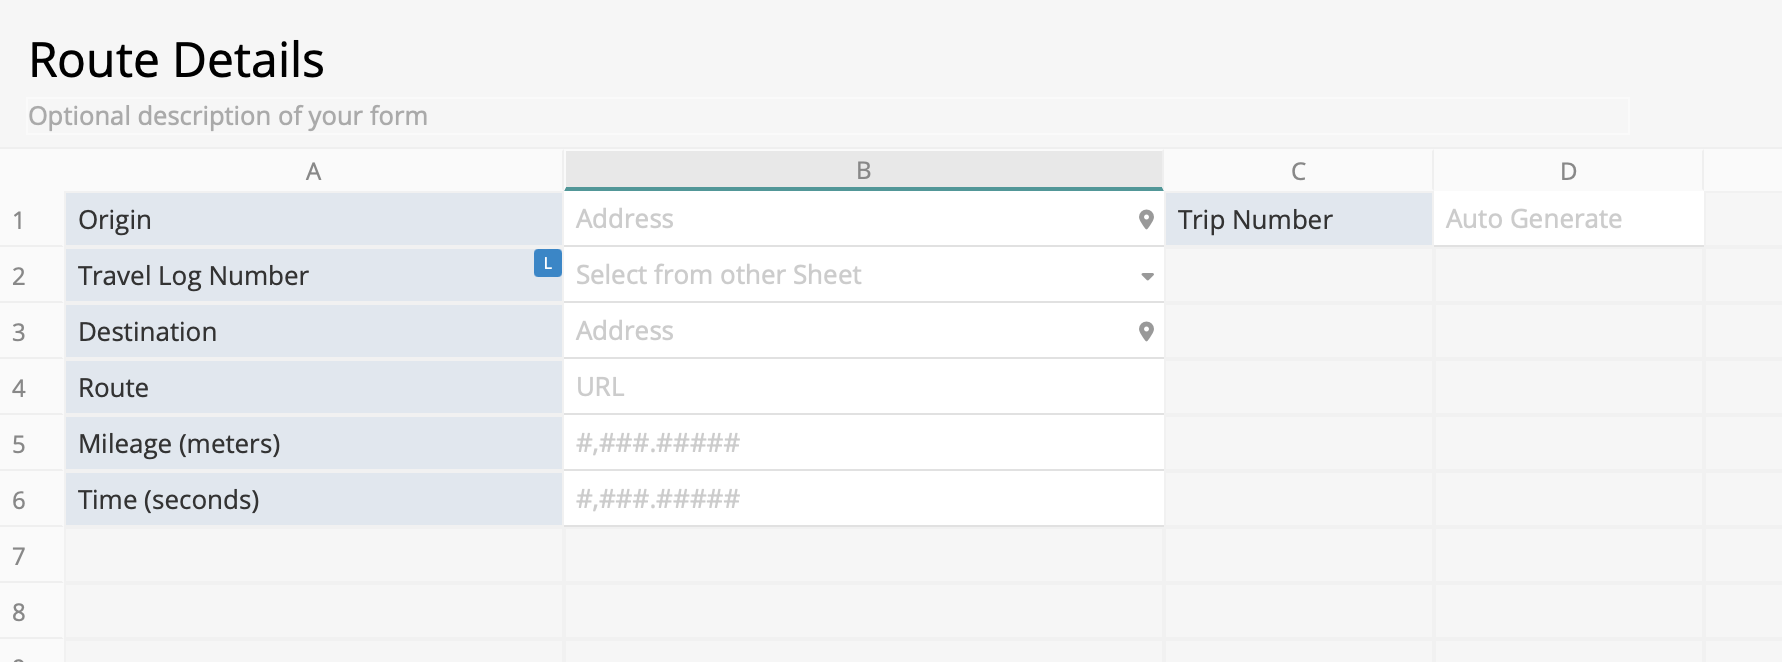
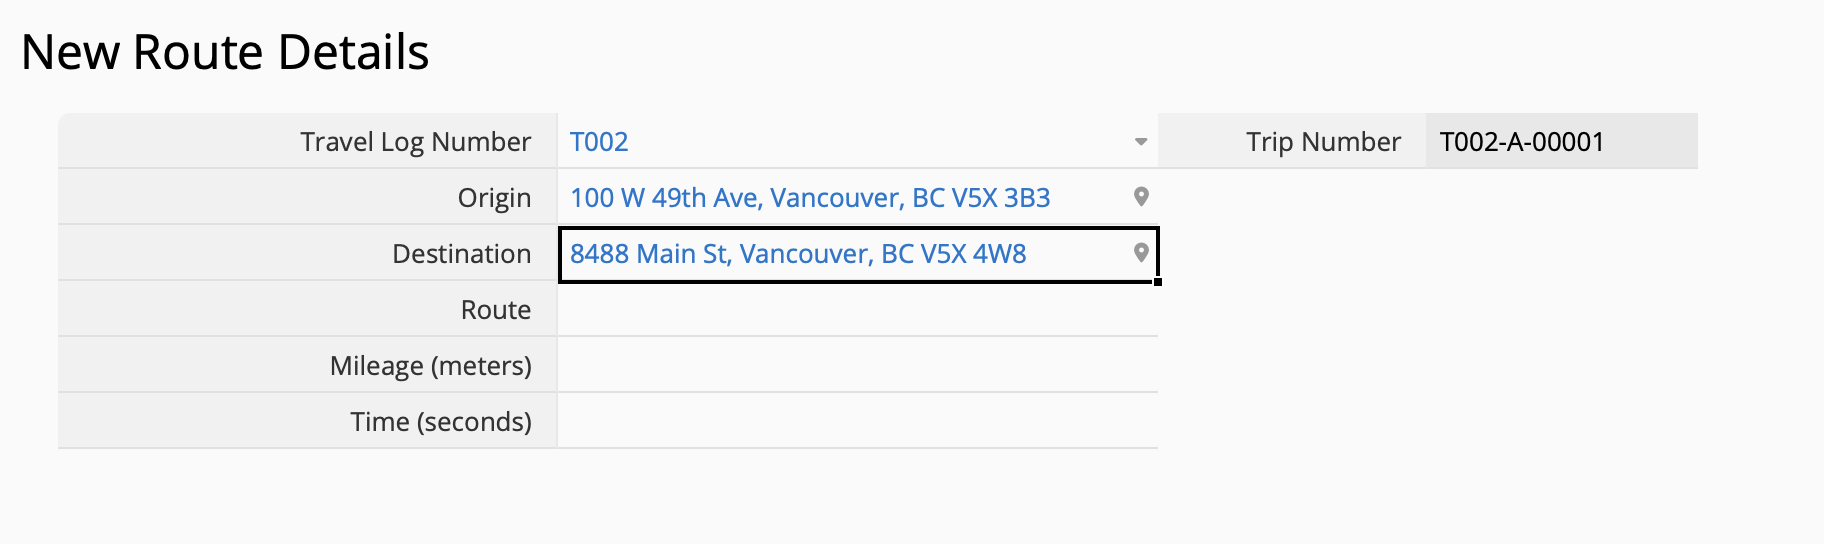
The output sheet would look like this:
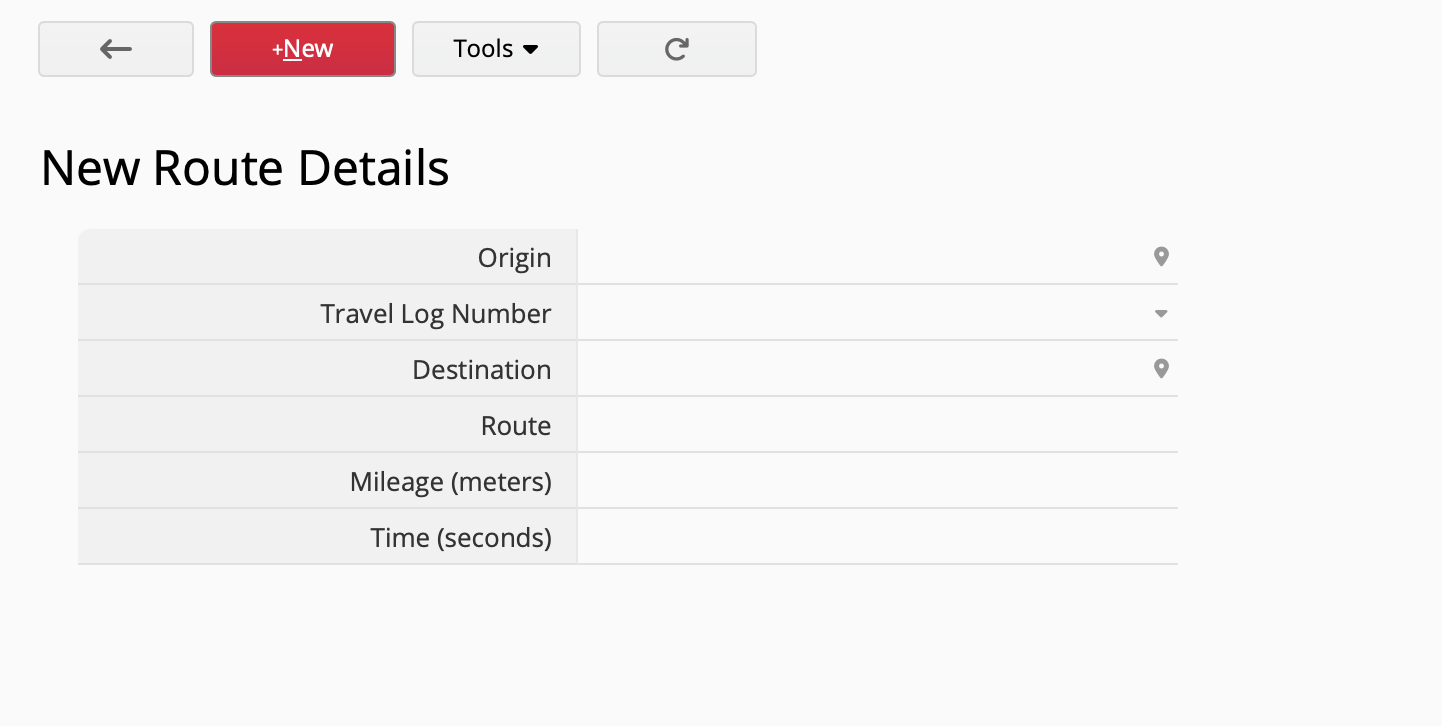
In order for Make to return data, this sheet also needs a Unique Value field. You can add an Automatic Generate field and name it "Trip Number."
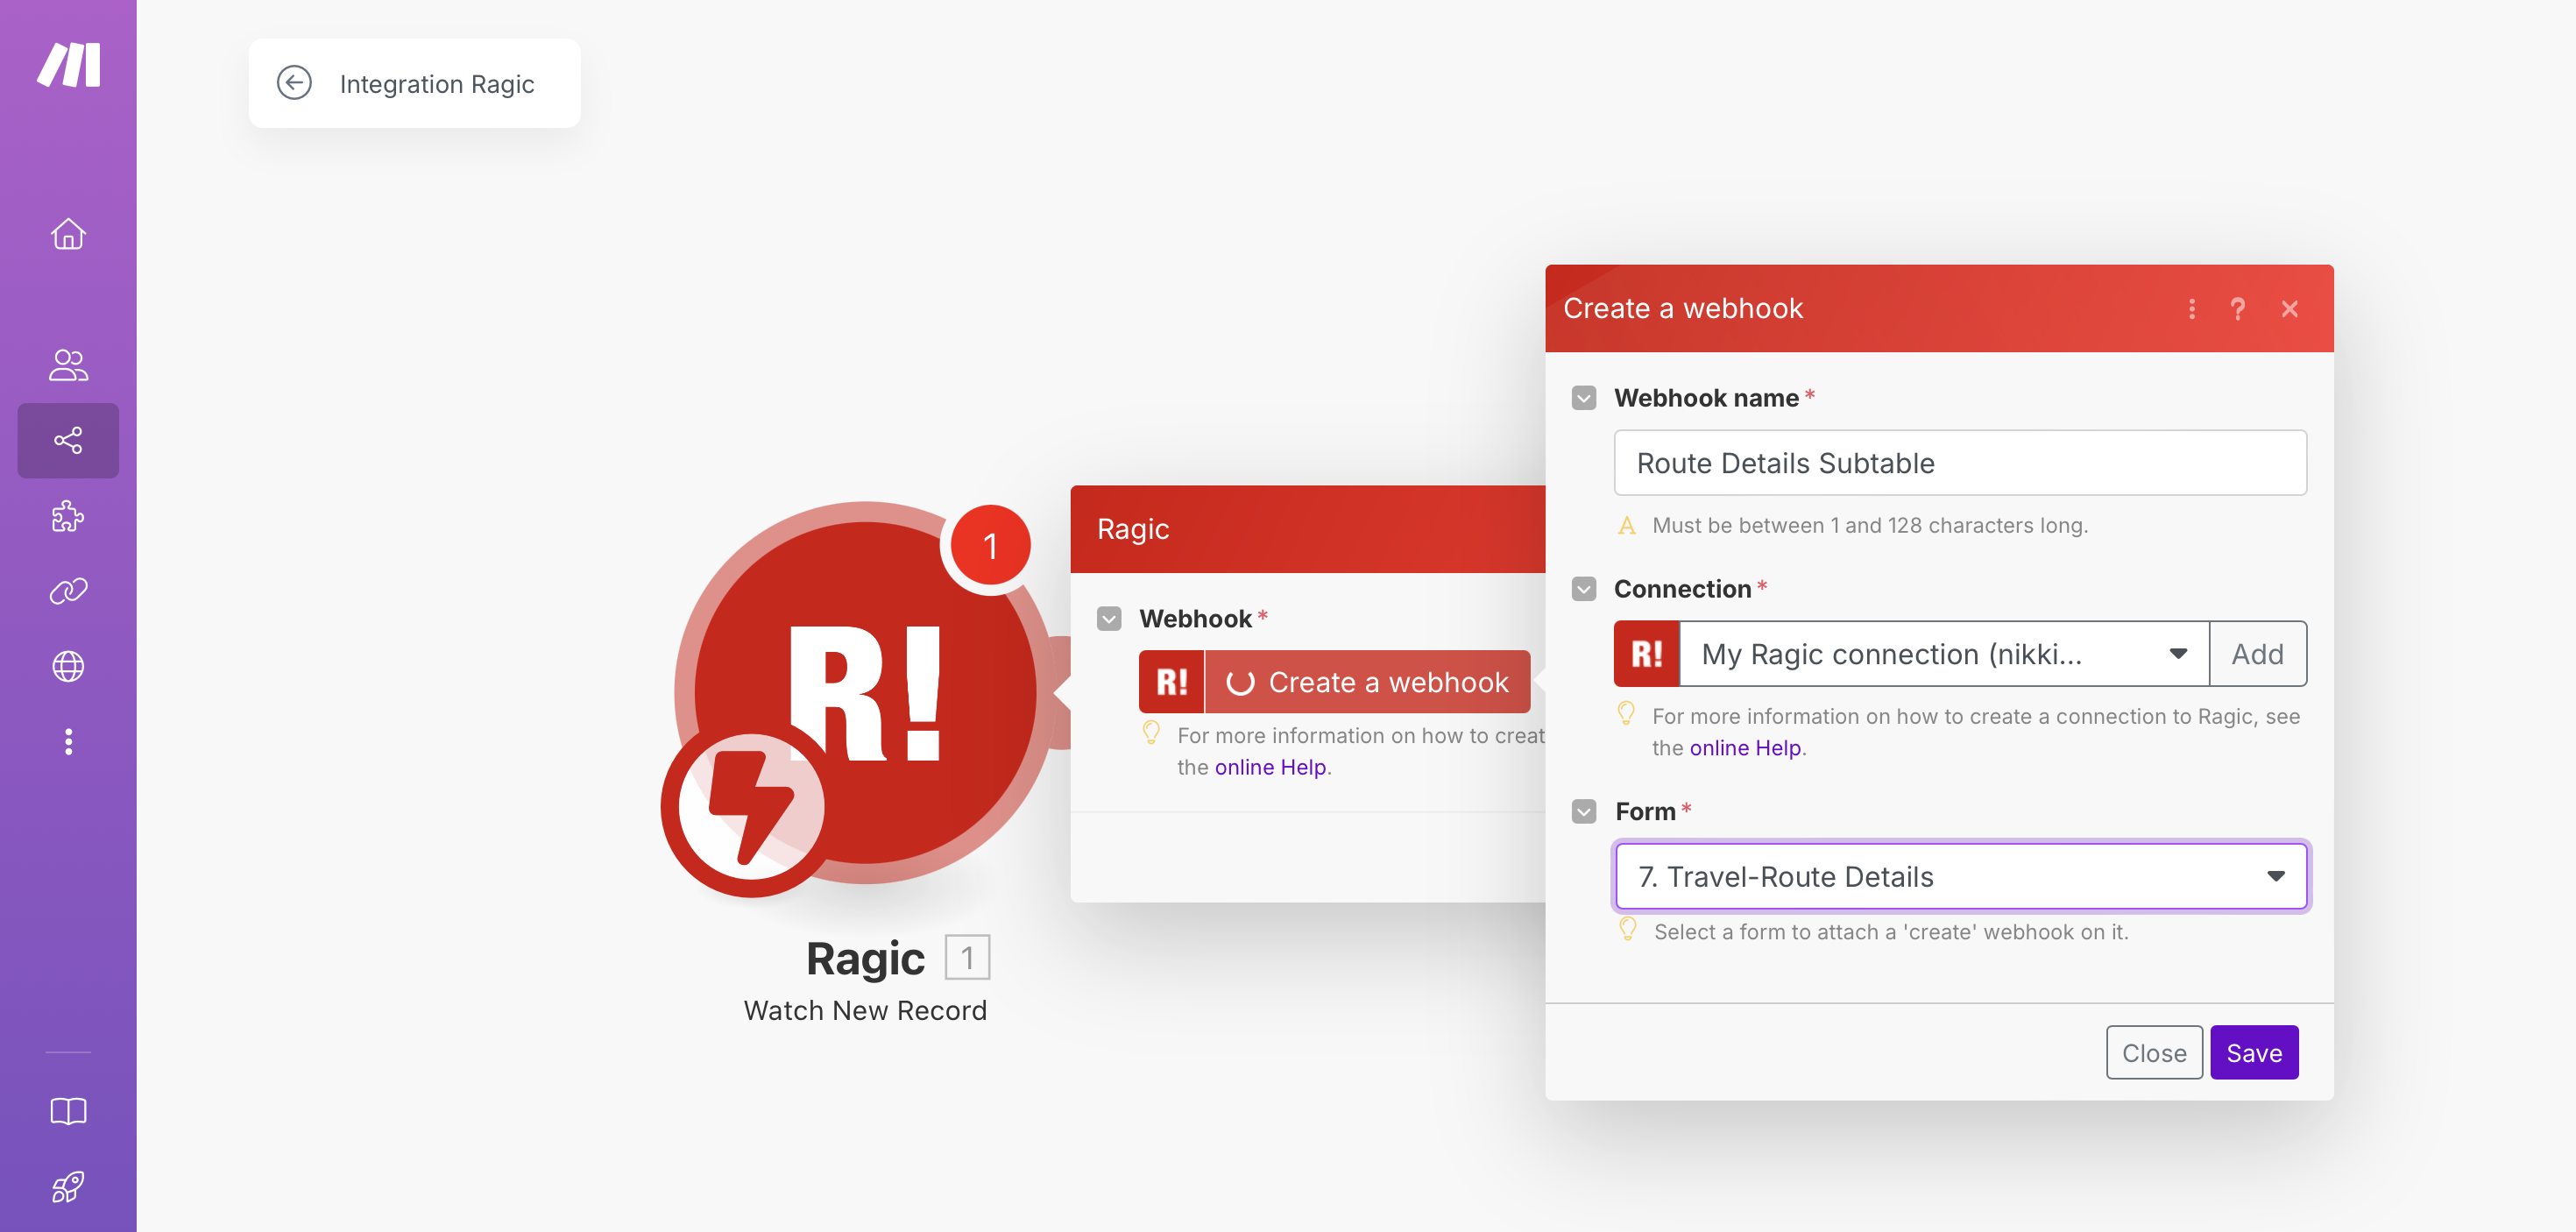
After this, the next steps are similar to the steps we have covered in the Simple Method. After saving the design on Ragic, you can go set the trigger on Make to connect to your newly generated Route Details sheet.
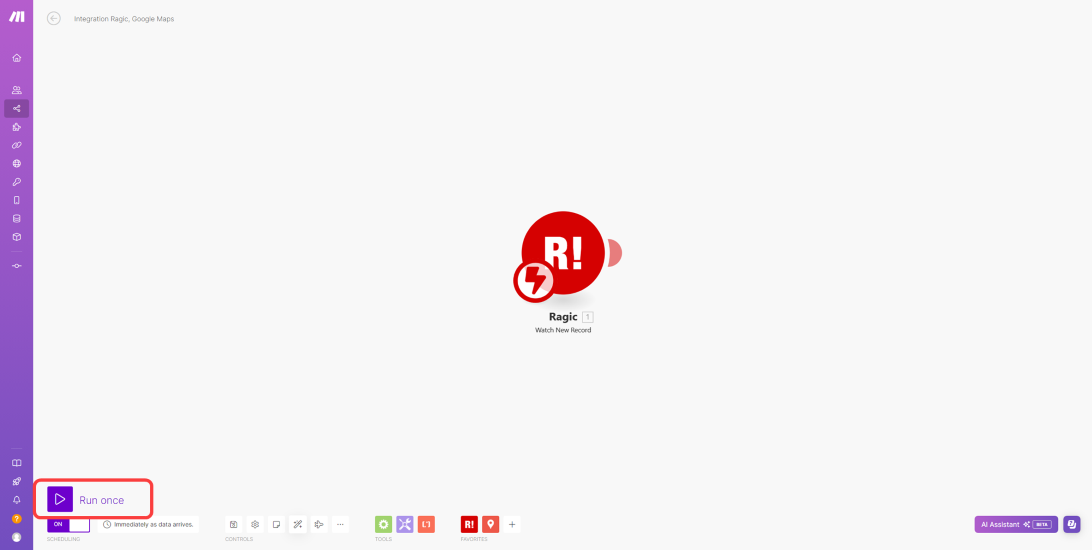
Then, click "Run Once" in the lower left corner of the screen and add a new record in the Route Details sheet for Make to test.
Next, add a Google Maps action to Make. Since we need to calculate the best route and find out the mileage and time of this path, we need to select the "Get Directions" action.
Similar to what we did in the Simple Method, set the field ID corresponding to the origin and destination points for Make to automatically transfer this data for calculation.
After adding the Google Maps action, we also need to add a Ragic action to return data. However, please note that we linked Make to the Route details sheet. The Key Domain and Keyword here is not the Travel Log Number, but rather the new Trip Number field that we have designed separately.
Next, set the connection for the mileage, time, and route fields.
For more details on this step, you can click here on how to connect your account to Google Maps and set up both endpoints.
Once the design is complete, you can start testing whether the connection works properly.
In order to make sure the connection works properly, press Run Once on the lower left corner again to start the connection process. Then, return to the Route Details sheet on Ragic and create a new entry.
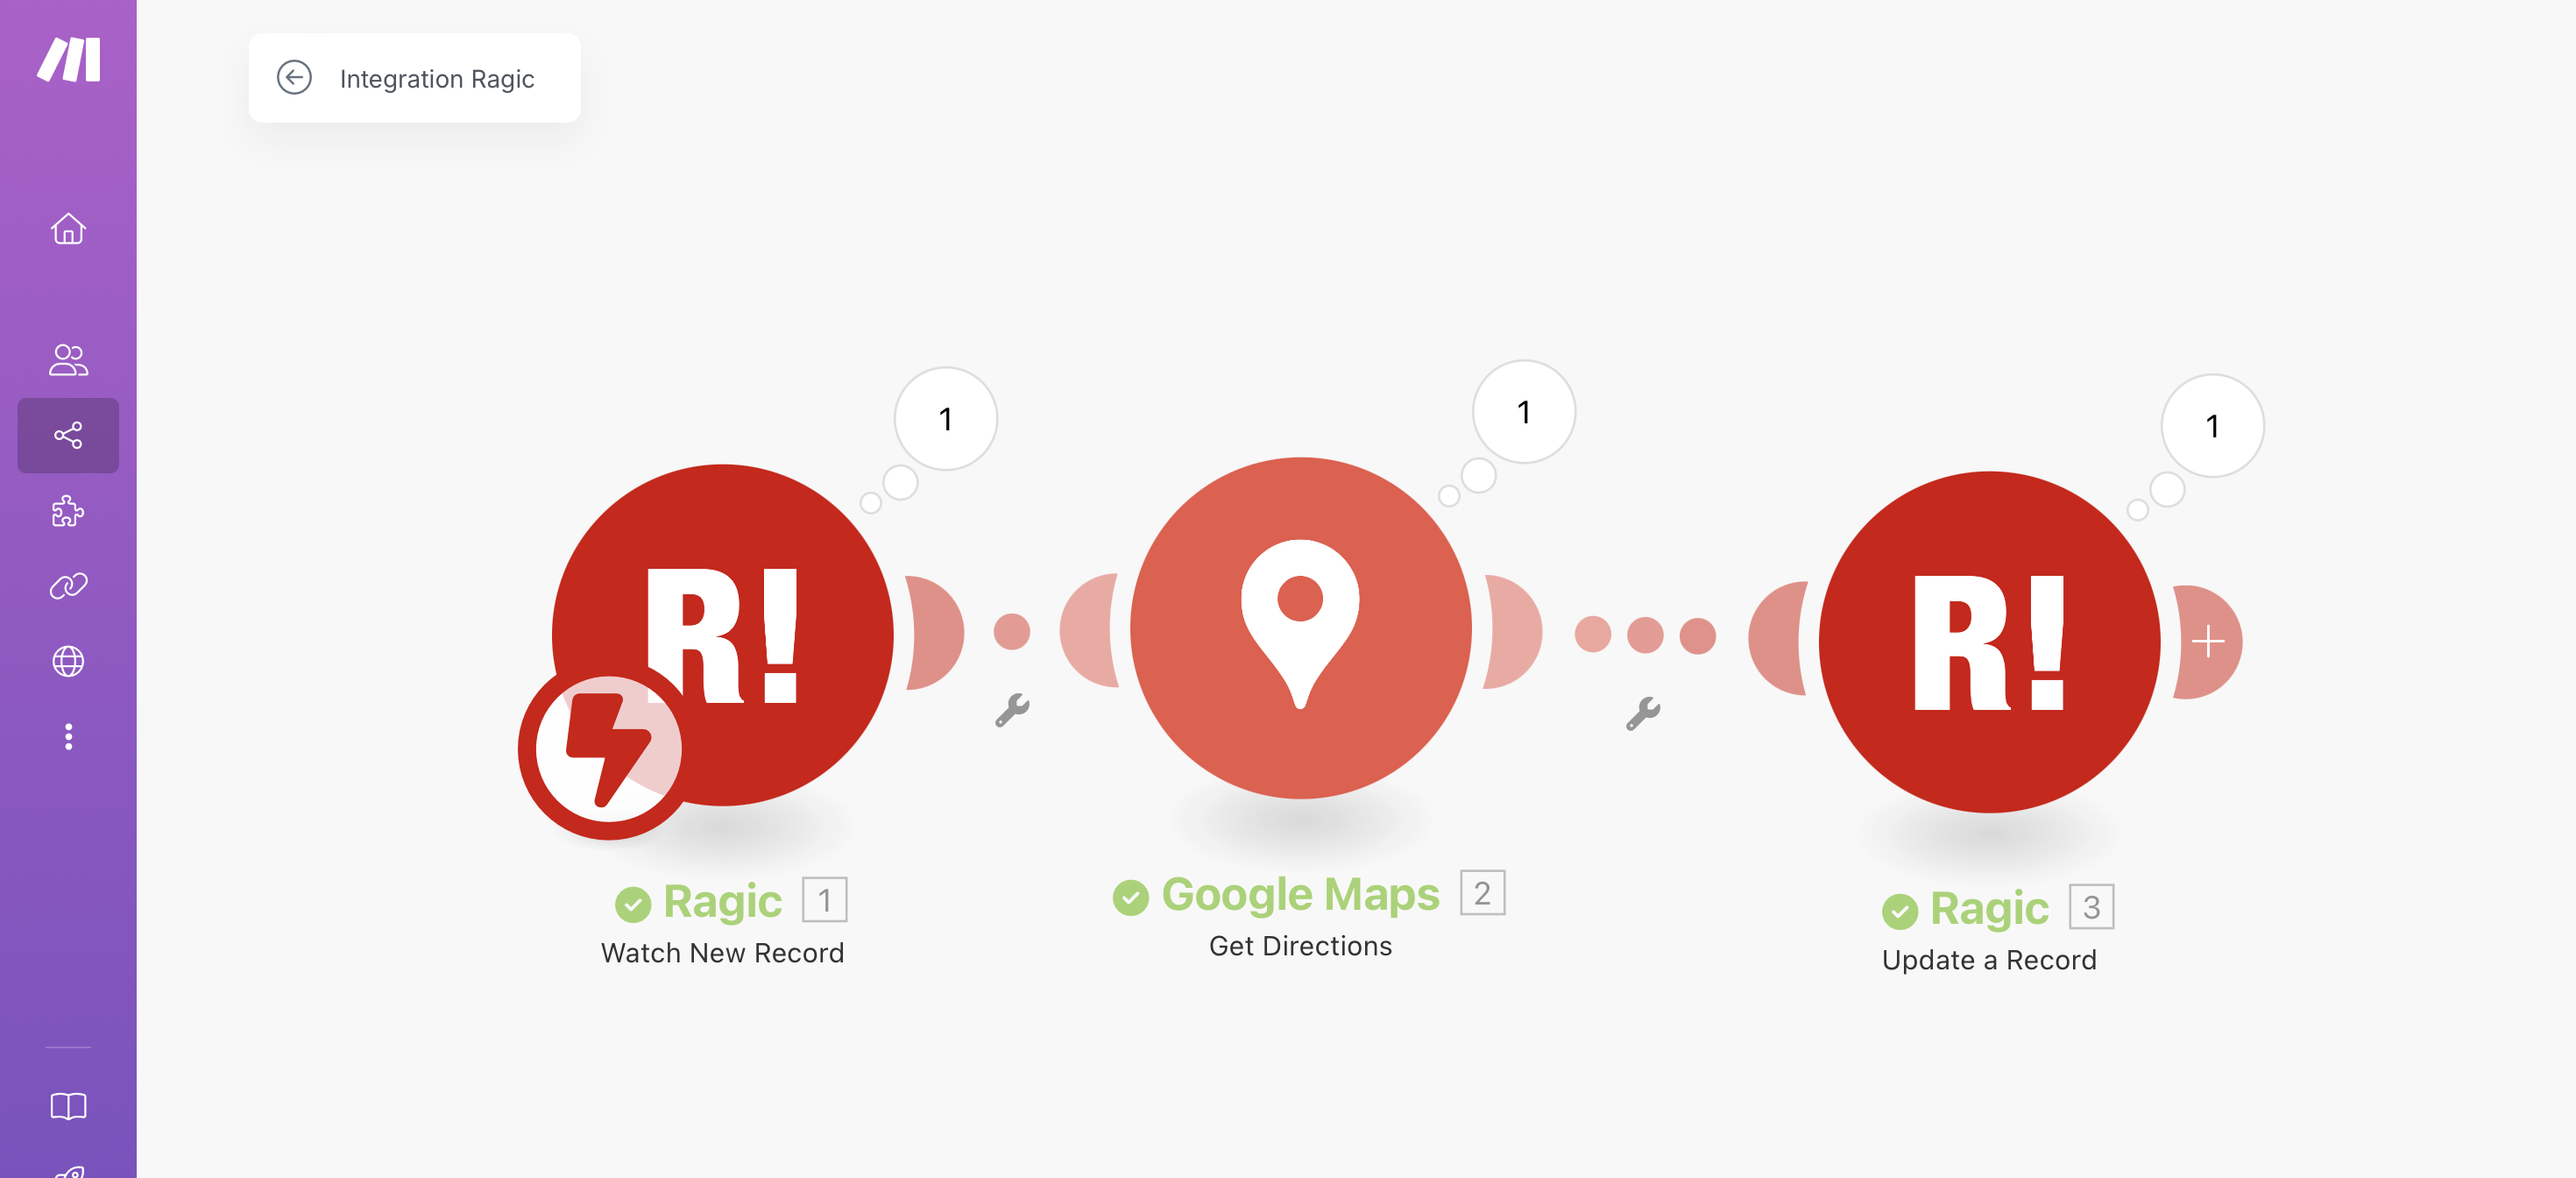
After pressing Save, return to Make and you can see that all three steps have been triggered and completed:
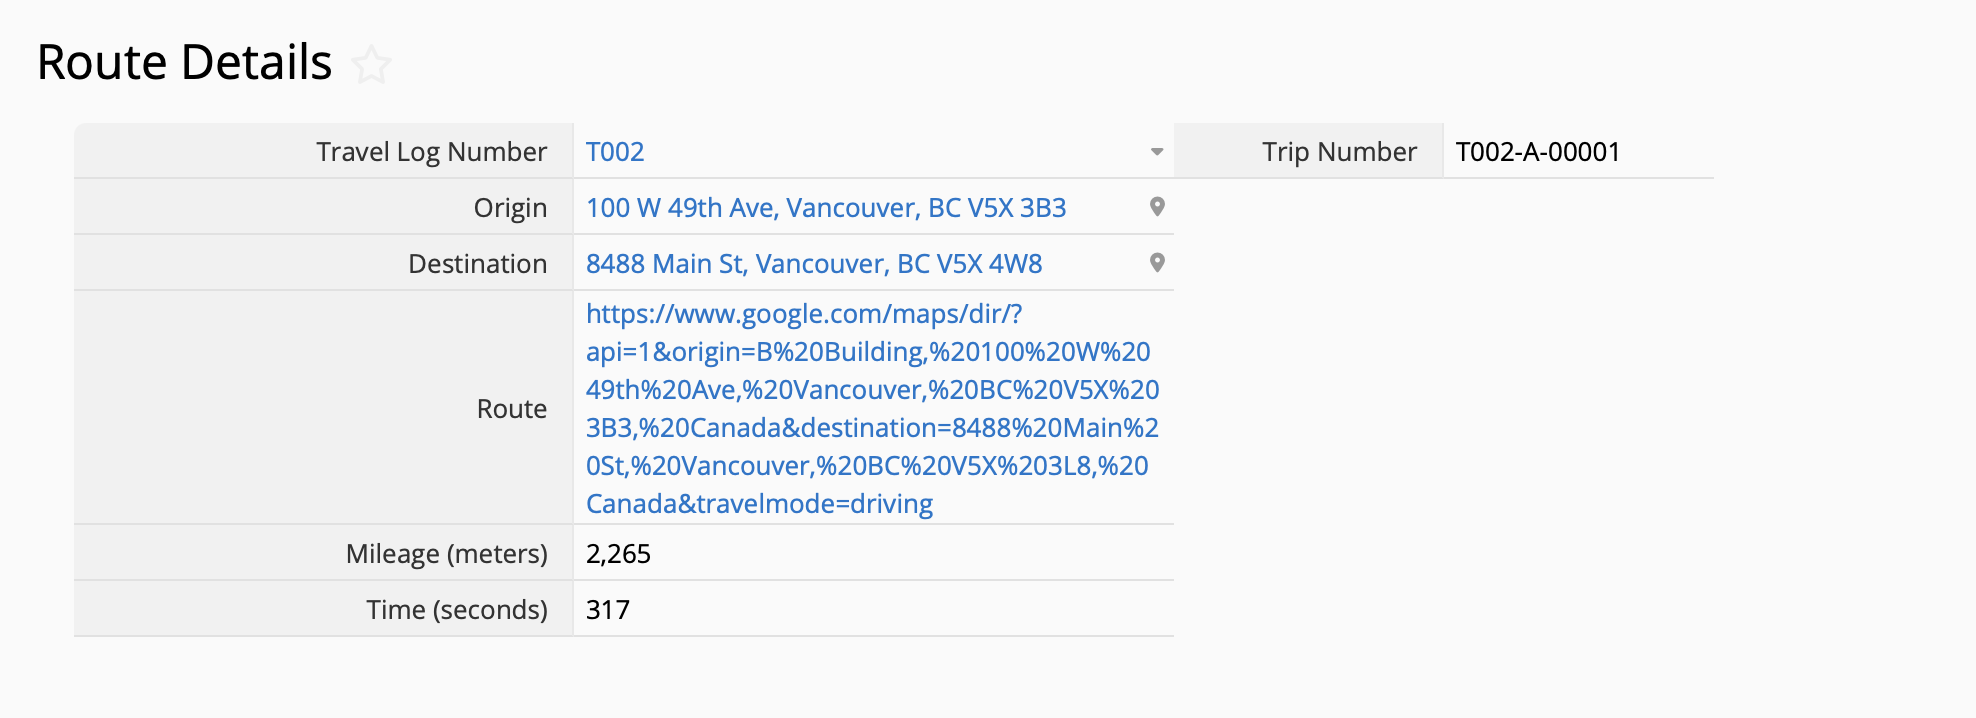
Go back to your Ragic sheet and you can see that the detailed route, mileage, and time data has been automatically filled out!
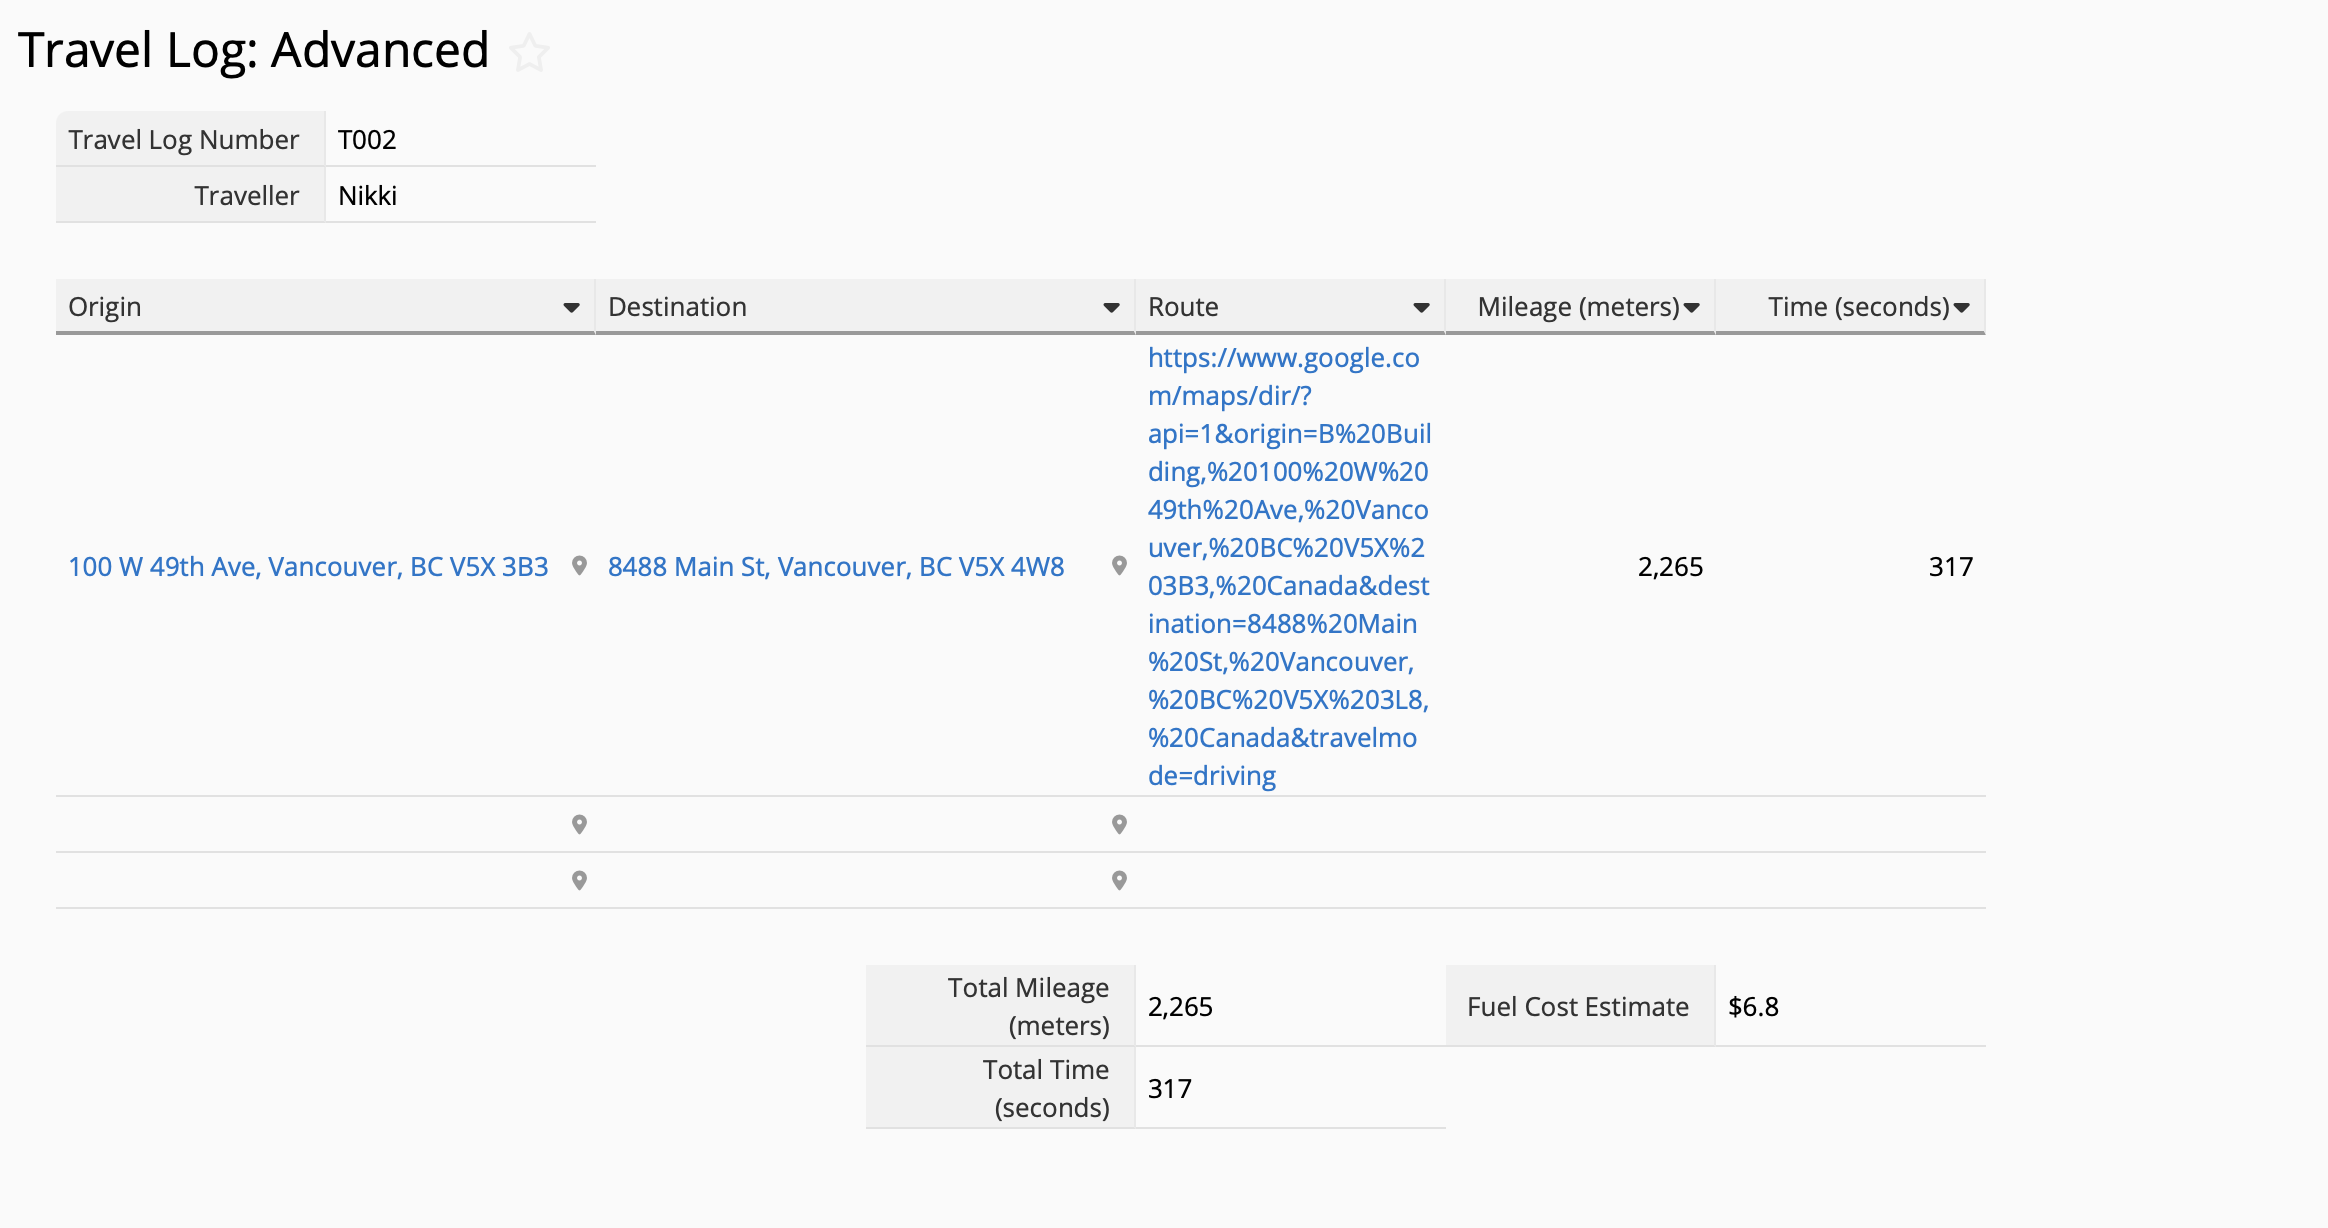
Finally, confirm that the route details are also calculated and populated into the Route Details subtable in your Advanced Travel Log sheet.
You can create a few more records to confirm that there are no problems with the formula design, or create more fields according to your needs. After confirming that it is fully functioning, the design is complete!
Note that although the new sheet Route Details is linked to the subtable in Advanced Travel Log, Make's Watch New Record action will only detect data added directly from the Route Details sheet at this stage. Therefore, when logging your trip information in the future, you must do it from the Route Details sheet rather than the Advanced Travel Log sheet.
 Thank you for your valuable feedback!
