Subtables are extremely useful for managing one-to-many relationships in your sheet. For example, you may want to create an entry for a customer account with activity history records for multiple contacts, or you may need to create records for multiple items in a purchase order or quotation. Subtables are everywhere in business applications, and Ragic provides the simplest way for you to create and manage them.

When using Subtables, users can enter many sub-entries belonging to the main sheet entry. Initially, the Subtable displays three empty rows for entering data, but as a user enters more information, additional rows will appear.

If a Subtable includes a Select From Other Sheet (Linked Field) and the Multiple subtable rows at once configuration is enabled, you can select multiple records at once when entering data, which will be sequentially added to the Subtable.
After selection, you will need to close the window manually. (If Multiple Subtable Rows at Once is not enabled, the window will automatically close after selecting a single record.)
If you only want to delete the value of a specific field, simply select the field and press Space, Delete, or Backspace to remove the value.
To delete an entire subtable row, switch to edit mode, select any field in the row, and click the red delete icon on the left to remove it.

When you want to filter or sort Subtable records, it's just like filtering and sorting data using field headers on a Listing Page. You can click on the dropdown arrows next to the field header.
You can use the Filter by Text option to filter your Subtable. If the field is a Selection Field or a Multiple Selection Field, you can also choose one of the options to filter.
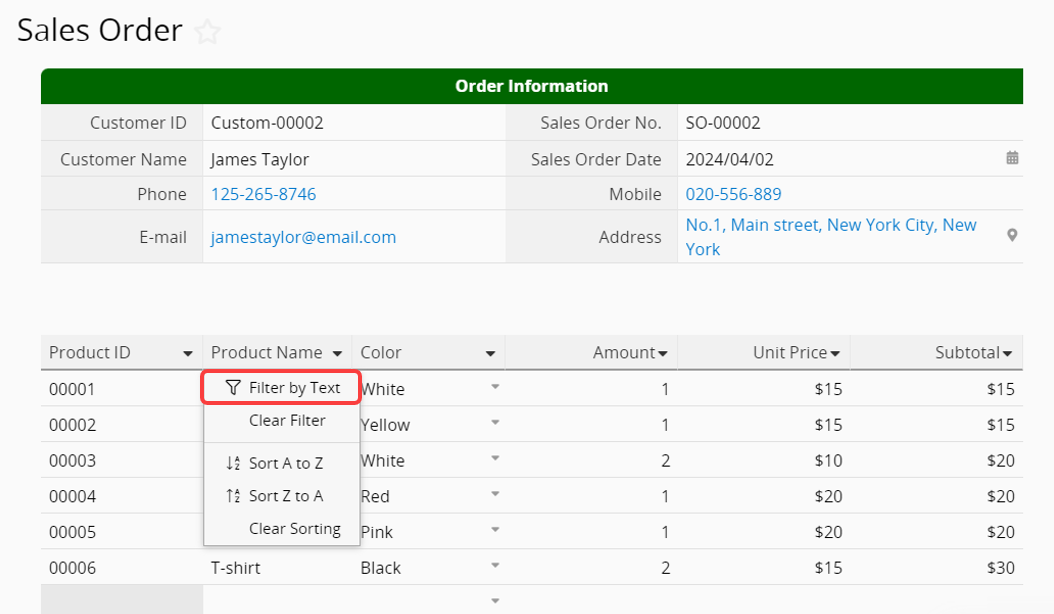
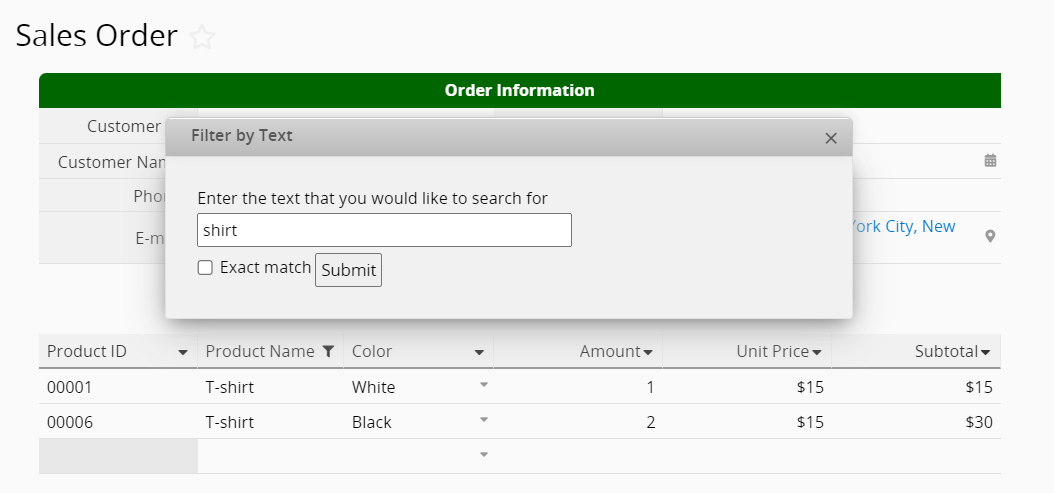
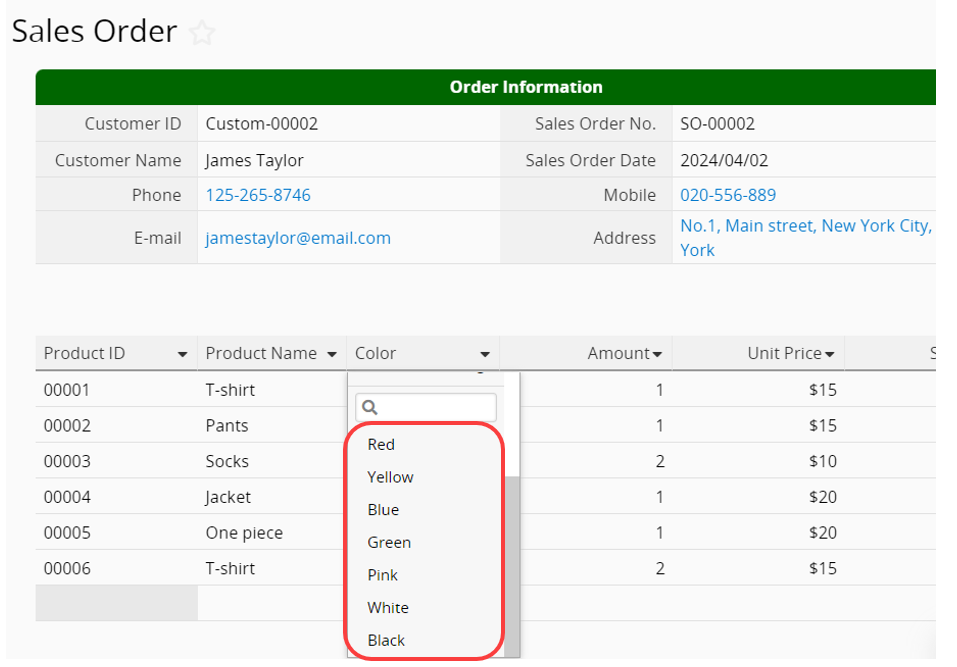
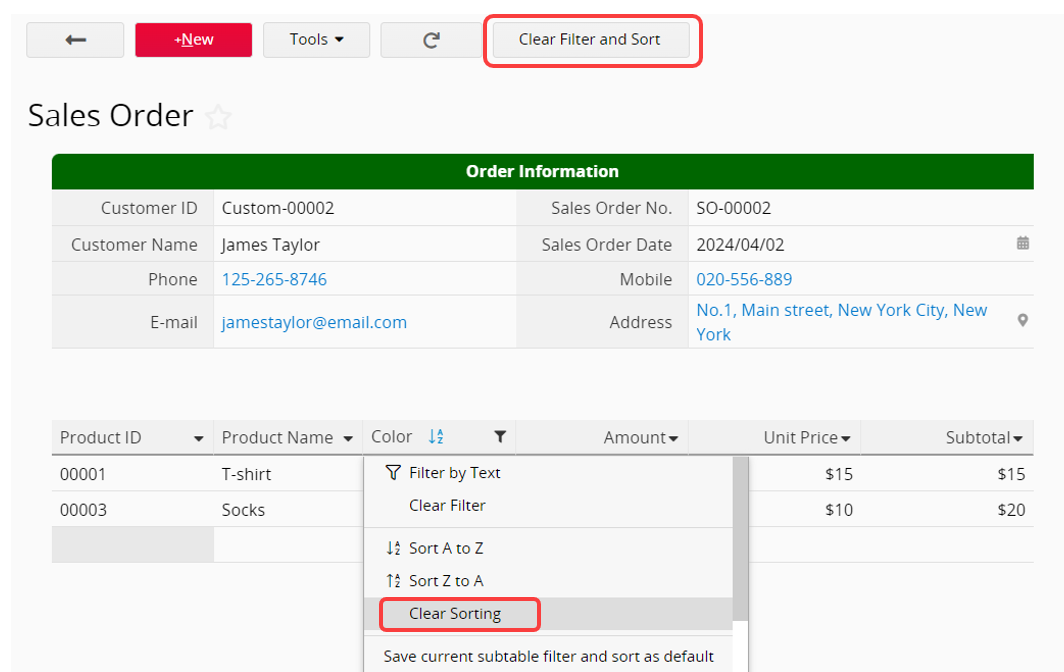
The applied filters can be cleared either by using the Clear Filter and Sort button located at the top of your page or by using the Clear Filter option accessible from the drop-down arrow of each field header.
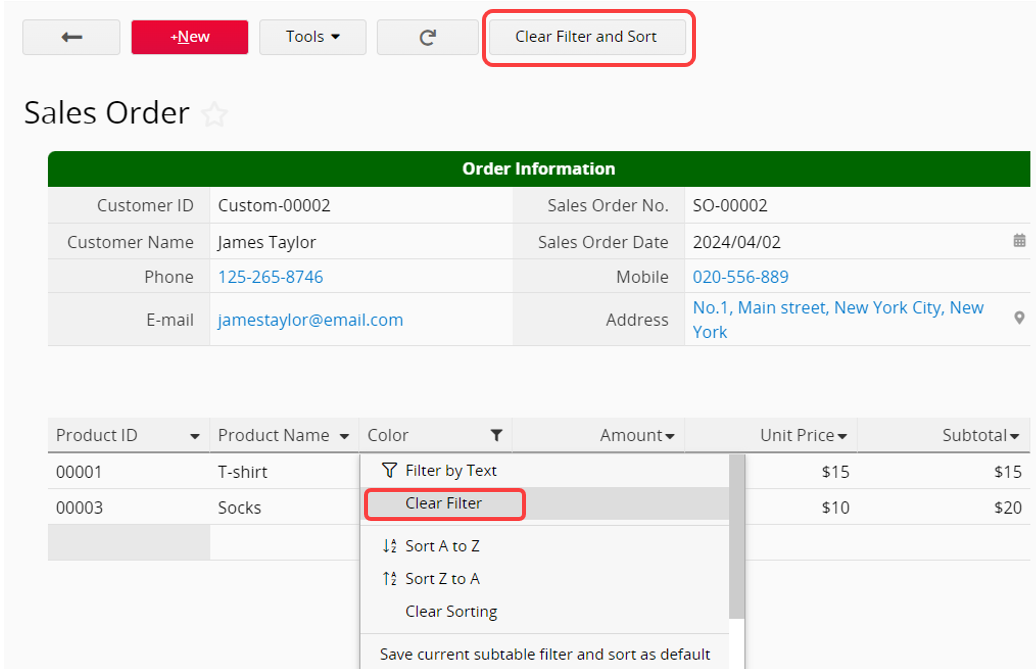
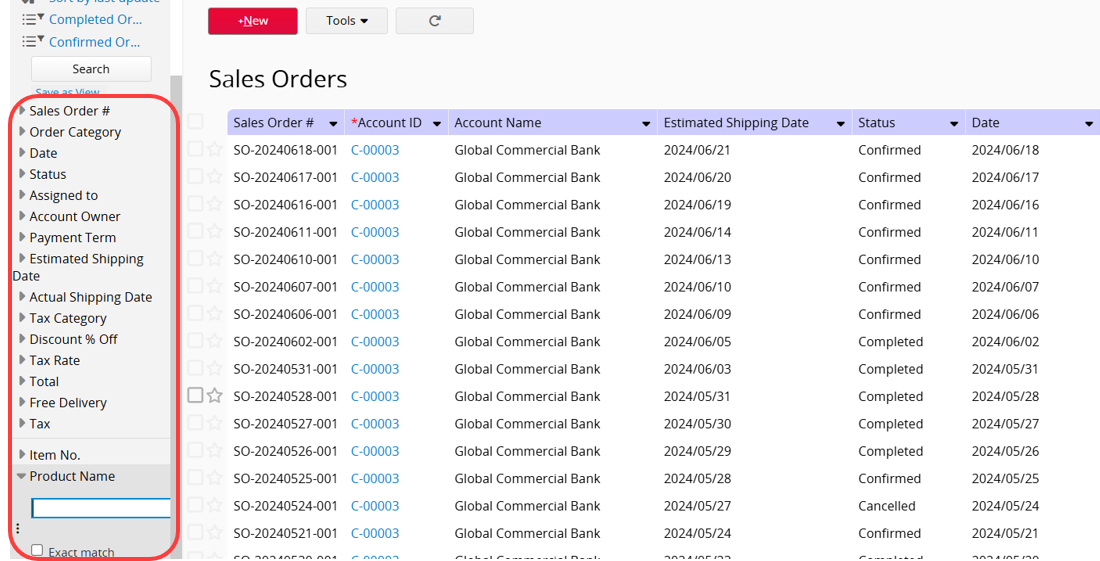
You can also filter Subtable records using the left sidebar, if the SYSAdmin has configured the fields to appear there.
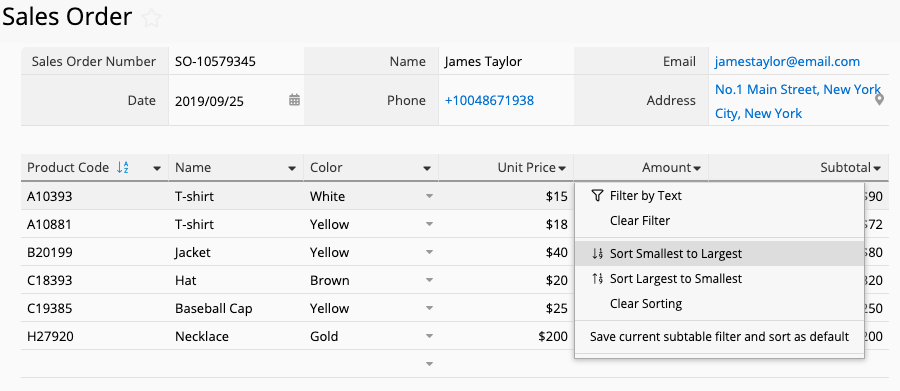
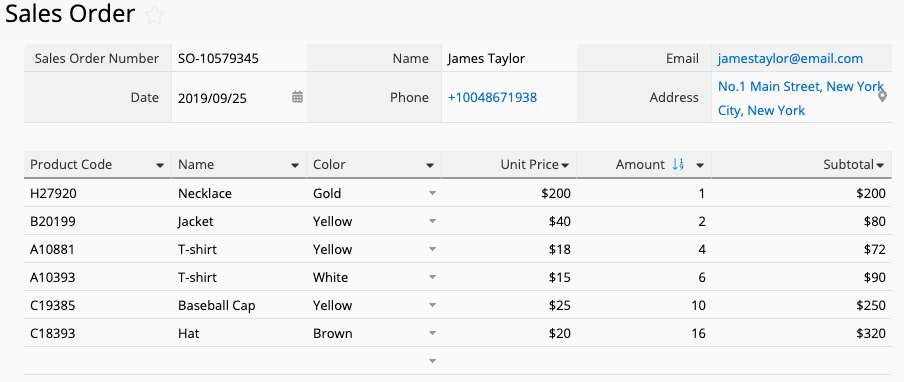
Options include sorting by ascending or descending order.
The applied Sorting can be cleared either by using the Clear Filter and Sort button located at the top of your page or by using the Clear Sorting option accessible from the drop-down arrow.
You can also sort multiple fields in the Subtables. For example, sorting Status first and then sorting Account Owner.
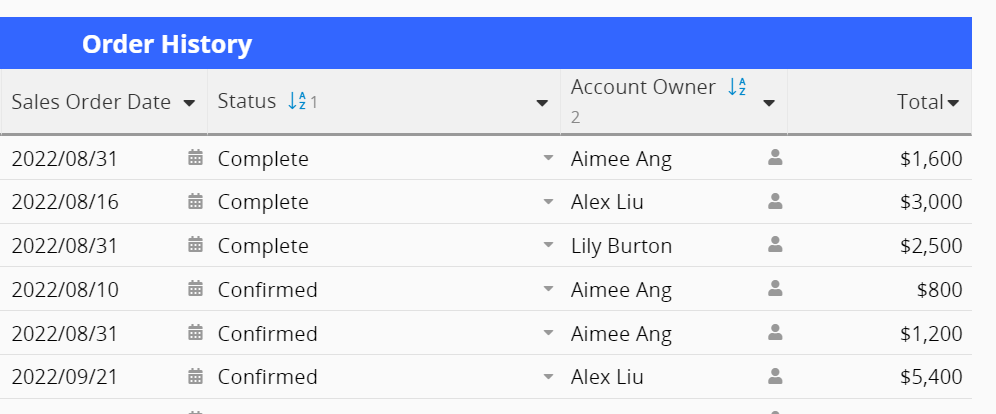
Note: Applying multiple sorting will be meaningful only when the previous sorted field has duplicate values.
Exporting Subtable data requires the SYSAdmin to Create a New Sheet From the Subtable. In the new sheet, each row of Subtable data will turn into independent records, allowing you to export records.
Users can import data from their "Excel" or "CSV" files into Ragic sheets.
If you don't see the following features on the sheets, it may be related to your access rights. Please contact your SYSAdmin to check the Feature Access Settings.
For example, if you want to import multiple order details (from the "Sales Orders" sheet to the "Order Details" Subtable), follow the steps below:
First, confirm with your SYSAdmin what the Selection Title Field for "Sales Orders" is, which is usually the "Sales Order Number".
Place the "Selection Title Field," such as "Sales Order Number", in the first column of the import file and fill in the corresponding values.
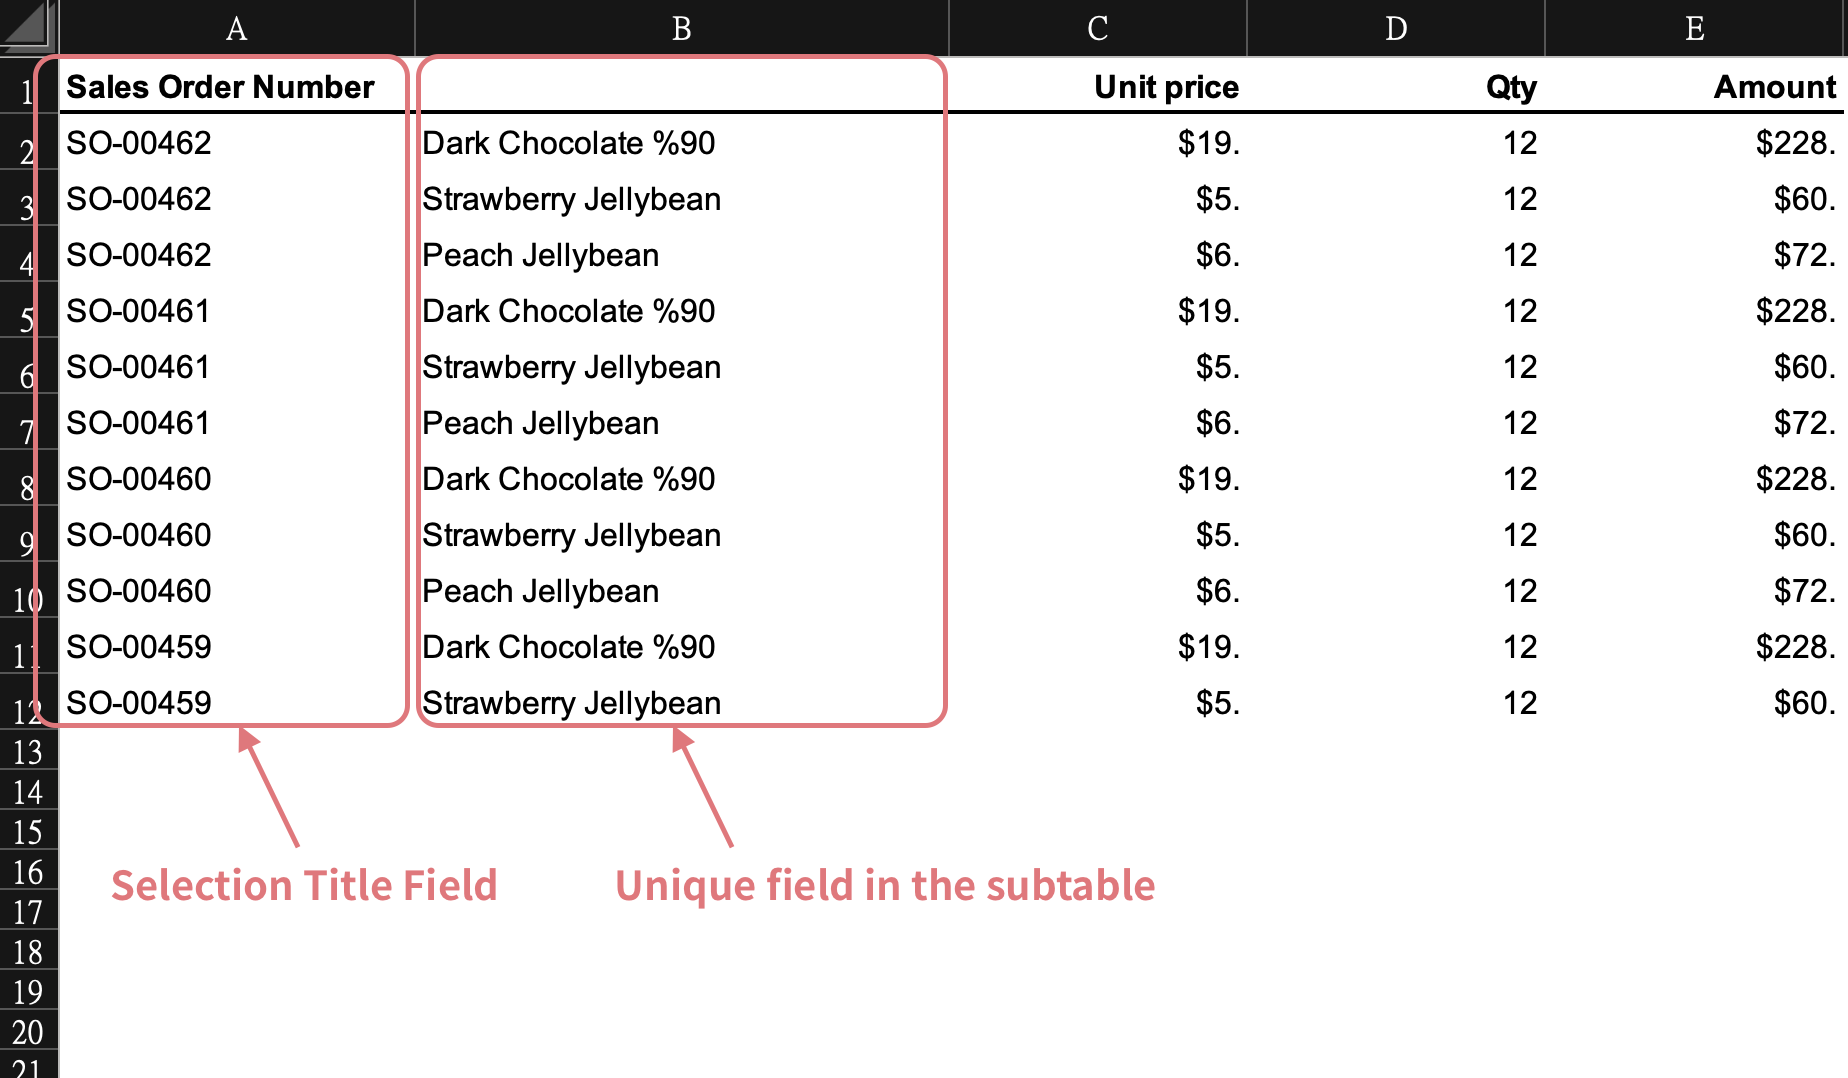
During import, the system uses the value in this column to determine which row in the Subtable belongs to which record. For example, it uses the "Sales Order Number" to decide into which "Sales Order" record each "Order Details" in the Subtable should be imported.
Before importing, ensure that the main record you intend to import into already exists. For instance, if you want to import "Order Details" for "Sales Order Number" "SO-20201022-001", there must already be a corresponding record with this "Sales Order Number" in the "Sales Orders" sheet. If not, please create it before you import data into the Subtable.
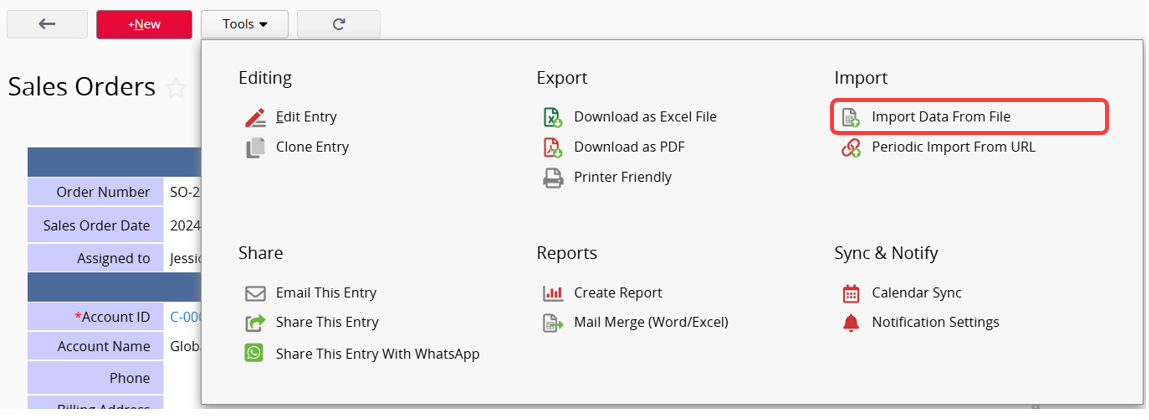
After preparing the import file, go to the sheet where you would like to import data and choose Import Data From File under Tools.
Upload your file and click "Next".

Check if the first row of your data is the header and if you need to reverse the import sequence.
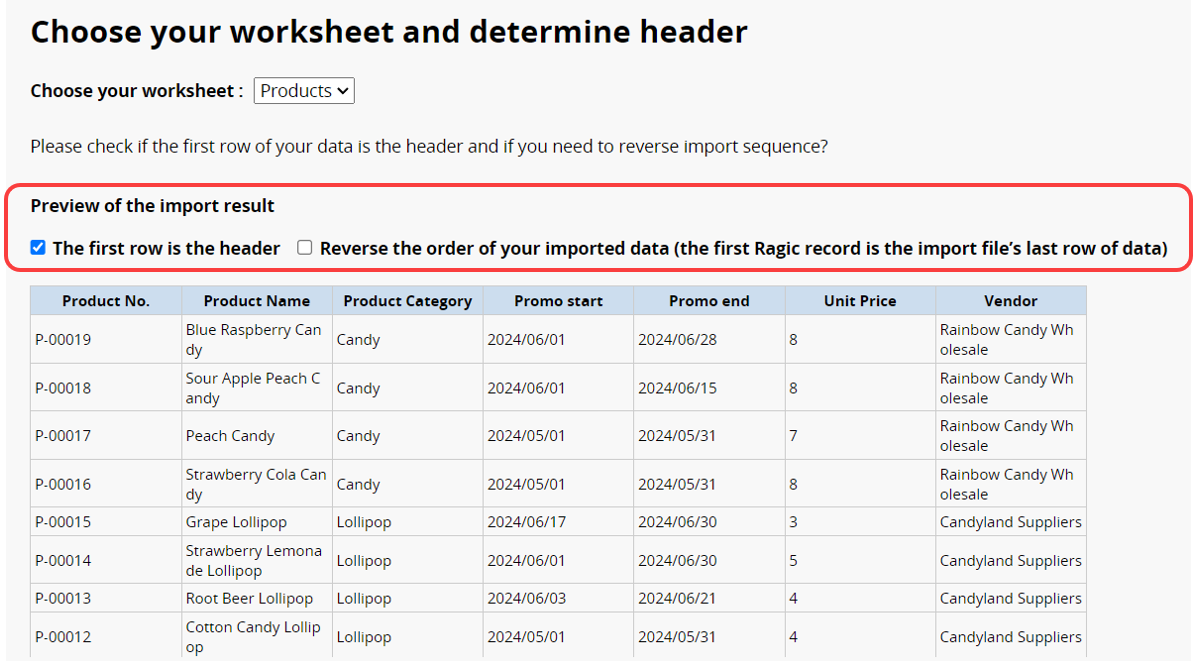
Select the name of the Subtable you want to import into from the dropdown menu.
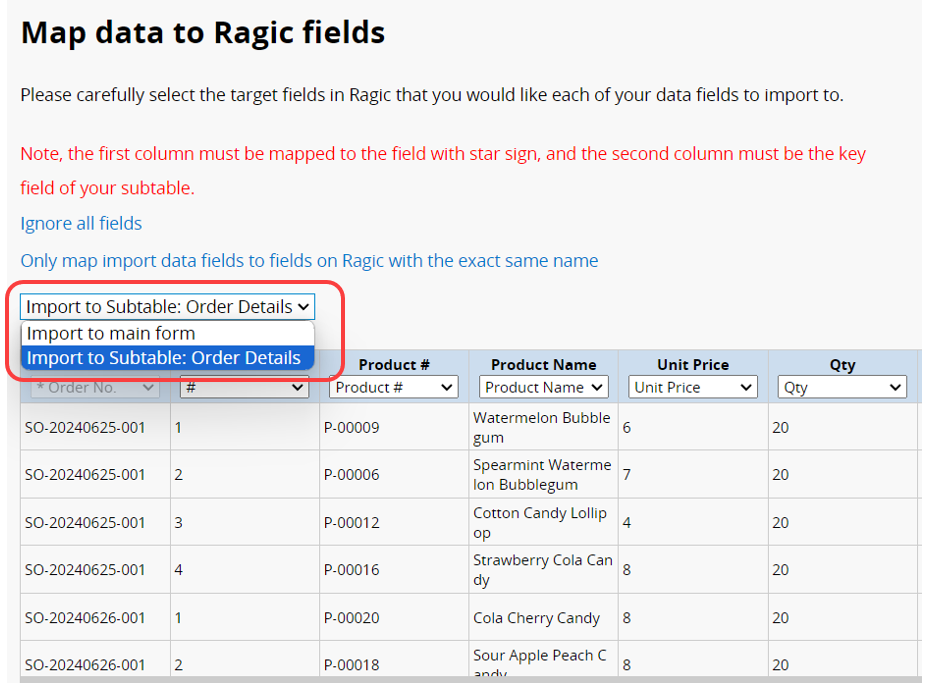
In the mapping process, the system automatically locks the first column. You can choose corresponding names for the other columns or ignore them if they are unnecessary.
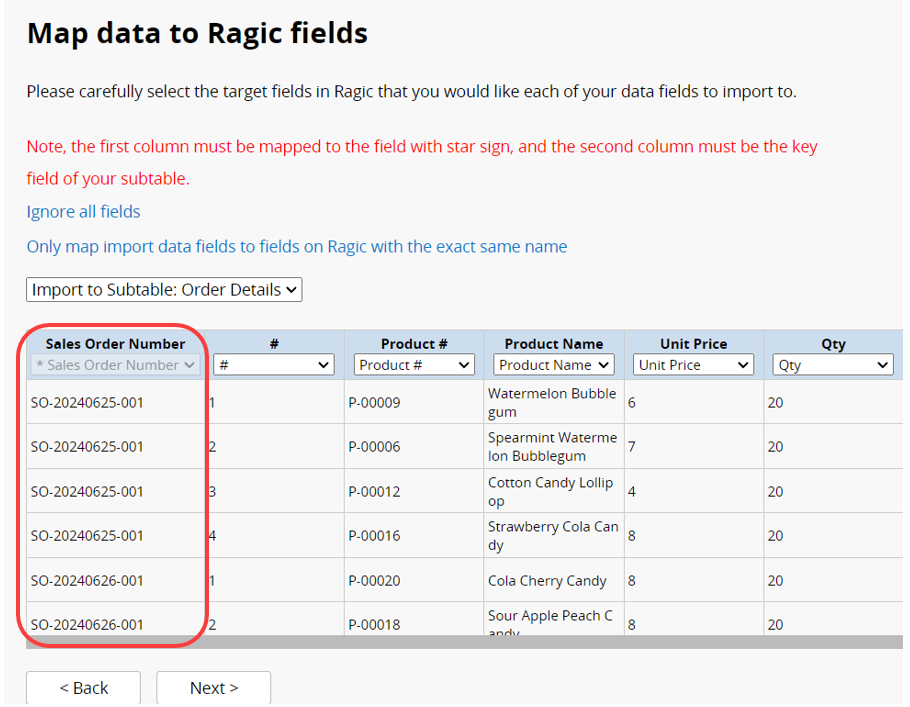
After mapping fields, you may select the proper import policy and advanced settings and then import your data.