Users can access the Reports tab to use the Reservation System designed by the SYSAdmin, for example, for room reservations or equipment rentals.
Note: If you find that you do not have access to the reports, please contact your SYSAdmin to check and adjust the Access Rights configuration.
In addition to accessing the Reservation System through the Reports tab, users can also access it by visiting the embedded report page or URL.

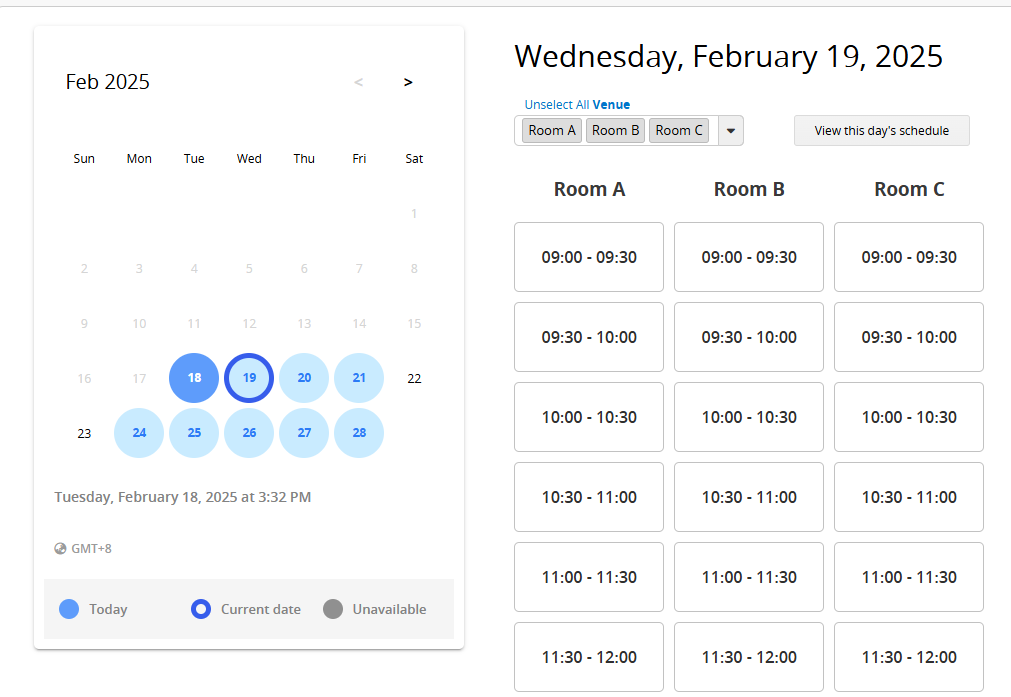
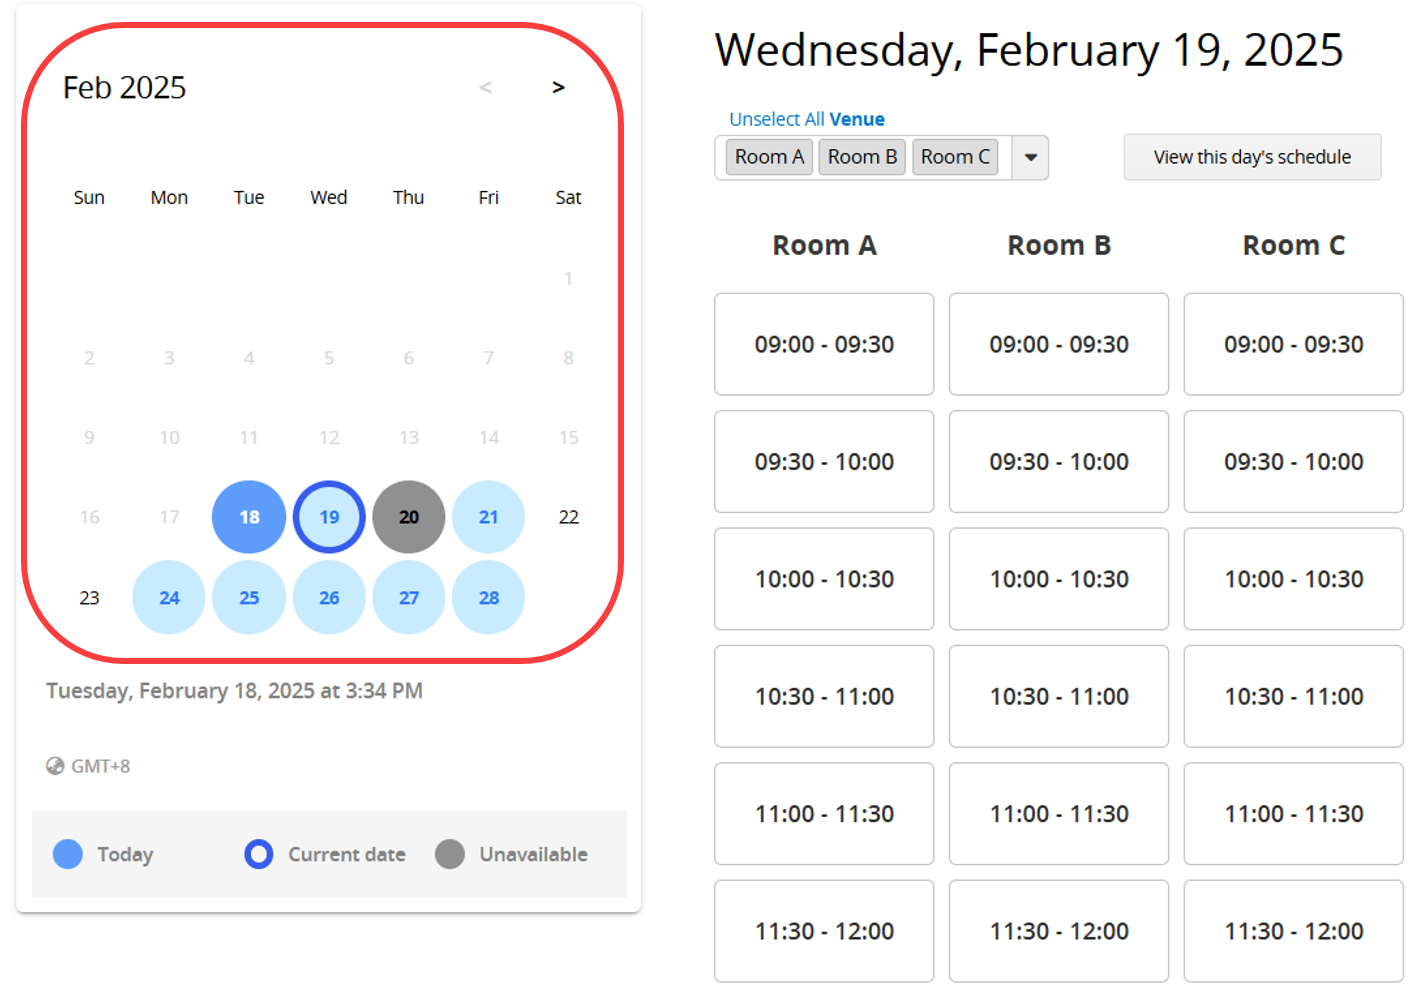
After entering the Reservation System, start by selecting a date from the left section. Dates with a gray background indicate that the day is fully reserved, and no reservations can be made. Additionally, past dates will not be displayed.
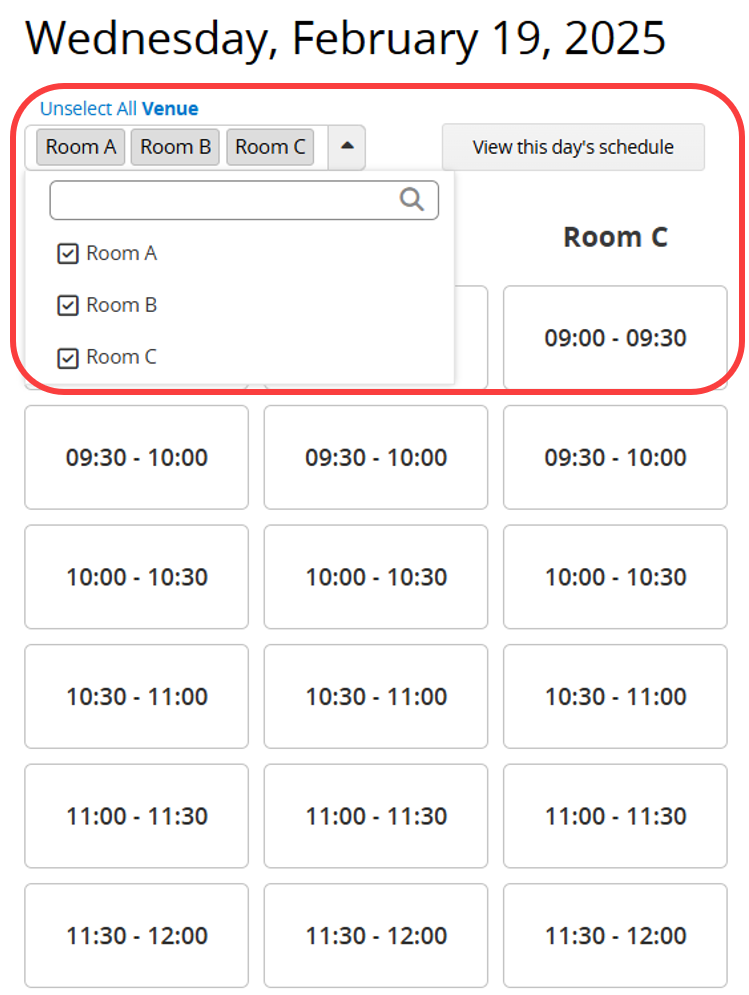
After selecting a date, choose the desired item from the options in the top-right section. Click the arrow to choose the items.
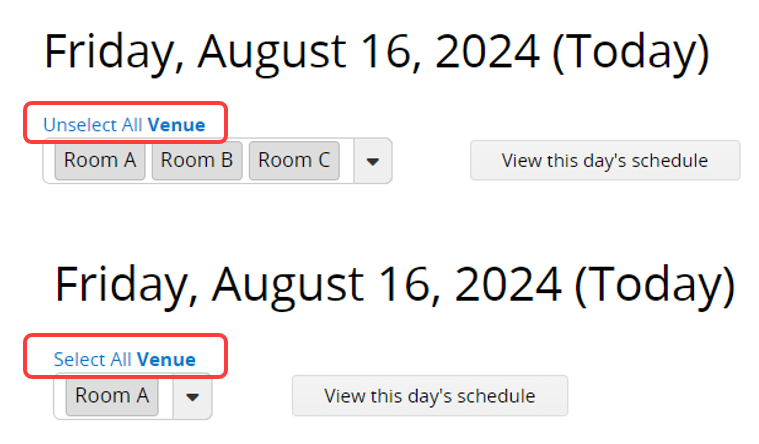
By default, all items are displayed. Click "Unselect All Items" at the top to clear all selections and choose items again. If you deselect some items, the option at the top will change to "Select All Items", allowing you to reset the selection.
After selecting the item and time increment, the following page will appear. You can choose the "End Time", select the "Reserved By", and fill in the "Remarks" and other Custom fields. Once you have made these configurations, click Make a Reservation.
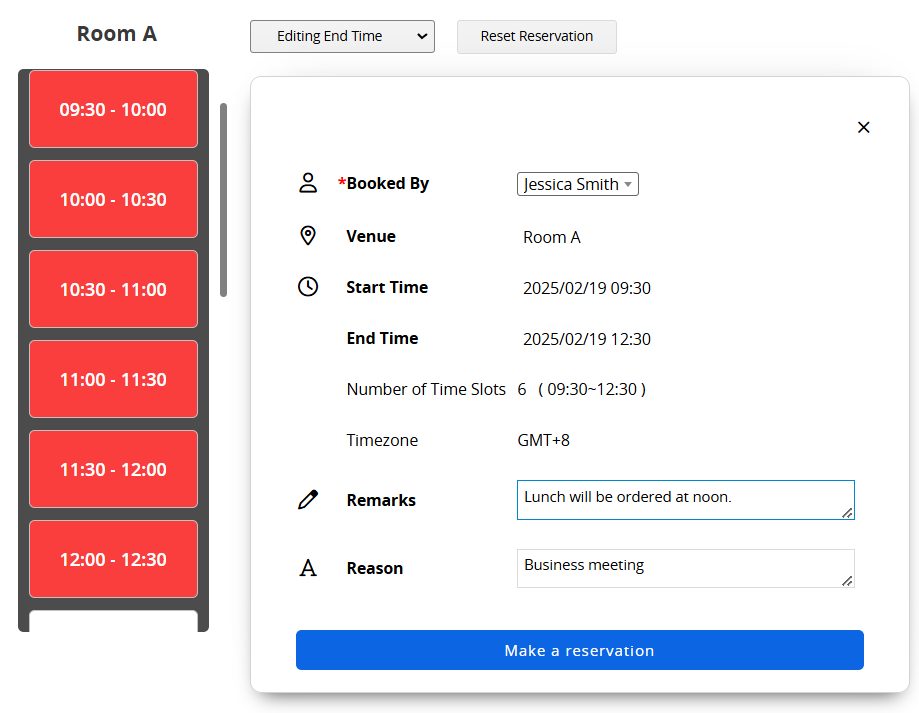
Additionally, you can edit the "Start Time" and "End Time", or directly click "Reset Reservation" for this item. If you want to reselect the item, click "View This Day’s Schedule" to return to the previous page.
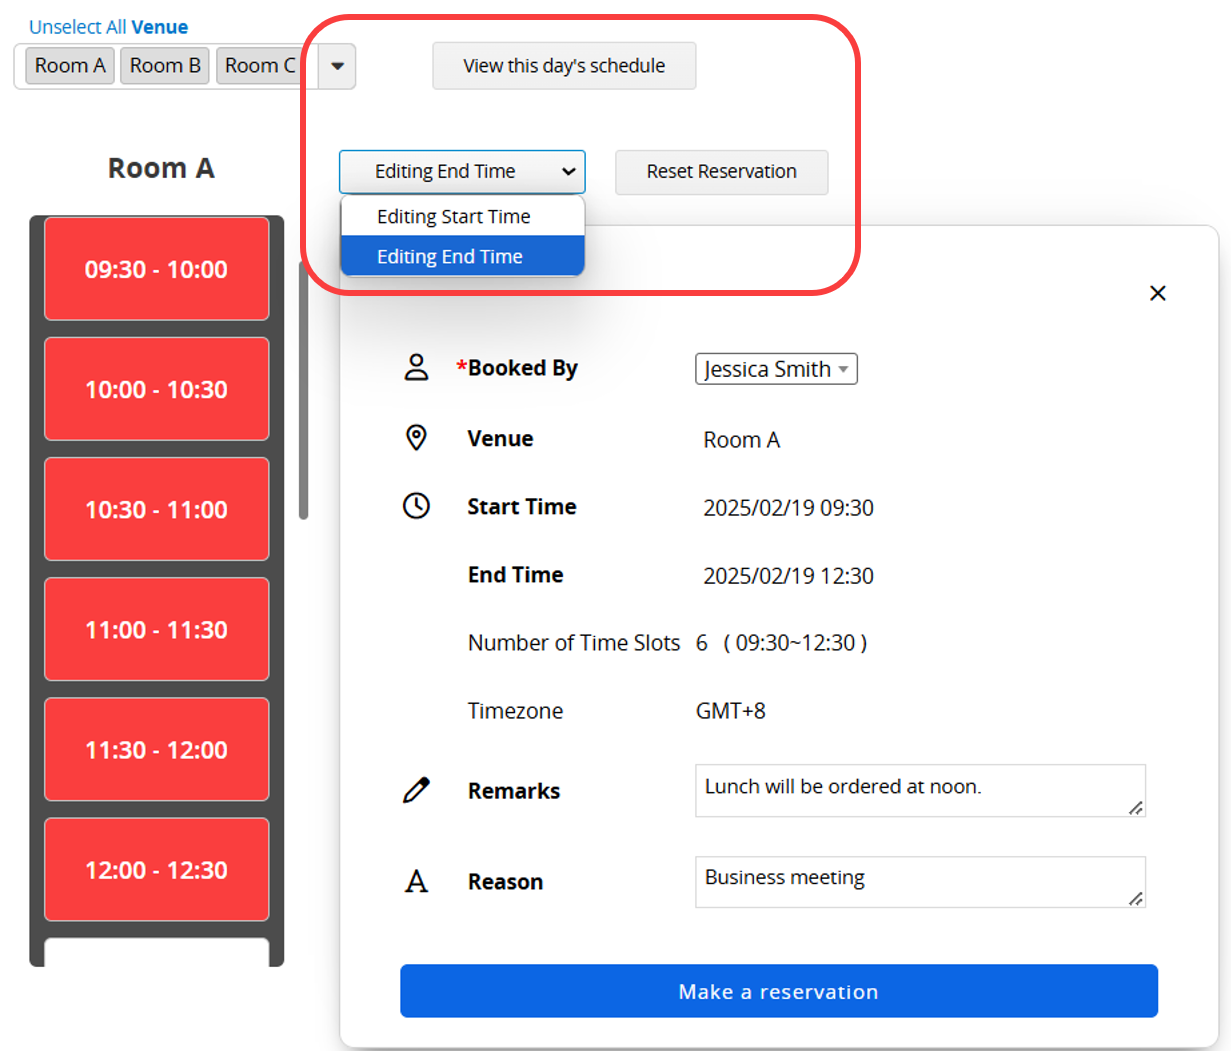
After making a reservation, the process differs for internal/external users and users without accounts or who are not logged in:
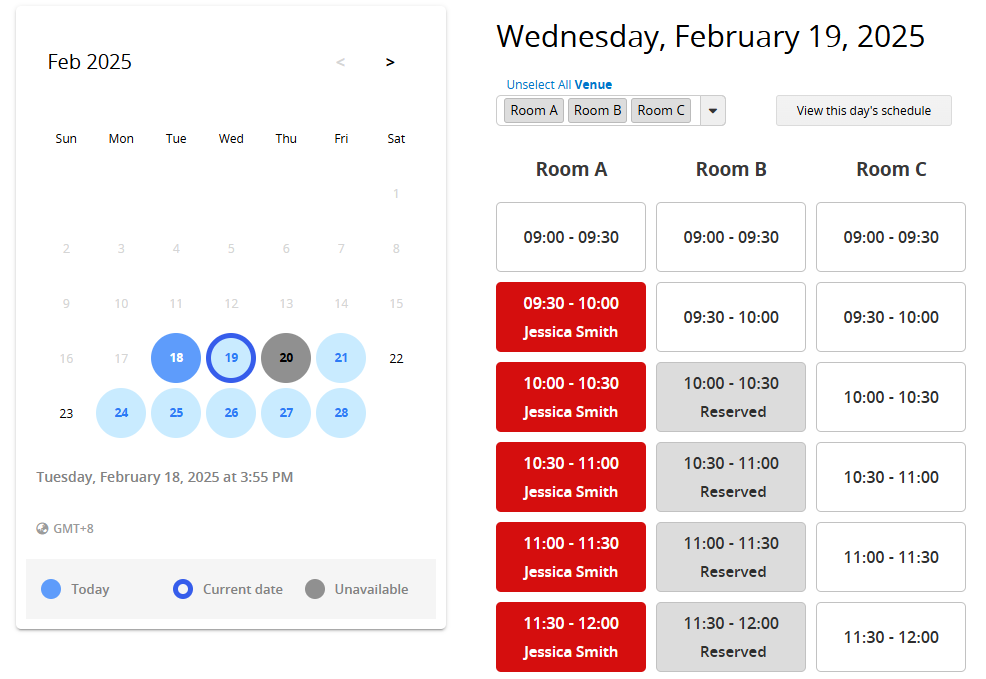
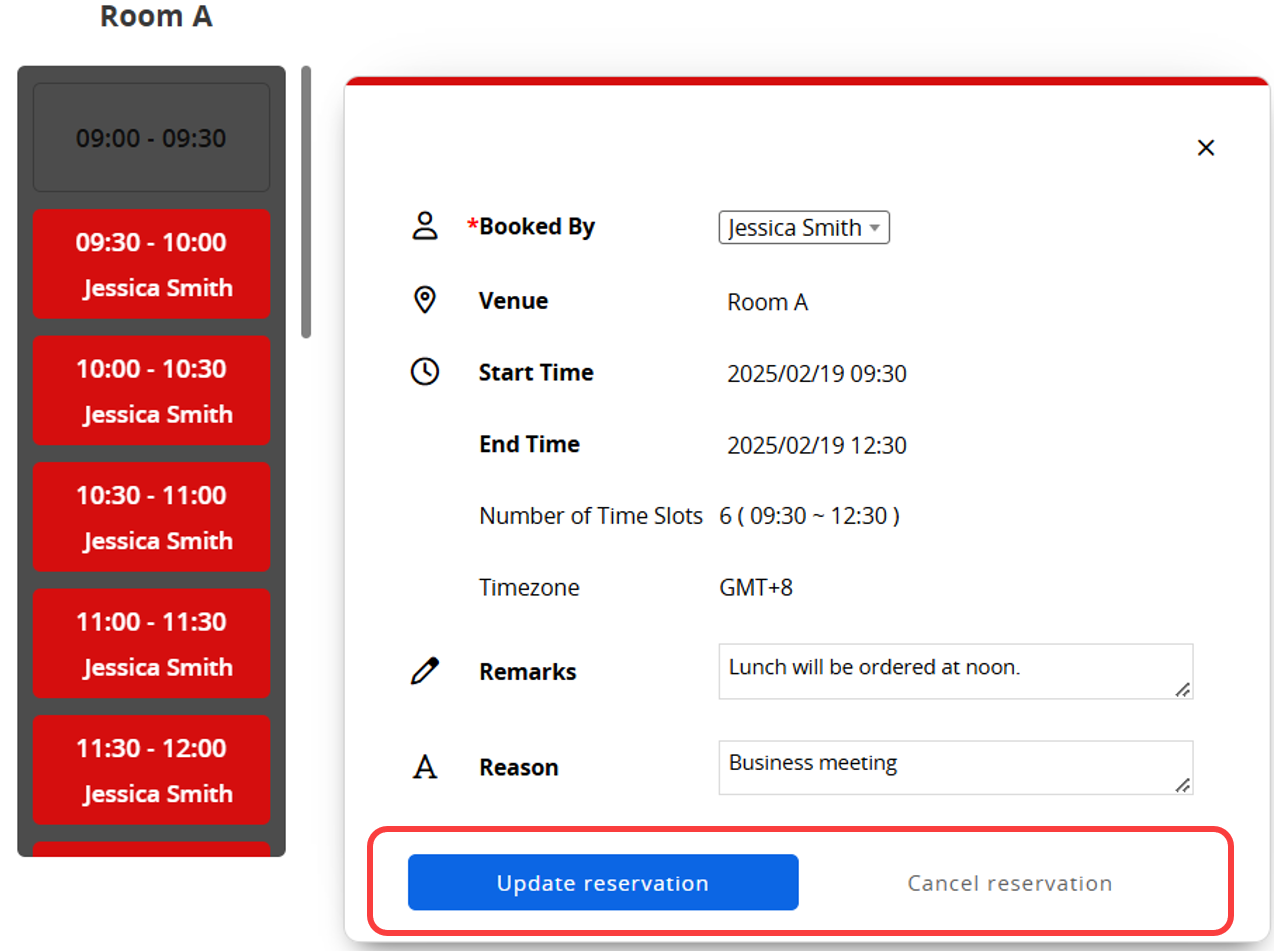
1. Internal/External Users: The reserved time increment will appear in red. Depending on the user's Access Rights, reservations made by others may display differently.
(1) For Survey Users, other users' reservations will only show as gray and marked as "Reserved," without revealing who made the reservation.
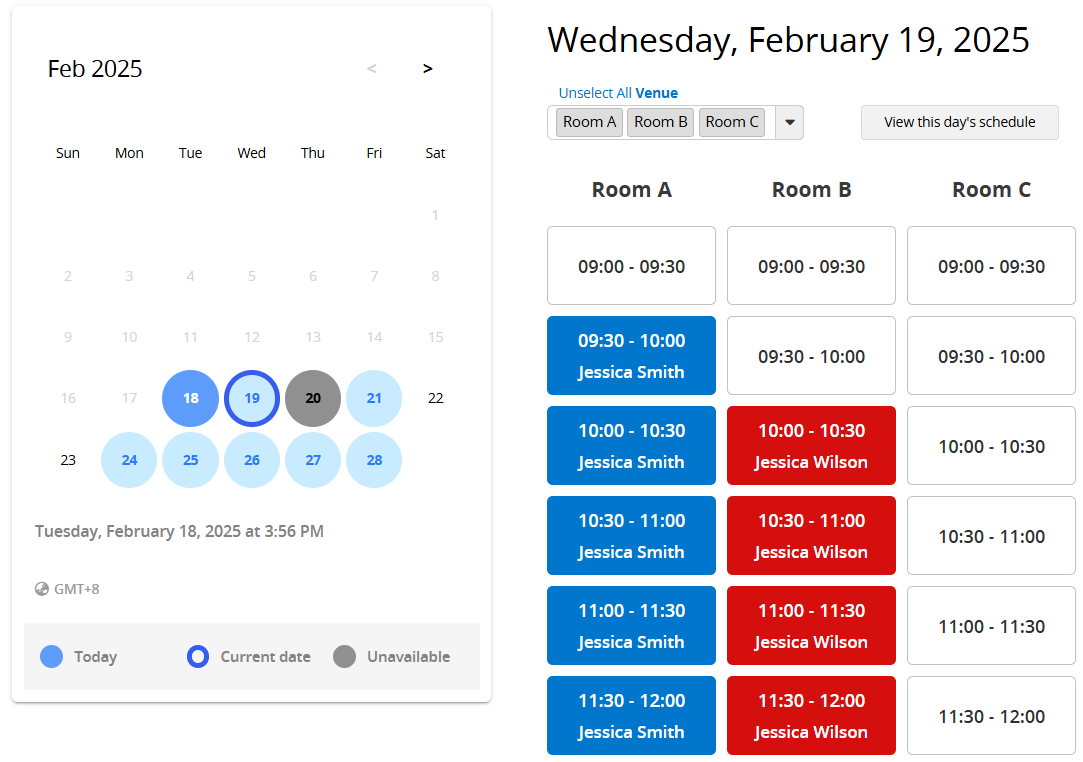
(2) For Bulletin Users, time increments reserved by others will appear with a blue background and display the name of the person who made the reservation.
After clicking on your reserved time increment, you can update the reservation details and click "Update reservation." If you want to cancel the reservation or change the reserved item or time increment, click "Cancel reservation" to make a new reservation.
2. Users without accounts or not logged in:
They can only confirm and modify reservation details during their initial reservation. After closing the browser window, they cannot modify previous reservations upon re-entering the system. The reservation will simply display as "Reserved", and clicking on it will show a notification indicating no Access Rights.
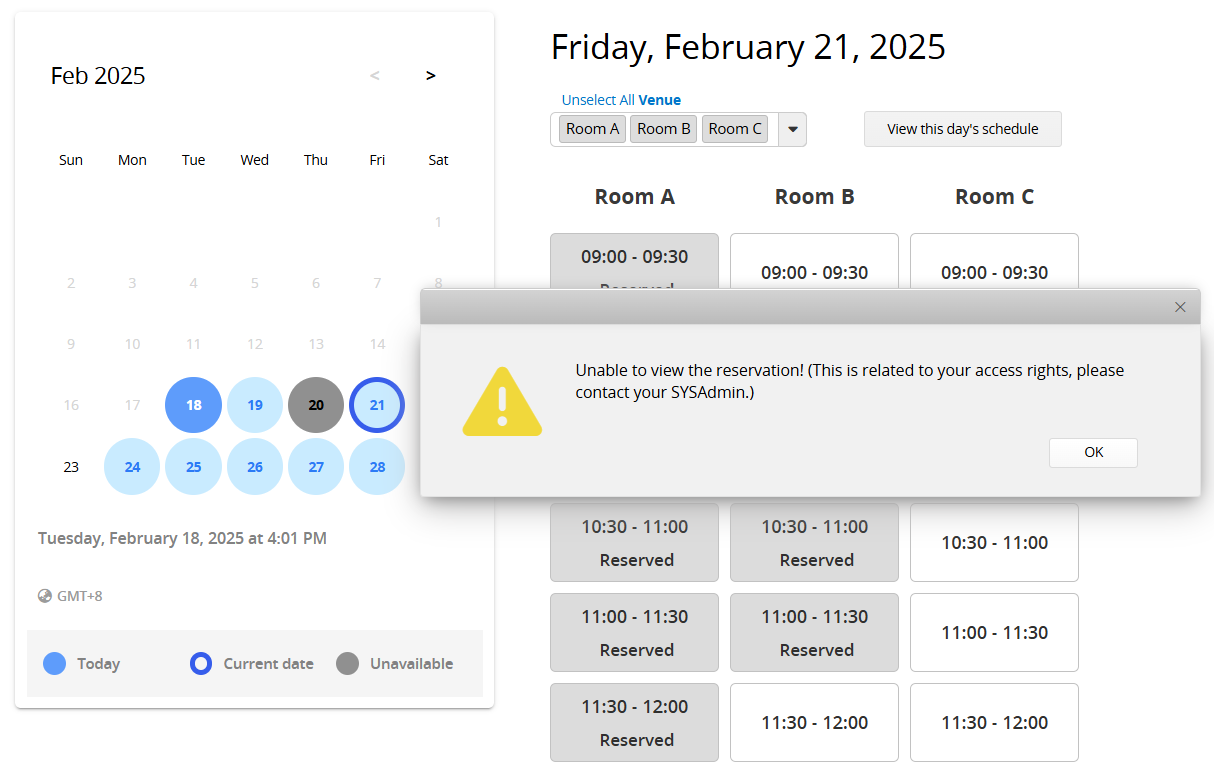
If users need to modify a reservation again, besides having SYSAdmin make changes, you can enable Guest User Email Validation to grant temporary access for viewing and modifying reservations. Users who access the reservation page via the link in the notification email will have temporary access to modify their previous reservations.
You can use the Printer Friendly or Download as PDF option to export reports.
You can embed the report into your website or share a link with others.
You can adjust the report’s style settings, including font, font size, boundaries, etc.