Step 1. Enter Azure Active Directory

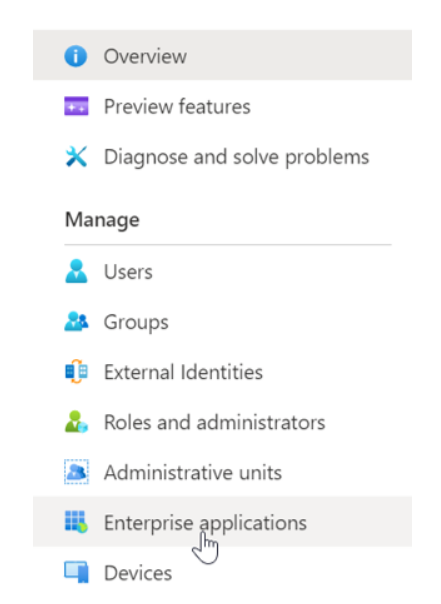
Step 2. Choose "Enterprise applications"
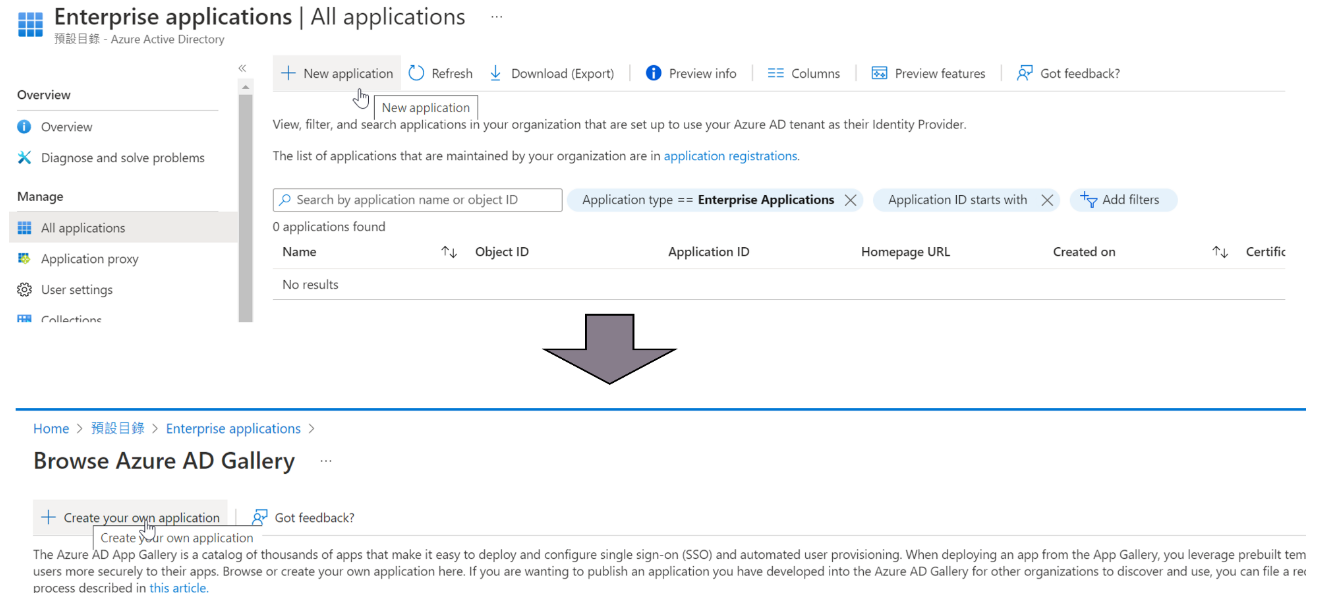
Step 3. Create New application: New application > Create your own application
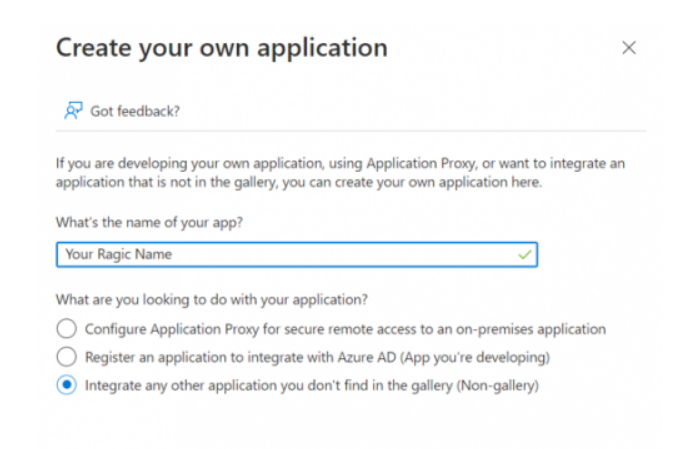
Step 4. Application Config
1. You may customize the application name.
2. Please select Non-Gallery App for the application.
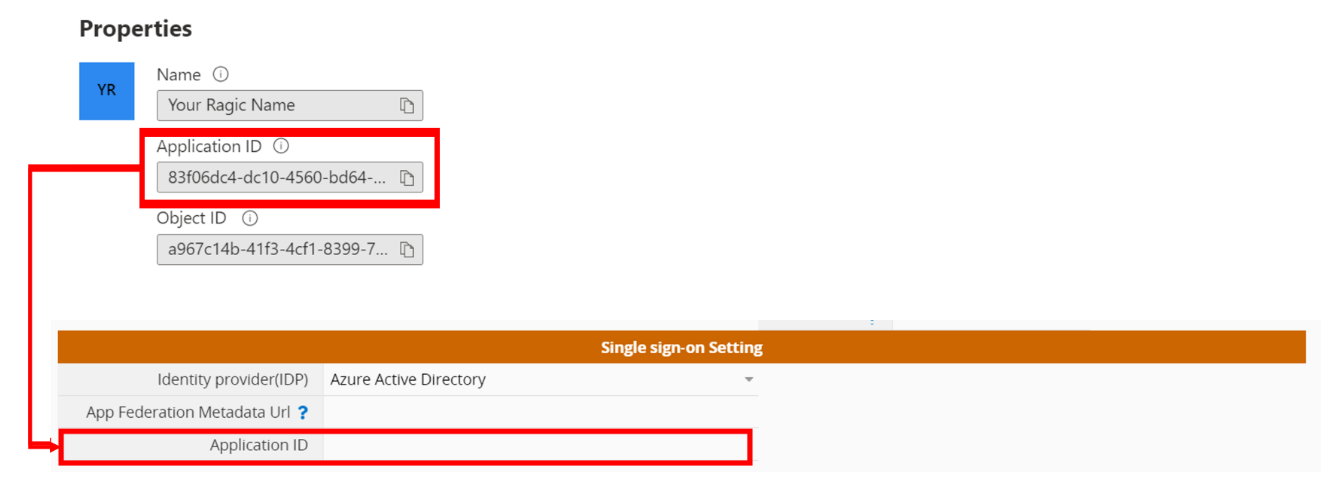
3. After creating the application, please fill in the application ID in the properties into the "Application ID" field on your Ragic Company Settings page.
Step 5. Add Users to the Application

Step 6. Configure Application Single-Sign-On (SSO)

Step 7. Select SAML
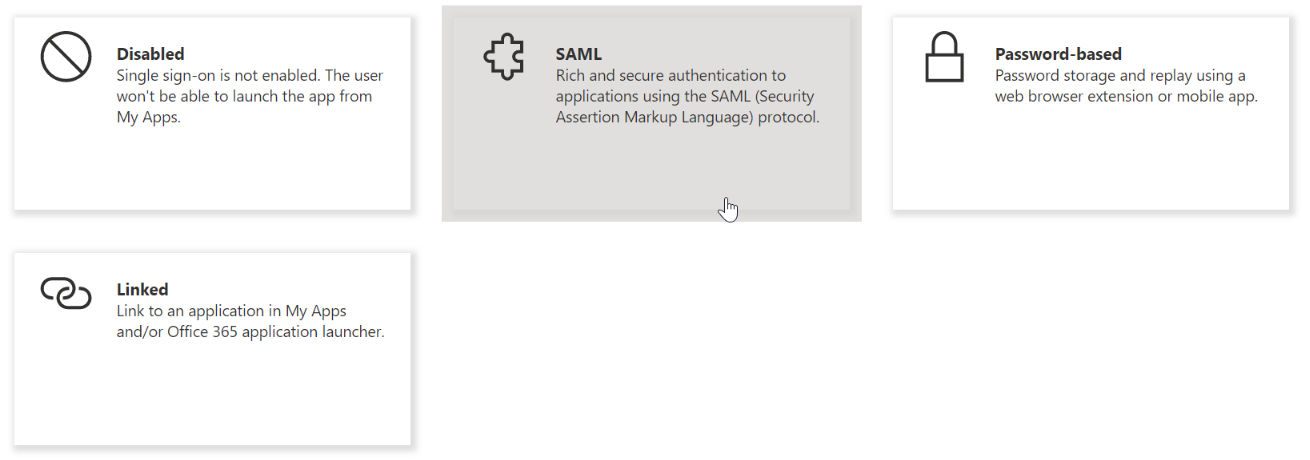
Step 8. Setting Parameters
1. In the Identifier (Entity ID) and the Reply URL (Assertion Consumer Service URL) in basic settings, please fill in the URL of the server where your Ragic is located (for example: https://test1.ragic.com).

2. In "Attributes & Claims", please change the unique user ID to the user mailbox.

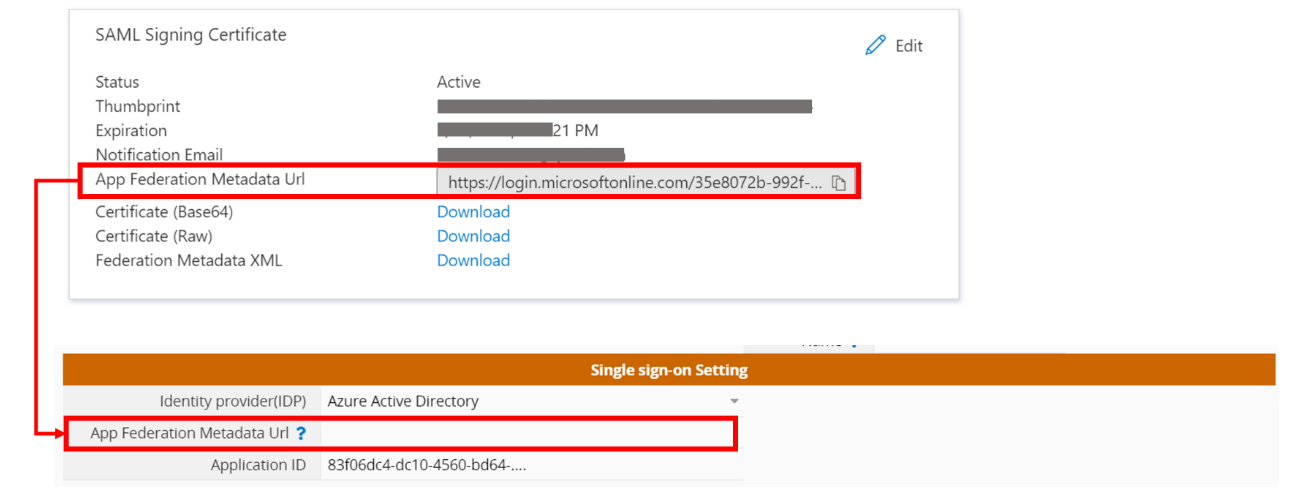
3. Please fill in the "App Federation Metadata URL" in the SAML Signing Certificate in your Ragic Company Settings.
 Thank you for your valuable feedback!