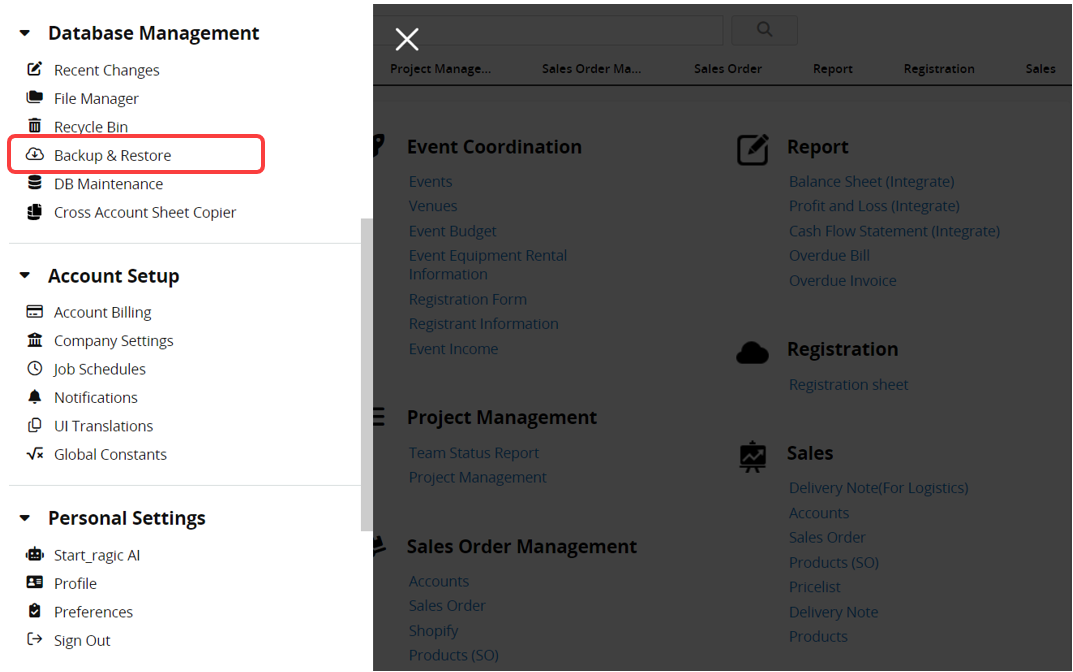
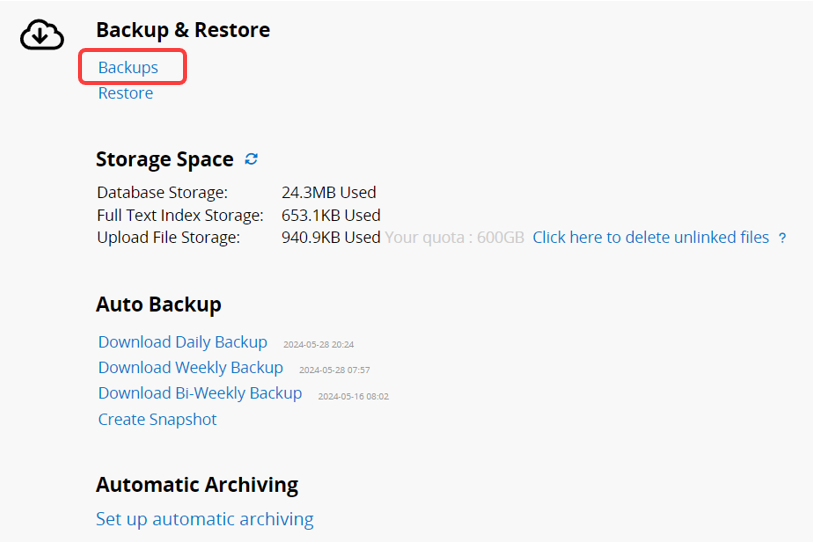
You can find Backup & Restore under Database Management by clicking the hamburger icon on the upper-left of the page.
Ragic servers are automatically backed up daily. Therefore, you usually don't need to perform manual backups. However, it is recommended to save a snapshot or save a manual backup before making major design changes, such as altering data links, so you can restore the backup if needed.
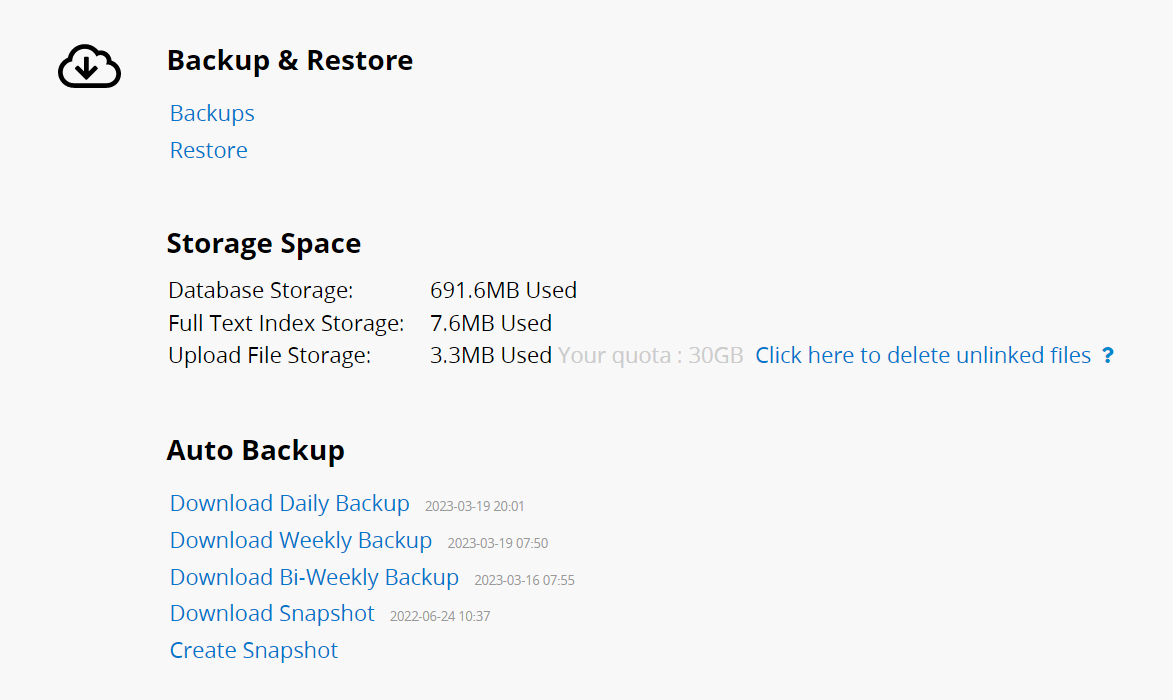
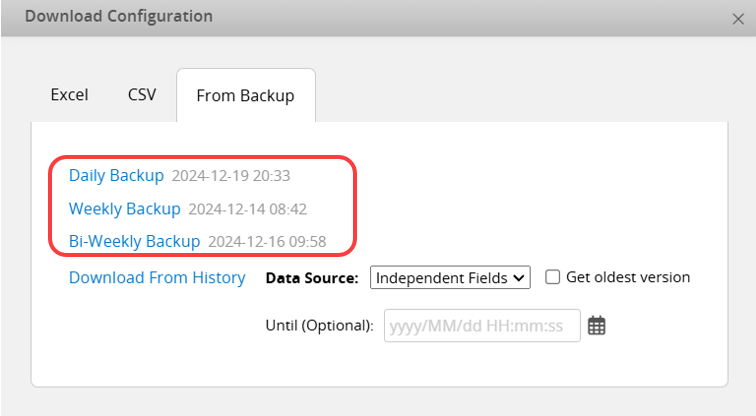
If you're using a Professional or higher plan, you can download daily, weekly, or bi-weekly backups and view when the backups were last saved on the Ragic servers through the Backup & Restore panel.
Daily Backup: Every day
Weekly Backup: On the 4th, 7th, 10th, 13th, 21st, 24th, and 27th of each month
Bi-weekly Backup: On the 1st and 15th of each month
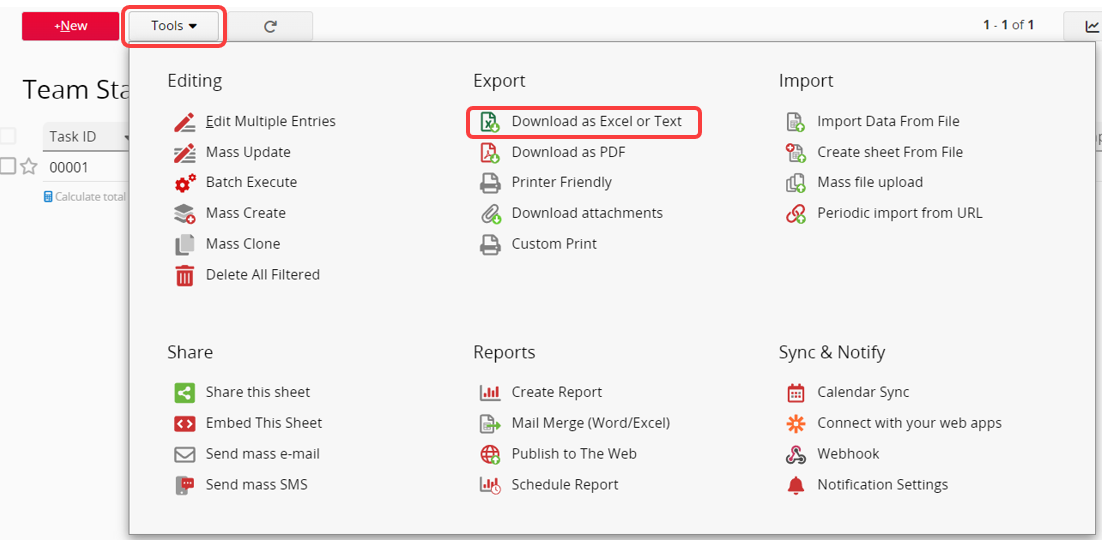
If you want to download backup data for a single sheet instead of the entire database, click Tools on the Listing Page of the sheet, select Download as Excel File or Text, go to the From Backup tab, and choose the desired backup time.
Note:
1. This feature allows you to back up data from a previous point in time. To back up the current sheet data, select Download as Excel File or Text from the Export section.
2. When downloading a backup, the process is asynchronous regardless of the number of records in the sheet. Once the download is complete, a notification will appear in the bottom left corner, and an email will be sent.

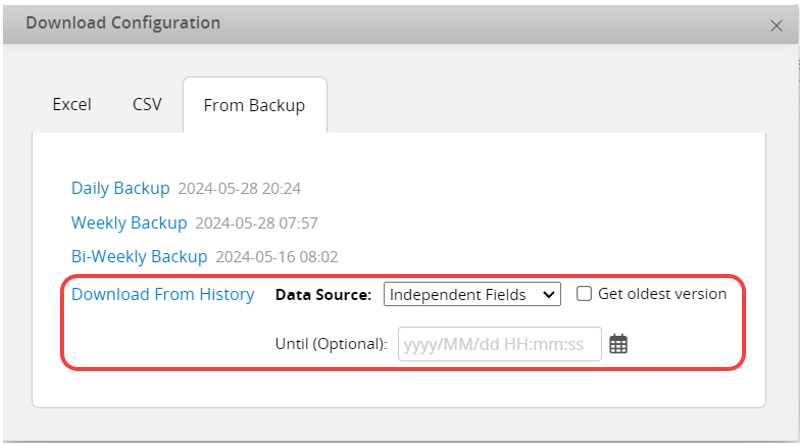
In addition to automatic backup time points, you can also Download From History. When using "Download From History", you can select to download values from independent fields or a Subtable, "until a certain time" or "the oldest version".
Enter the sheet you want to back up, click on the Tools option on the Listing Page, and select Download as Excel File or Text. Then, choose From Backup to download the data for that sheet.

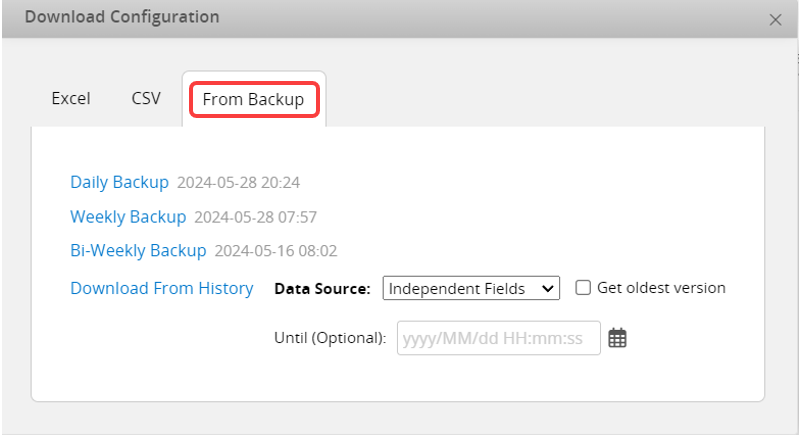
You may download automatic backups or choose Download From History. When using "Download From History", you can select to download values from independent fields or a Subtable, "until a certain time" or "the oldest version".

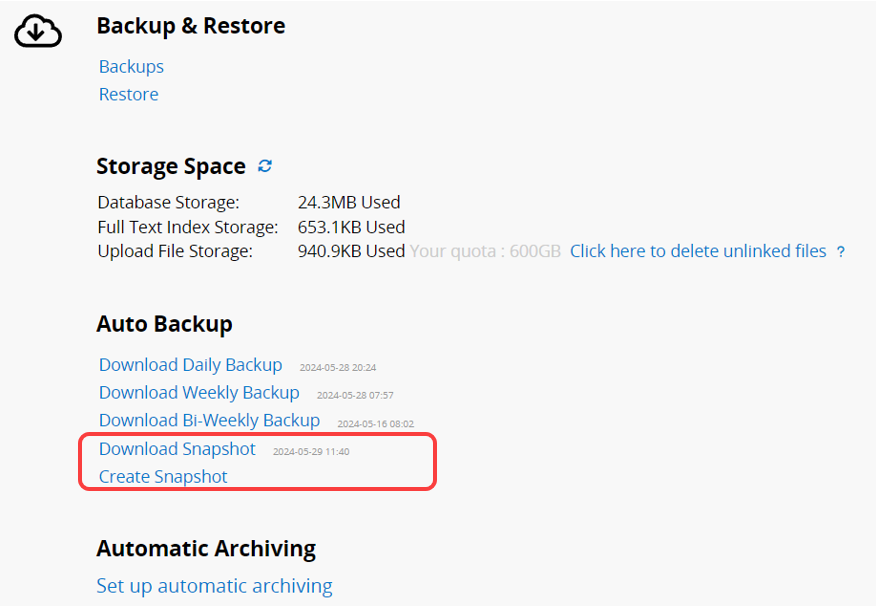
With a Professional plan or higher, you can create a database snapshot to save the current version of your database, which you can restore later if needed.
To save a snapshot of your current database, click the "Create Snapshot" under the "Auto Backup" section. Ragic will save a backup of your account, this may take some time if you have a large amount of data. Your snapshot will be saved under the "Auto Backup" section.
If you need to restore a backup that was saved as a snapshot, you can download and manually restore it when needed.
Note: The restoration process will overwrite your entire database with the restored backup, so please make sure that you are restoring the correct backup file.
Usually, you don't need to perform manual backups, but it's still recommended to save a manual backup before making major design changes so that you can restore the backup if needed.
To save a backup manually, navigate to Backup & Restore > Backups.
Note: If the databases that you are backing up and restoring data are located on different servers, please select to back up as the Compressed backup format. You can determine the servers of your database from its URL with the first three letters after "https://", such as www, ap2, ap3, eu2, na2...

To save an entire backup of your database in its current state, ensure that none of the checkboxes are selected. Then, click the "Backup" button to download a backup file to your computer with the extension .ragicdb, which is a proprietary format readable only by Ragic.
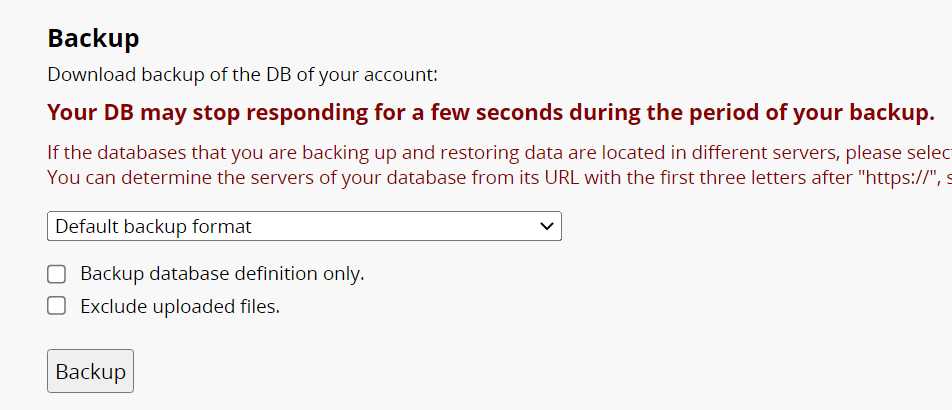
If you only want to download the backup of your database design without any data, you can check the Backup database definition only option. This will save a backup file on your computer with the .ragic extension, a proprietary format readable only by Ragic.

When restoring this backup on another account, only the design will be restored, leaving the data unaffected. This method is usually used for sharing designs across different accounts. For example, if you have multiple database accounts, you can modify the design in your test environment and ensure everything functions correctly before restoring it to your production environment. For more information, please refer to this article.
Restoring a backup will overwrite your entire database, so please ensure that the version you are restoring is correct. Also, note that restoring the backup file of an entire database will overwrite the user list as well. Therefore, log in to the destination database using the user credentials from the source database after the restoration process is complete.
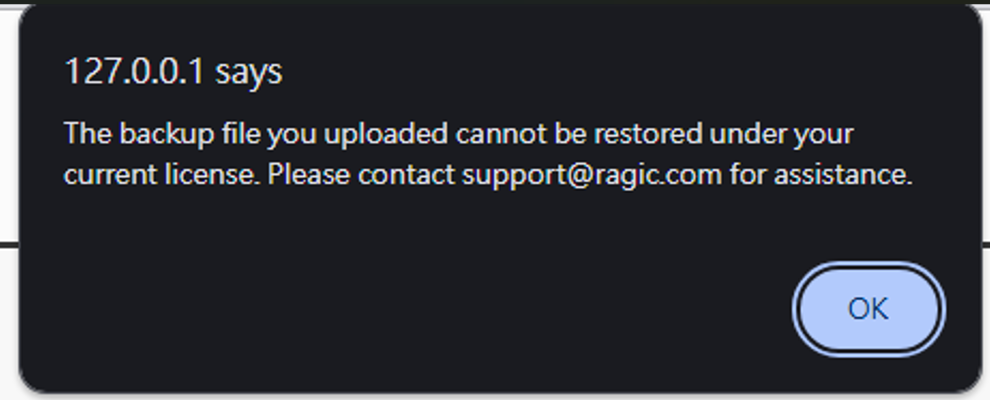
Note: When restoring backup files on an On-premises Private Server, the system checks the database account's version restrictions. If unmet, a prompt message will appear.
The database storage space consists of the following three components:
1. Database Storage: Storage used for sheet data, excluding uploaded files and images.
2. Full-Text Index Storage: Storage used for the database’s full-text search feature.
3. Upload File Storage: Storage used by all uploaded files and images (including fields, comments, and emails).
The limit for Upload File Storage is determined by your database plan and the number of users. If storage exceeds the allocated limit, the following message will appear:
"You have used {Used Upload Storage Size}, which has exceeded your quota of {Authorized Upload Storage Size}. File upload is currently disabled. Please purchase more users to increase your file upload storage."
When deleting files from the File Upload and Image Upload fields, they won't be immediately removed entirely from your database but will be considered unlinked files. Under certain circumstances, users can still restore unlinked files when restoring entries or using other methods. Unlinked files will be kept in the database for at least a month. If you want to delete these files entirely from your database, please click this button.
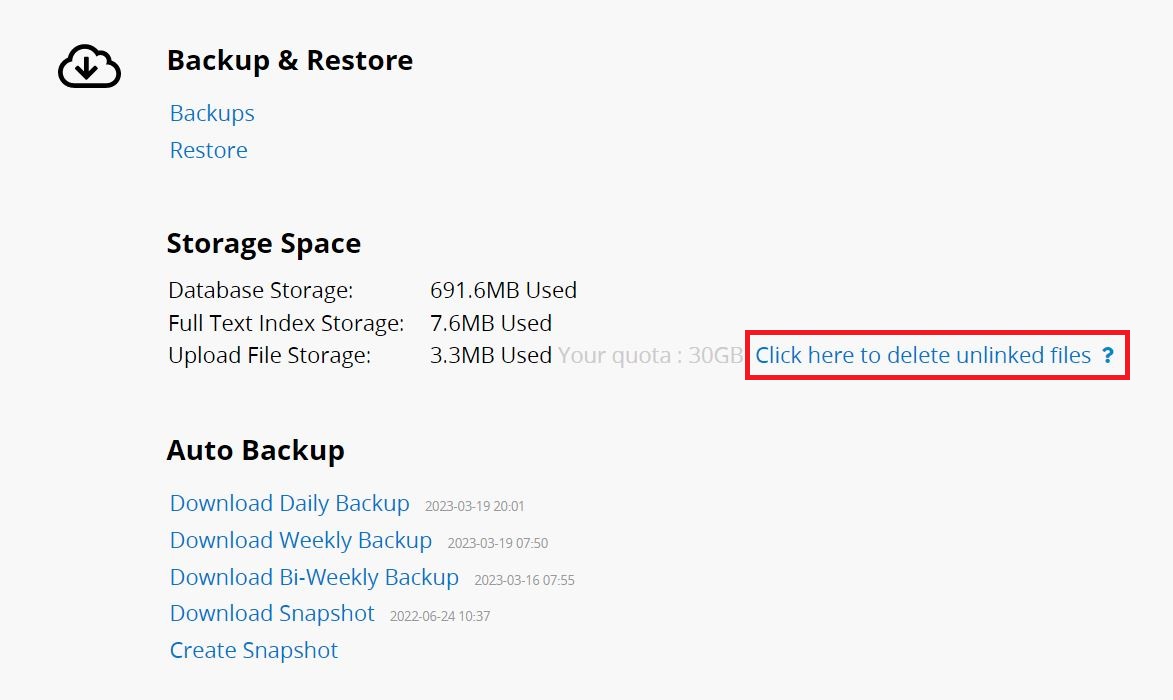
If Upload File Storage remains insufficient after clicking "Delete Unlinked Files", refer to this document for instructions on expanding storage.
As the duration of usage extends, the volume of data will also continue to grow. When there are a large number of records in the sheet, it may potentially affect the system speed, including functions such as record display, filtering, and report generation. In such cases, you may consider Automatic Archiving.
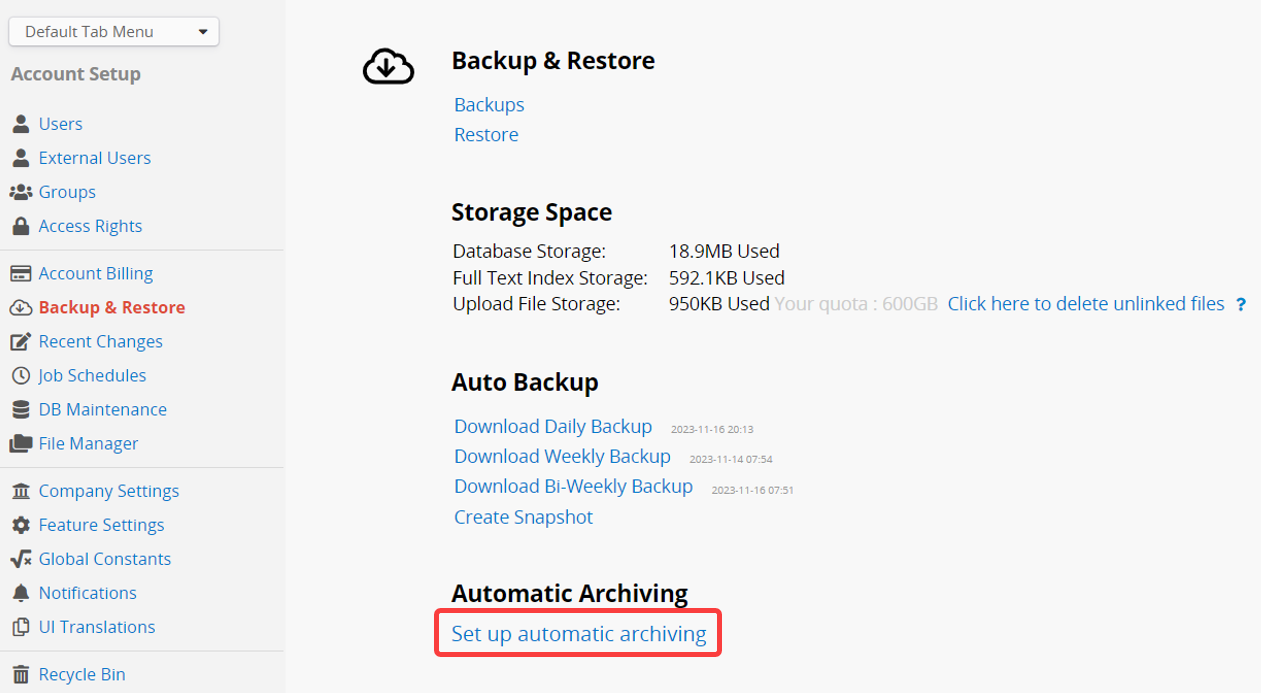
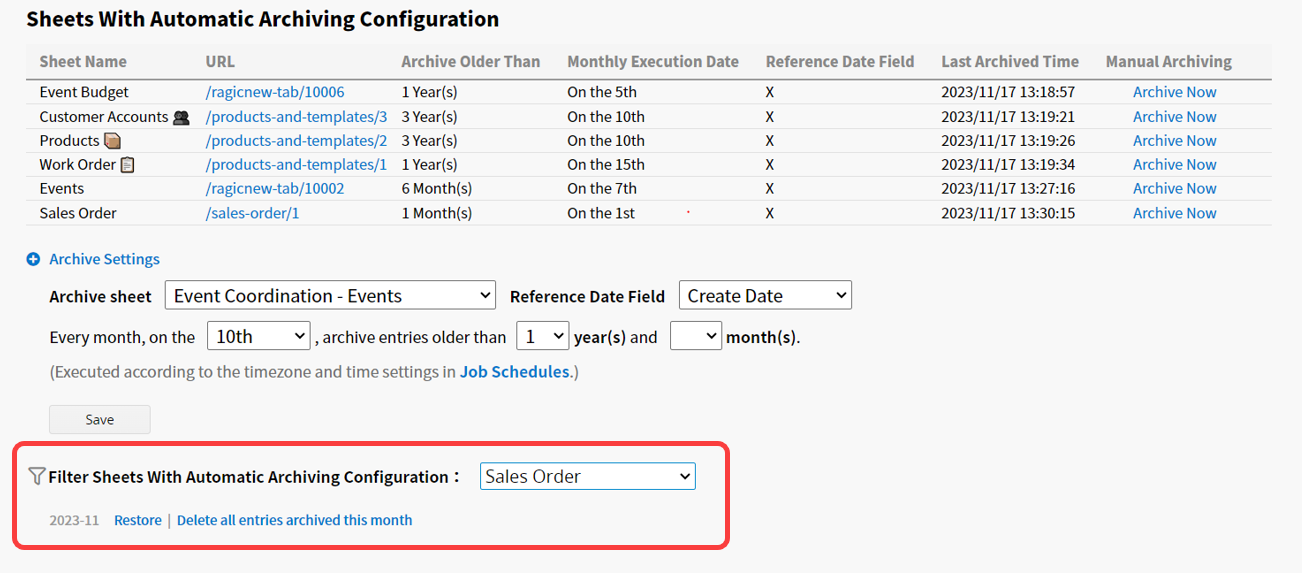
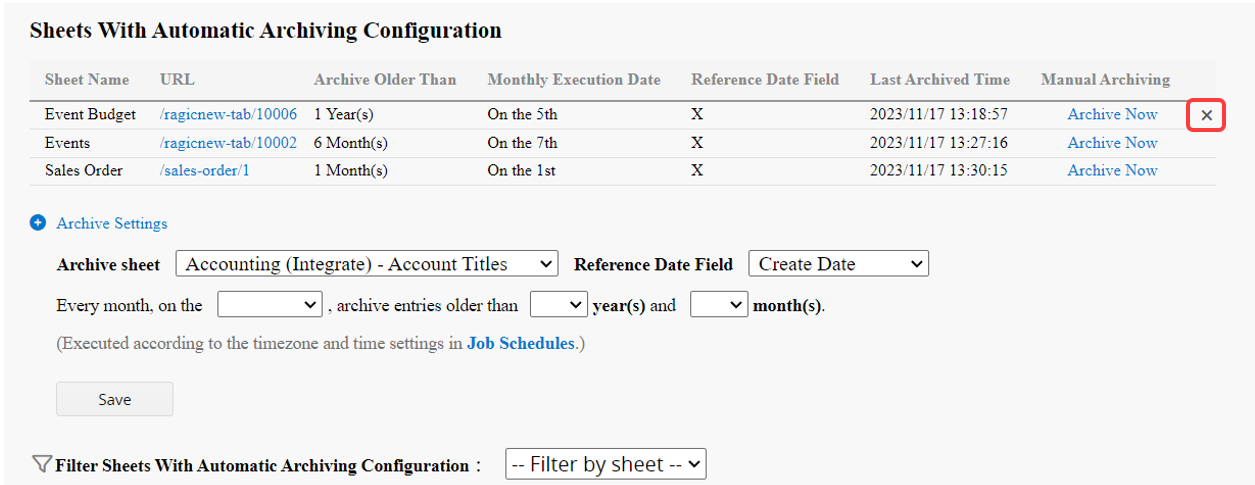
You will see the current archiving settings here, click the "X" behind the archive setting to delete it if needed.
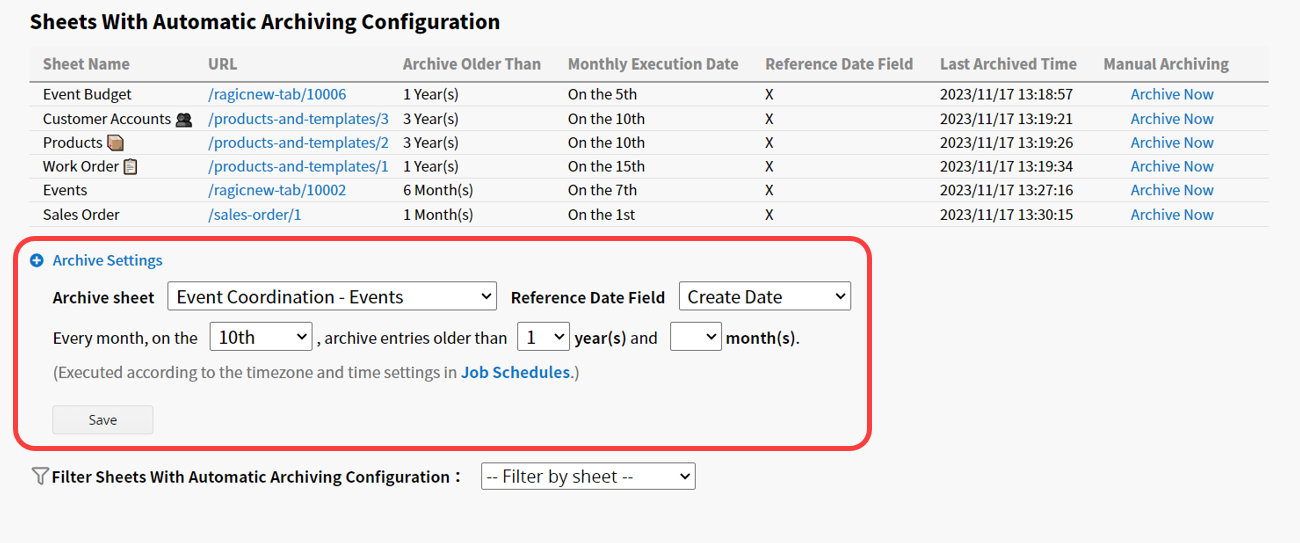
After clicking on the Archive Settings, select the sheet to be archived, then configure the reference date field, the day of the month, and the timeframe for archiving data. After completing, remember to click Save.
At the bottom section, you can filter the sheets with archived data. If necessary, you can restore archived data or permanently delete it.
