If you don't see the features mentioned below in your Company Settings sheet, please contact support to manually update your system default sheets.
If you are using Ragic's professional, on-premise, or enterprise plan, you can replace some assets like logos and banners to fit your corporate identity. If you are using Ragic's lite plan, you can only modify the account settings.
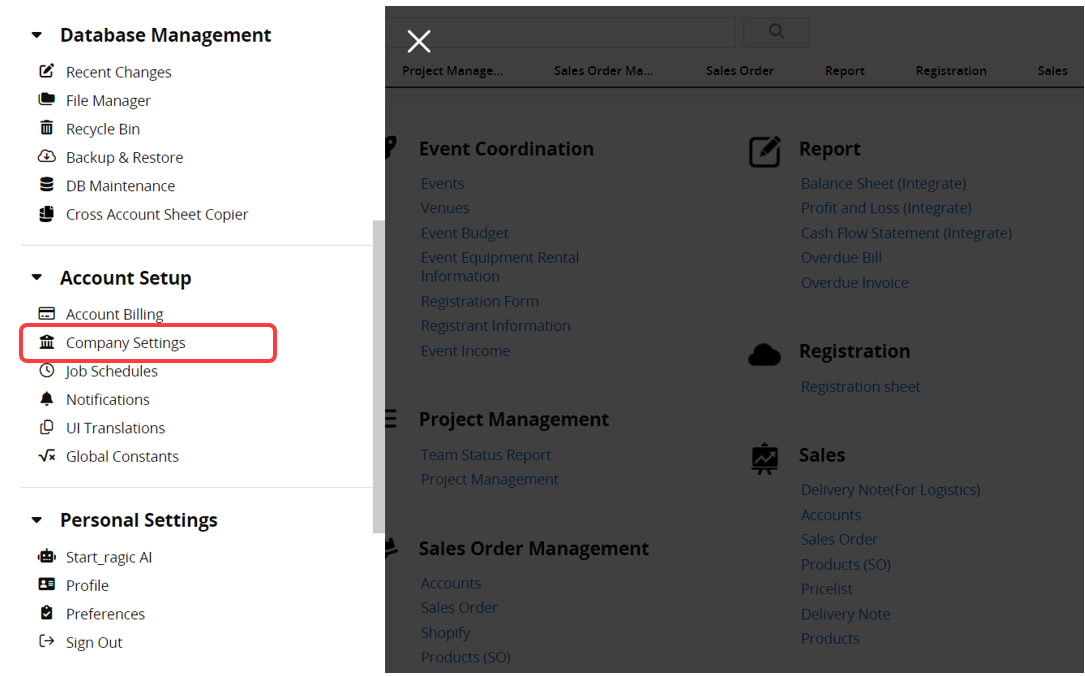
Click the hamburger icon on the upper-left of the page, and select Company Setting under Account Setup.
In the Company Information section of Company Settings, you can configure the Organization Name and Name Displayed in App.
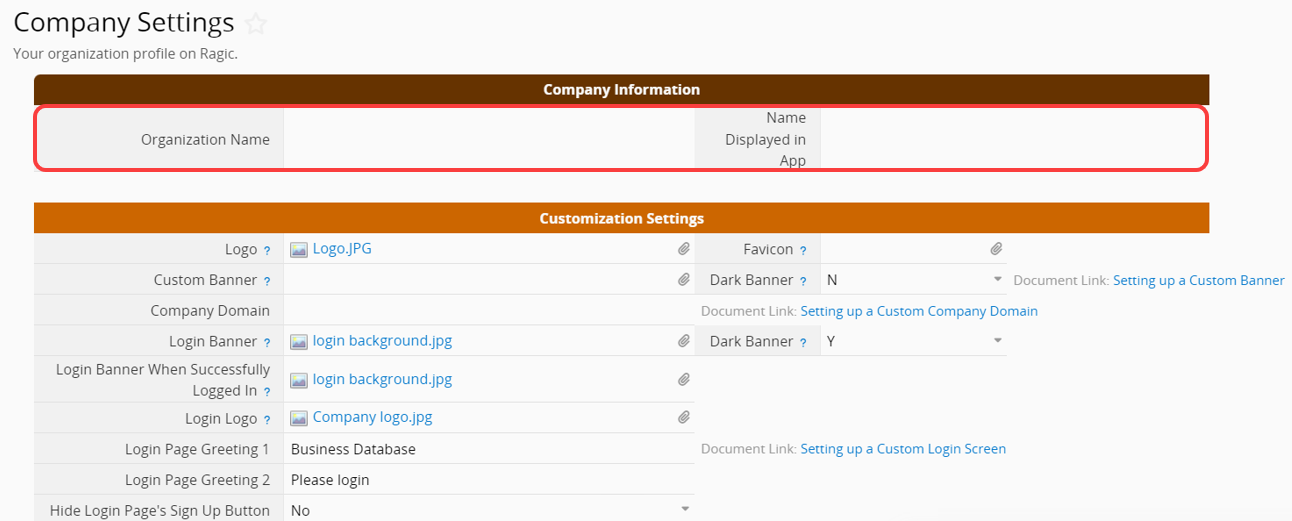
If the Name Displayed in App is not set, the App will use the Organization Name. If neither is set, the database name will be displayed instead.
In Contact Information, you can enter the company's contact details.

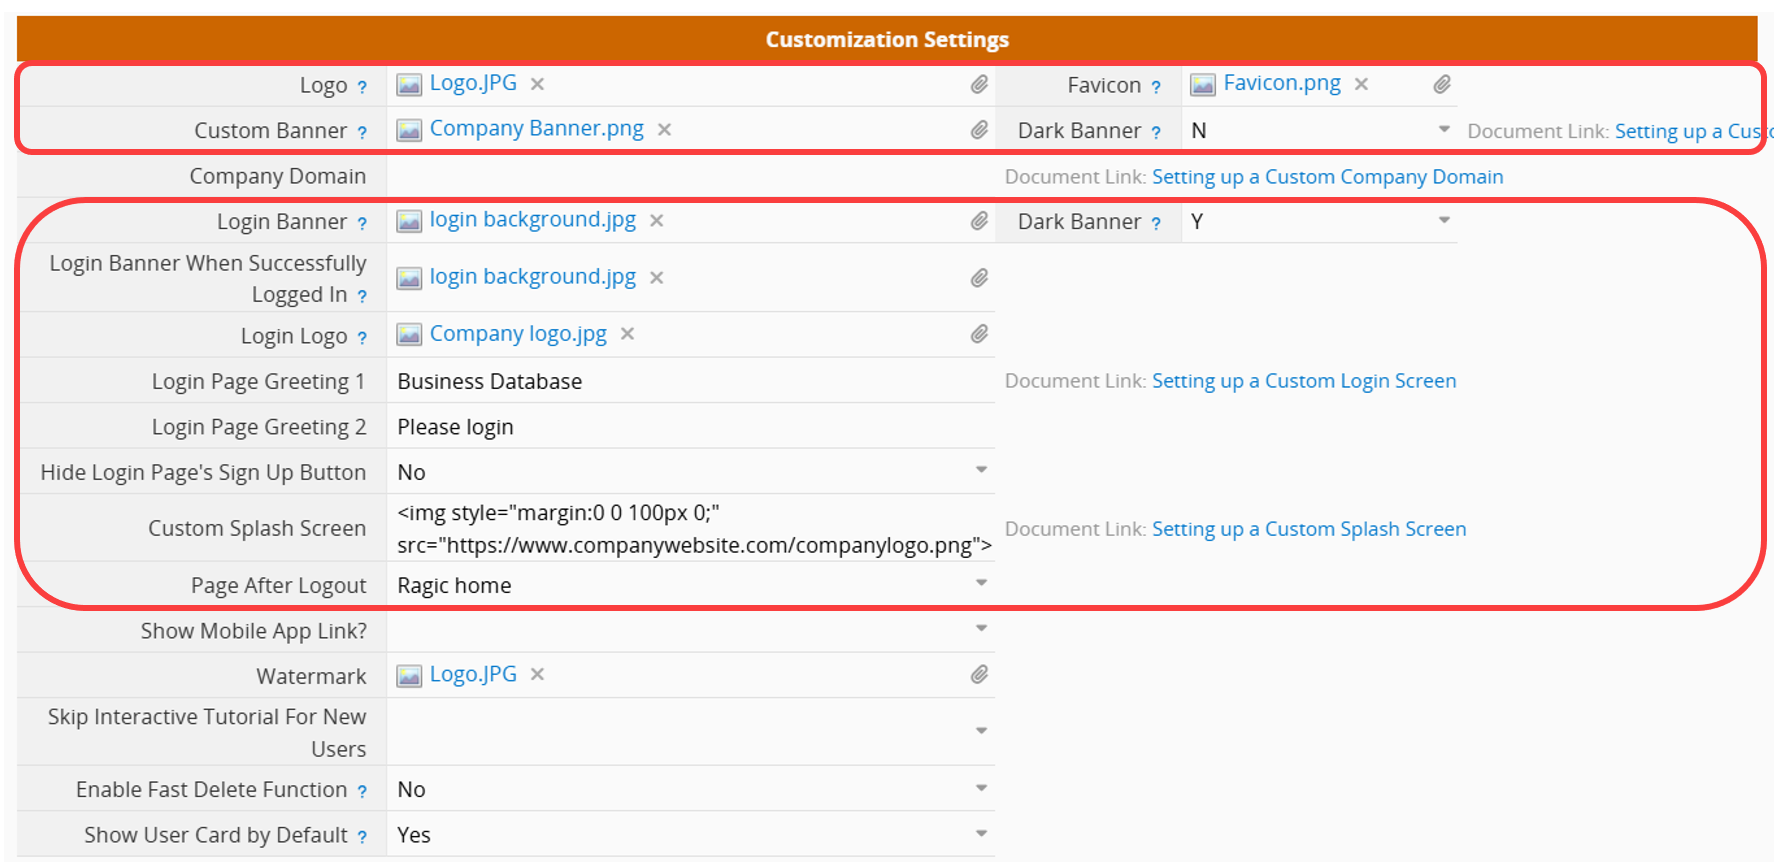
Logo and Banner:
Upload images to the Logo and Banner fields. These images will be applied to all tab menus.
When sharing your database URL, the uploaded logo will appear as the thumbnail.

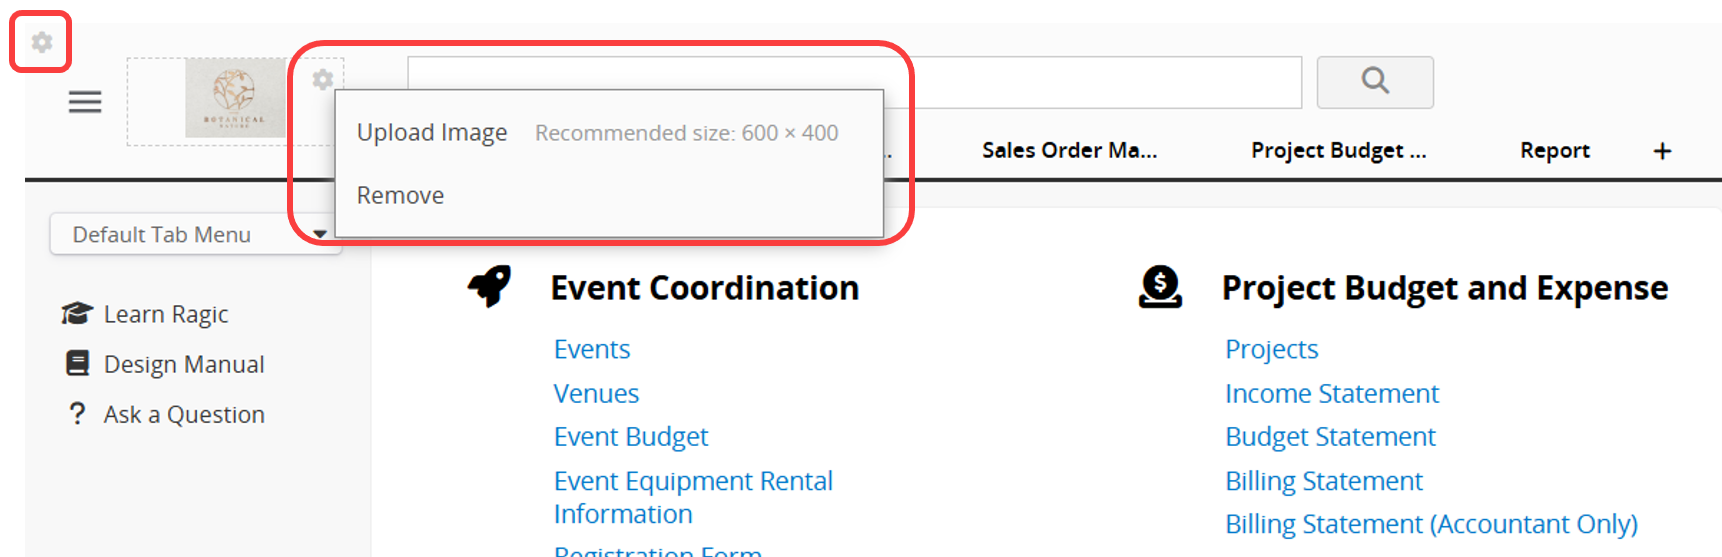
If you would like to change the logo or banner for each tab menu, navigate to the homepage of the tab menu and click the Gear Icon to upload the image.
It's recommended to create your banner image's width depending on the resolution of the monitors set on your company computers. The recommended height for the banner image is 102px. You can also download the custom banners we made.

Note: Tab menu logo and banner settings will be prior to those in the Company Setting.
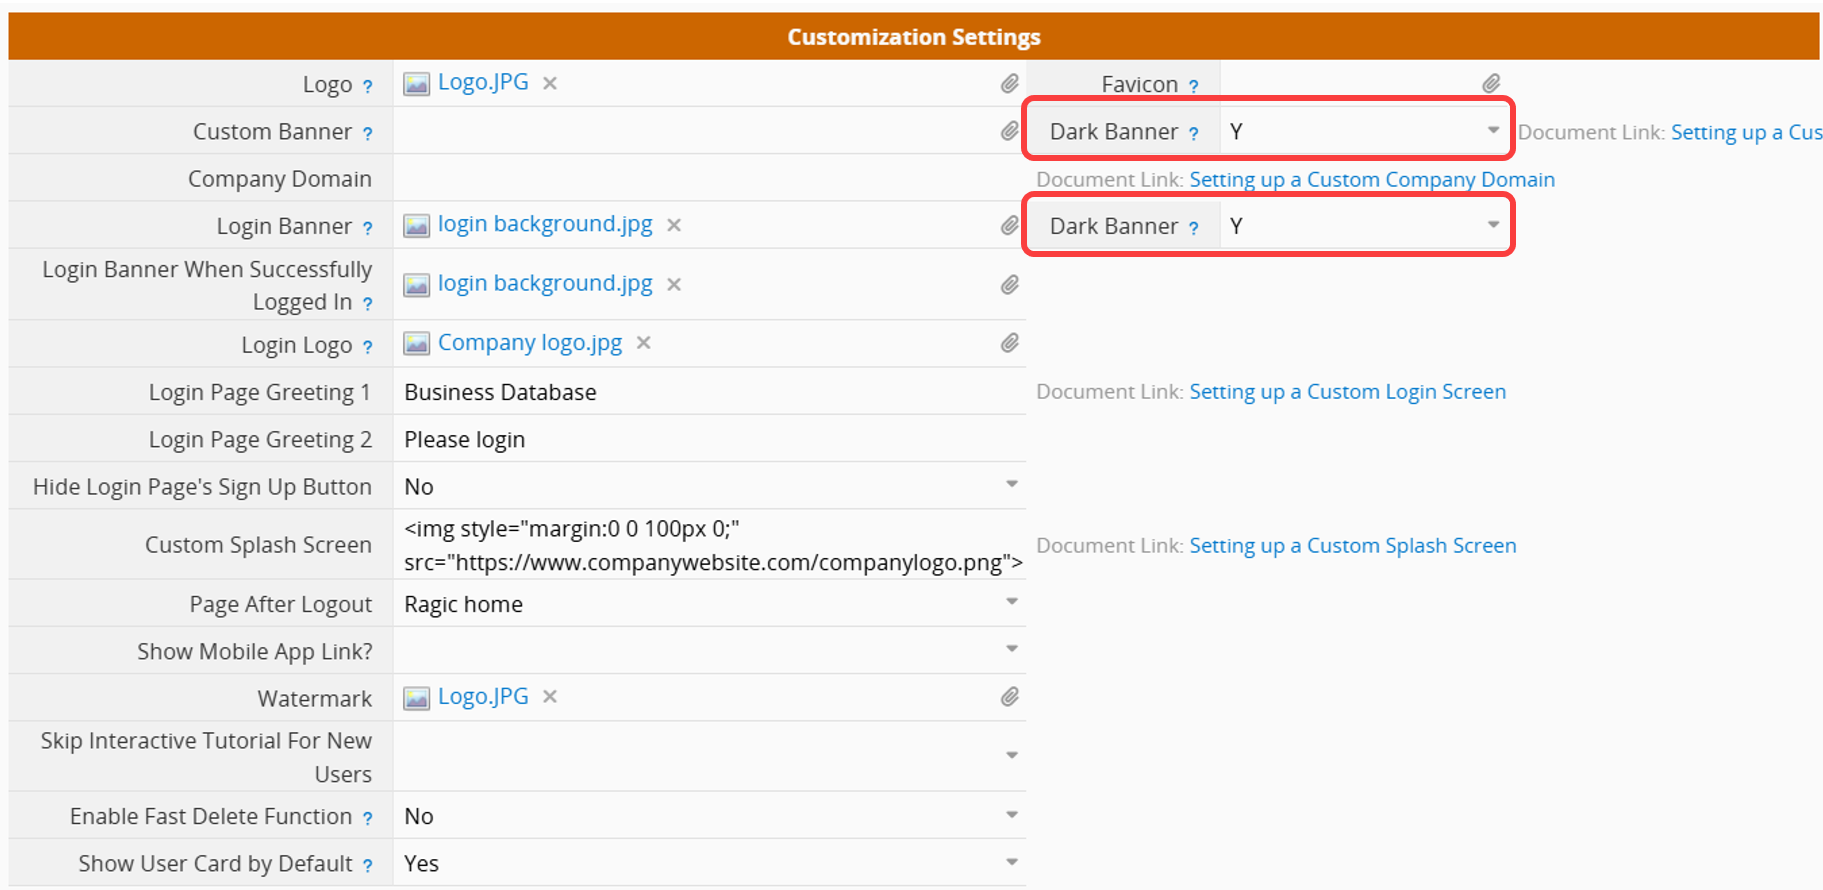
Dark Banner:
If your banner image is dark, you can choose the option "Y" for the Dark Banner setting so that the layout's visibility can adjust accordingly with lighter text.
The Login Banner for the Custom Login Screen can be configured the same way.
Favicon:
Upload an image to the Favicon field. Once uploaded, the icon will appear to the left of the webpage name.

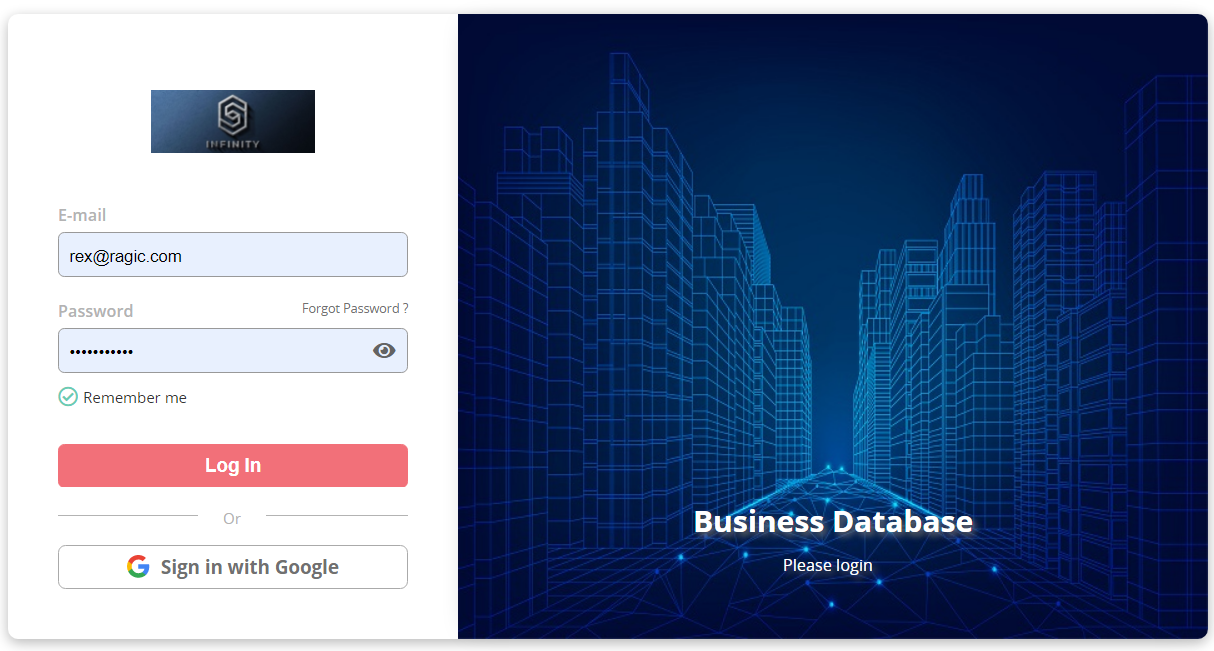
Custom Login Screen:
You can set up a custom login screen for your company that will make it easier for users to recognize your branding while logging in.
1. Login Banner: It will be displayed on the right side of the login screen.
2. Login Banner When Successfully Logged In: It will be displayed on the right side of the login screen after a successful login.
3. Login Logo: It will be displayed in the upper left corner of the login screen, replacing the Ragic logo.
4. Login Page Greeting 1 and Login Page Greeting 2: Change the greeting message.
5. Hide Login Page's Sign Up Button: After setting it to "Yes", the login page will no longer display the sign-up button.
Custom Splash Screen:
You can set up a custom splash screen for your company, making it easier for users to recognize your branding during the brief loading time in Ragic. In the Custom Splash Screen field, you can use basic HTML to add your company logo or other types of images.
Example HTML code:
<img src="https://www.companywebsite.com/companylogo.png">
Design Tip: The progress bar might overlap your images. To ensure it appears below your images, you can adjust the page layout by adding the margin property to your images.
Example HTML code:
<img style="margin:0 0 100px 0;" src="https://www.companywebsite.com/companylogo.png">
Your custom splash screen will be displayed according to the settings you have made on the company settings page.

Page After Logout:
You can configure the Page after logout, users will go to that page after they log out.
Recommended Image Sizes:
| Asset Name | Recommended image size (pixels, width x height) |
|---|---|
| Logo | 600 x 400 |
| Custom Banner | any x 102 |
| Favicon | 16 x 16 |
| Login Banner | 600 x 500 |
| Login Banner When Successfully Logged In | 600 x 500 |
| Login Logo | any x 28 |
| Splash Screen | No limitations |
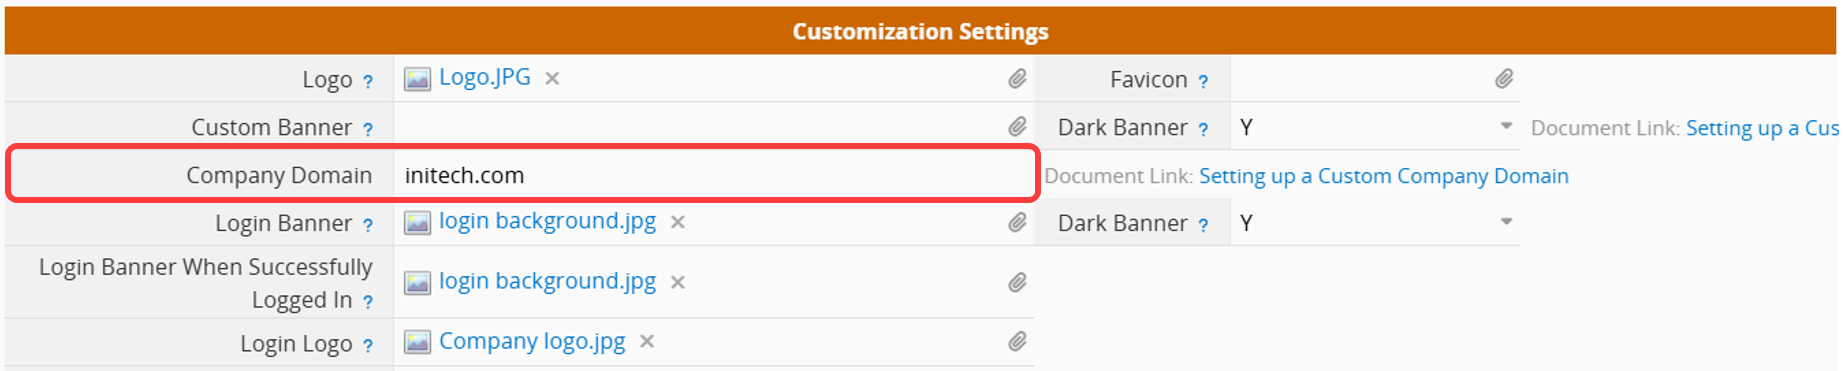
If you have your own domain, you can create a custom URL to make it easier for users to find your Ragic database.
For example, with a custom address, users can sign in to their account at yourdomain.com instead of at the longer default address, such as https://www.ragic.com/youraccountname.
Note: This company domain does not change your original Ragic database URL (https://www.ragic.com/youraccountname) but merely redirects you to it.
To change this setting, fill in the Company Domain field with the URL you want to set.
Remember to add a CNAME record pointing to your Ragic Server Name.
For example, if your account URL is: ap2.ragic.com/demo
the Server Name is: ap2.ragic.com.
You will need to point ragic.yourdomain.com to ap2.ragic.com.
Adding a CNAME record requires logging into your domain host's website, not Ragic. If you cannot access your domain's DNS records, please contact your domain host directly for assistance. For detailed steps, please refer to this article.
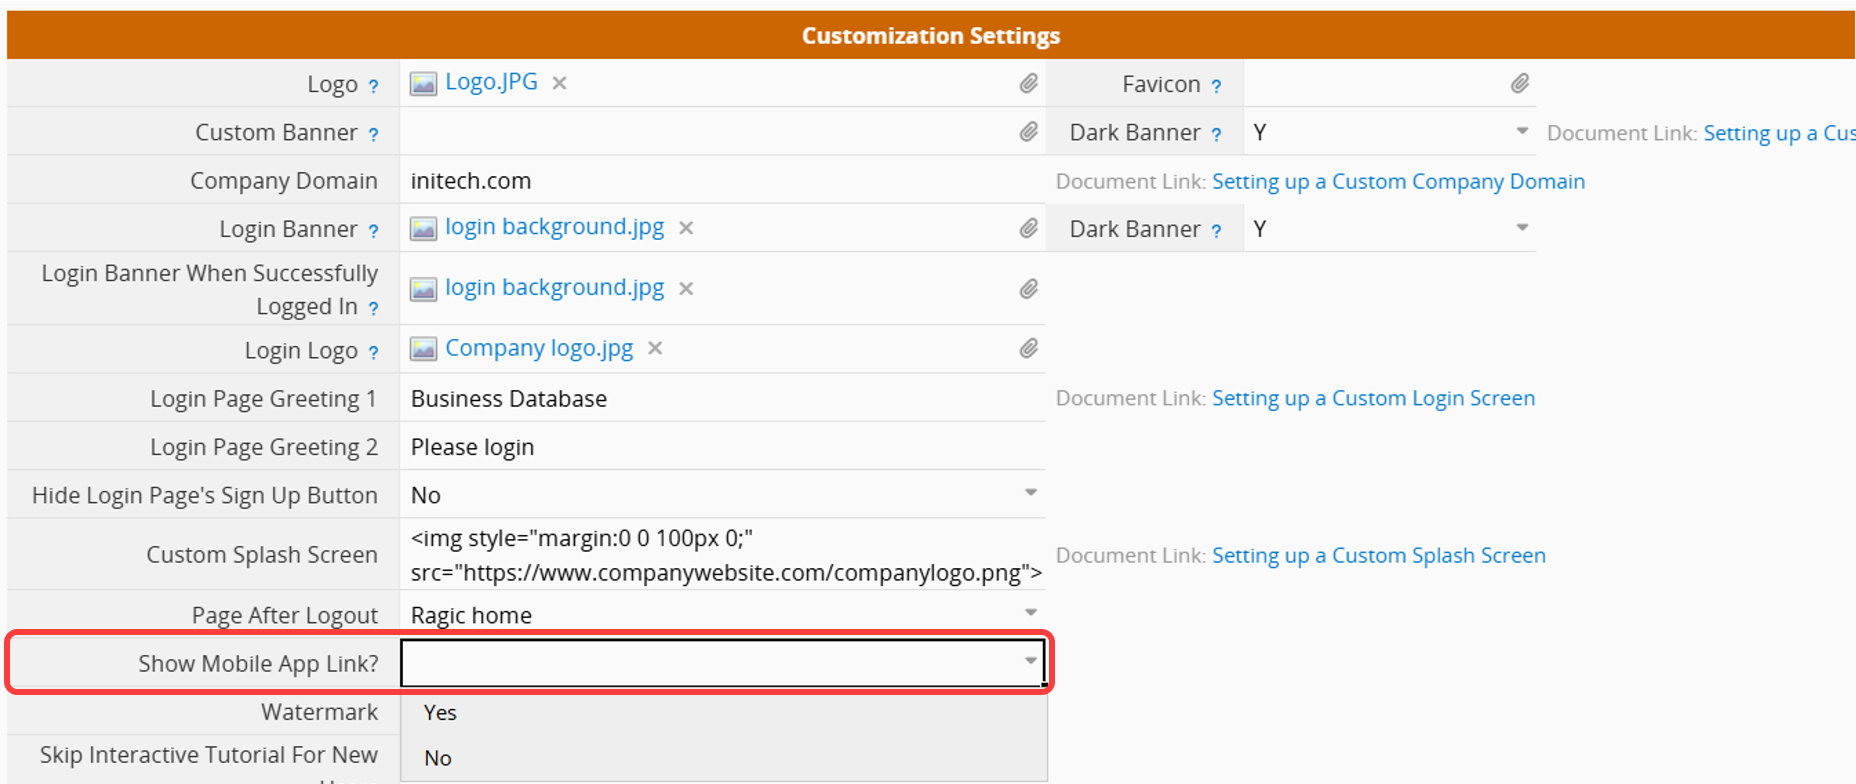
Configure whether to display the Ragic mobile app link for the mobile browser here.

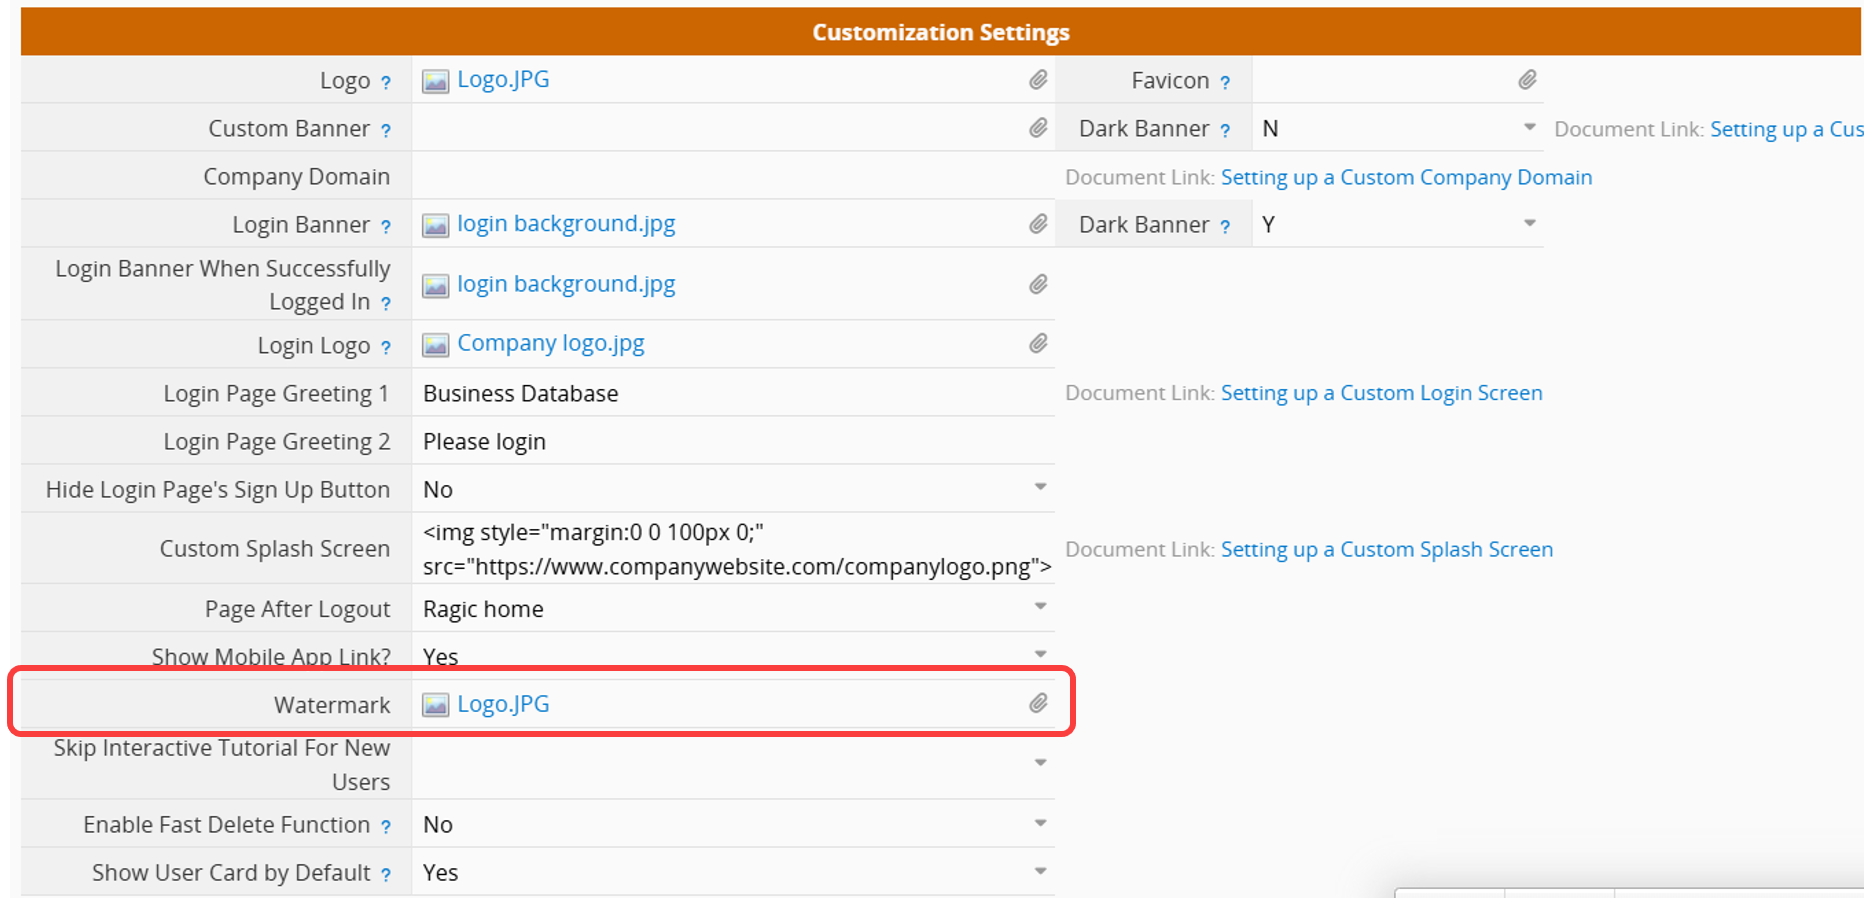
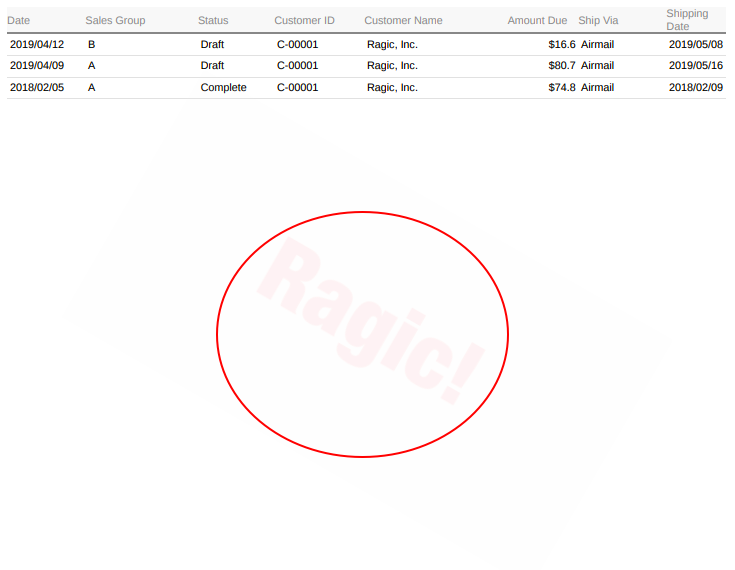
You can upload your company logo to the Watermark field, you will see the watermark after you download the file as a PDF.
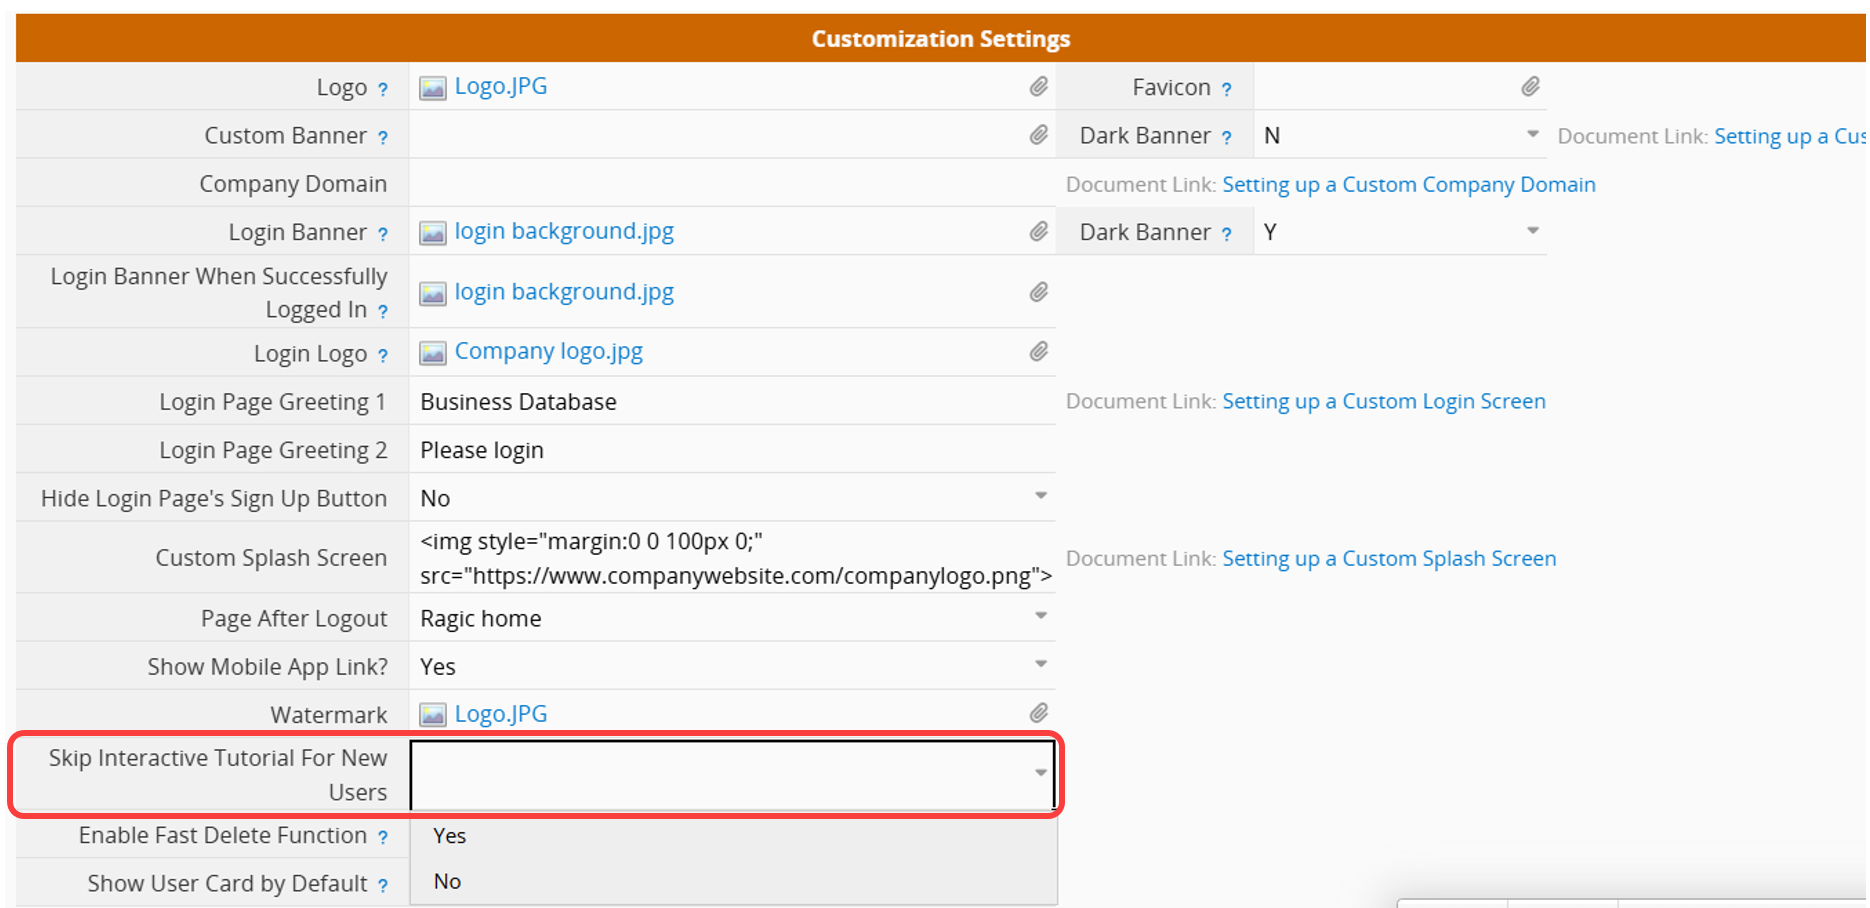
Although the interactive tutorial is very helpful for new users to get a fast understanding of Ragic, you can disable it for them by selecting "Yes" in this field.
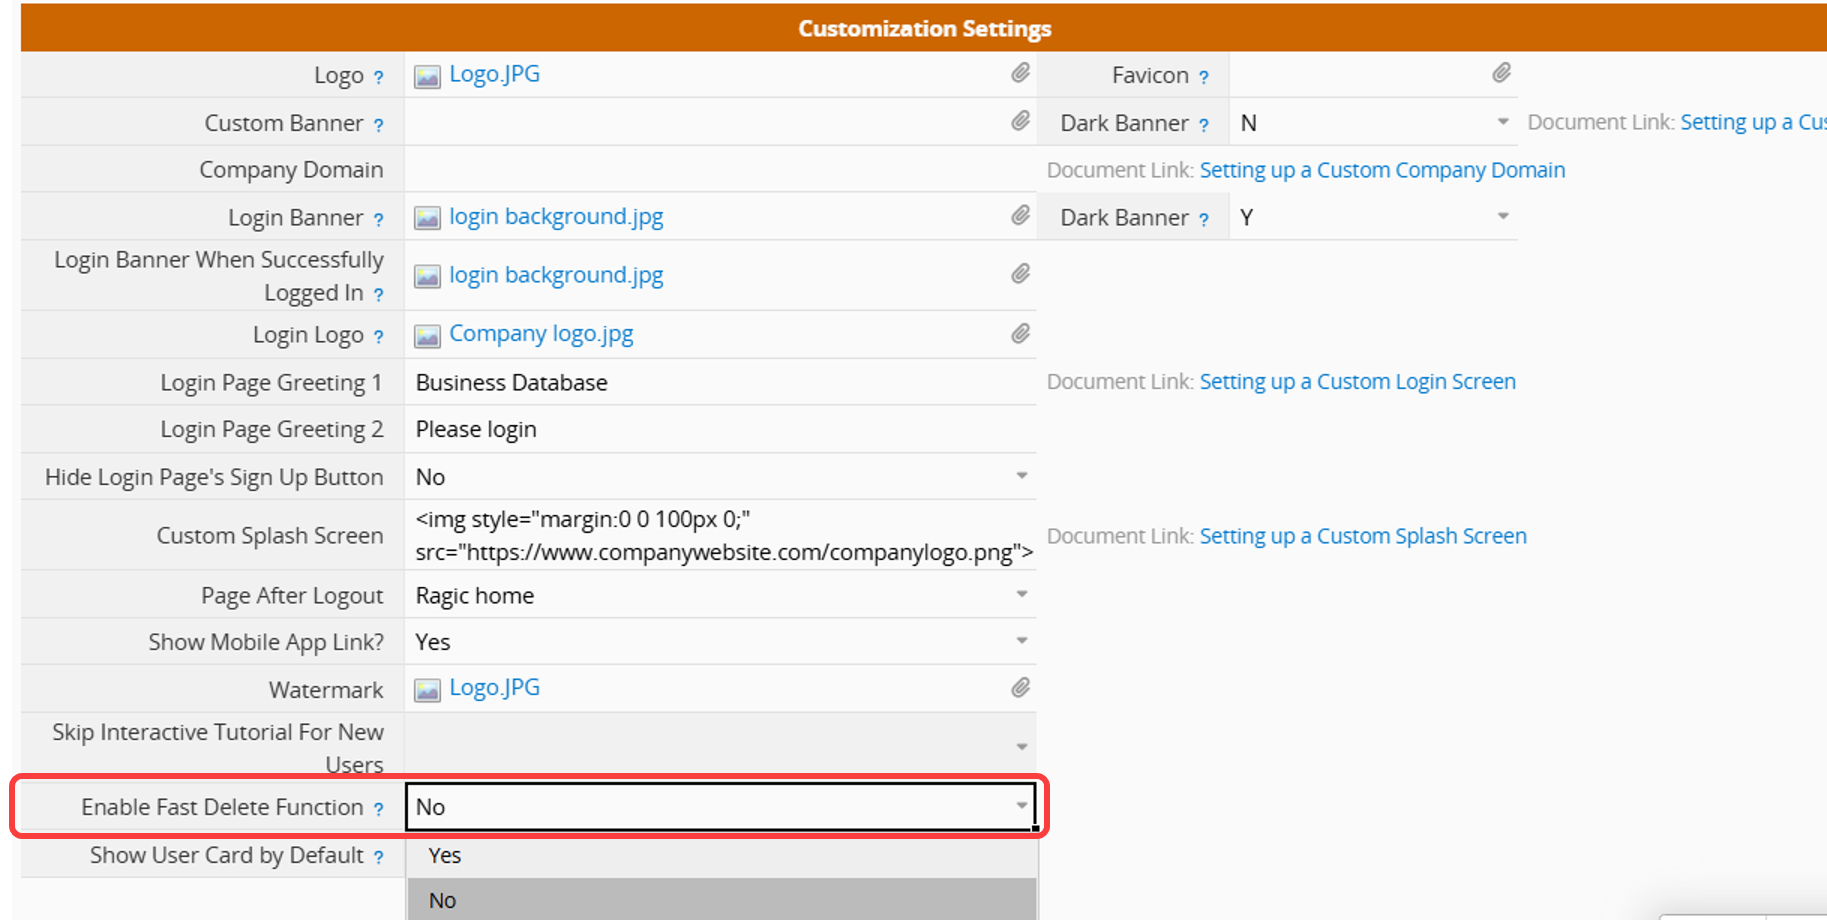
Configure whether to allow users to Fast Delete records.
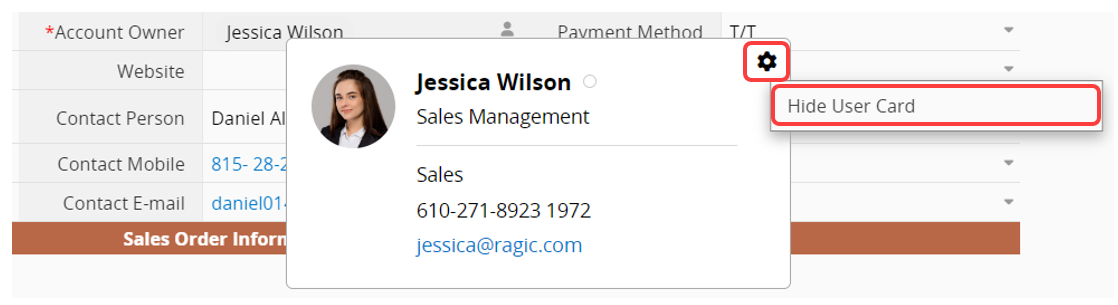
This setting determines if new users will see User Card information by default.
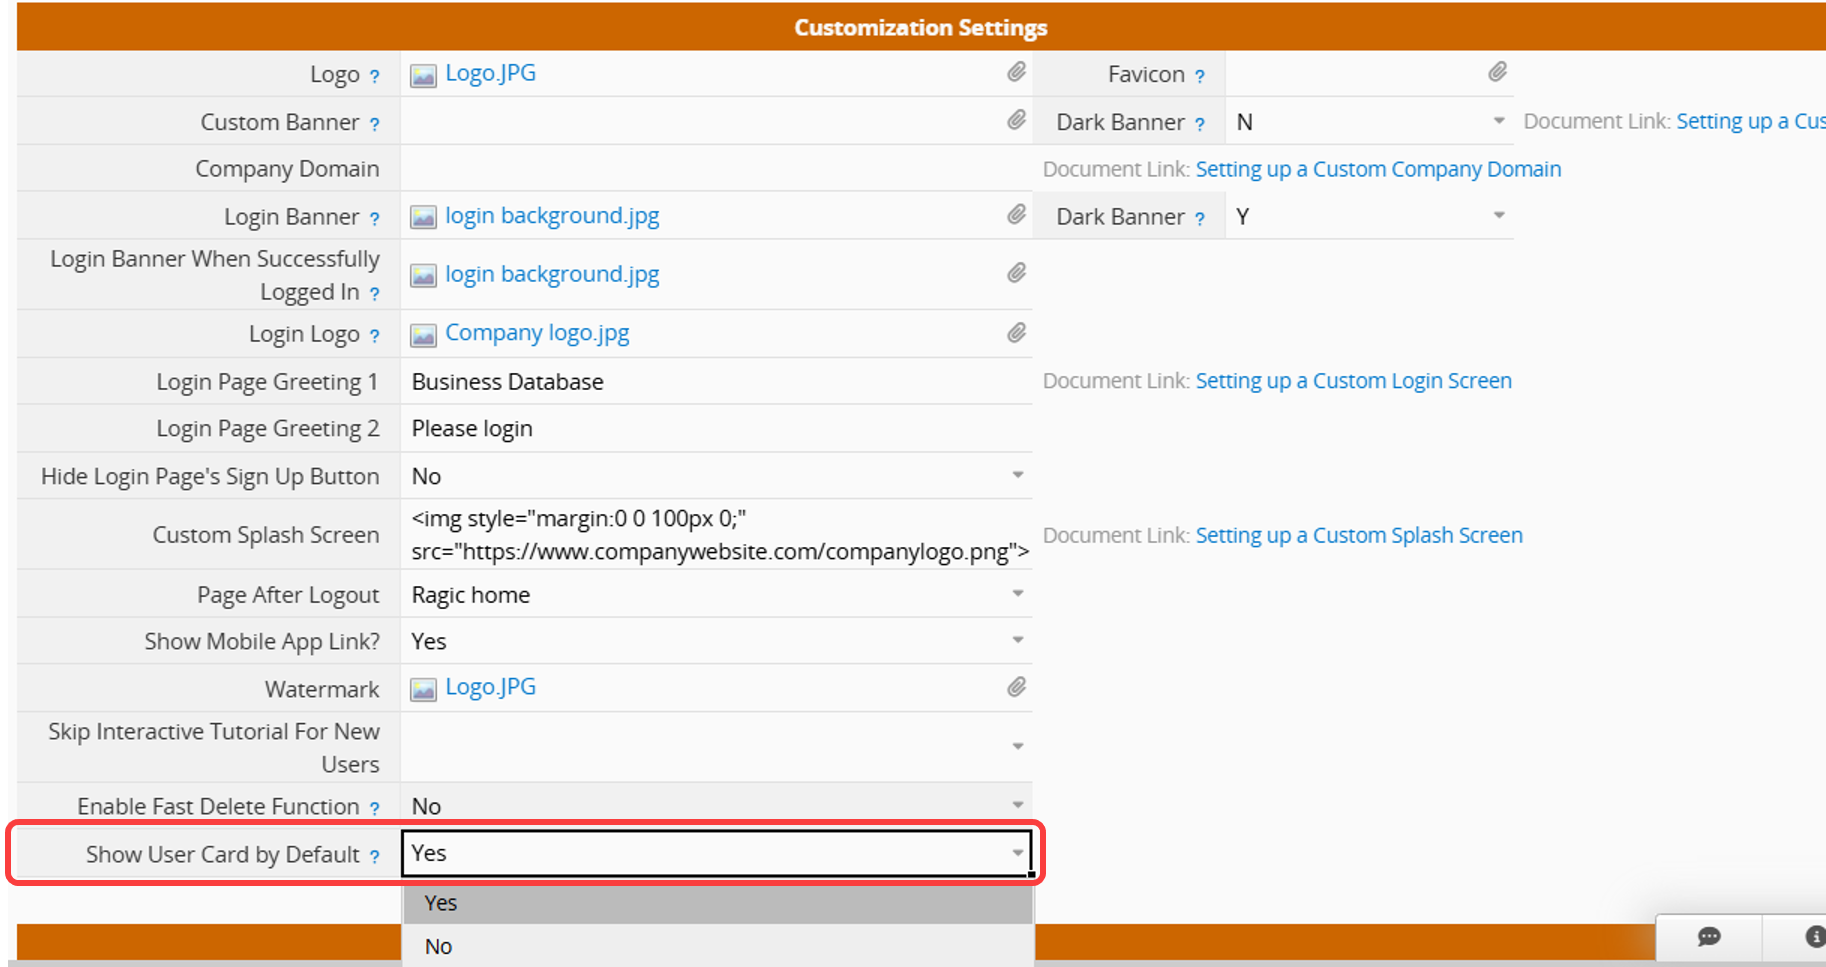
Users can later customize this setting in their Personal Settings or directly click the gear icon at the top right of the User Card to turn it off.
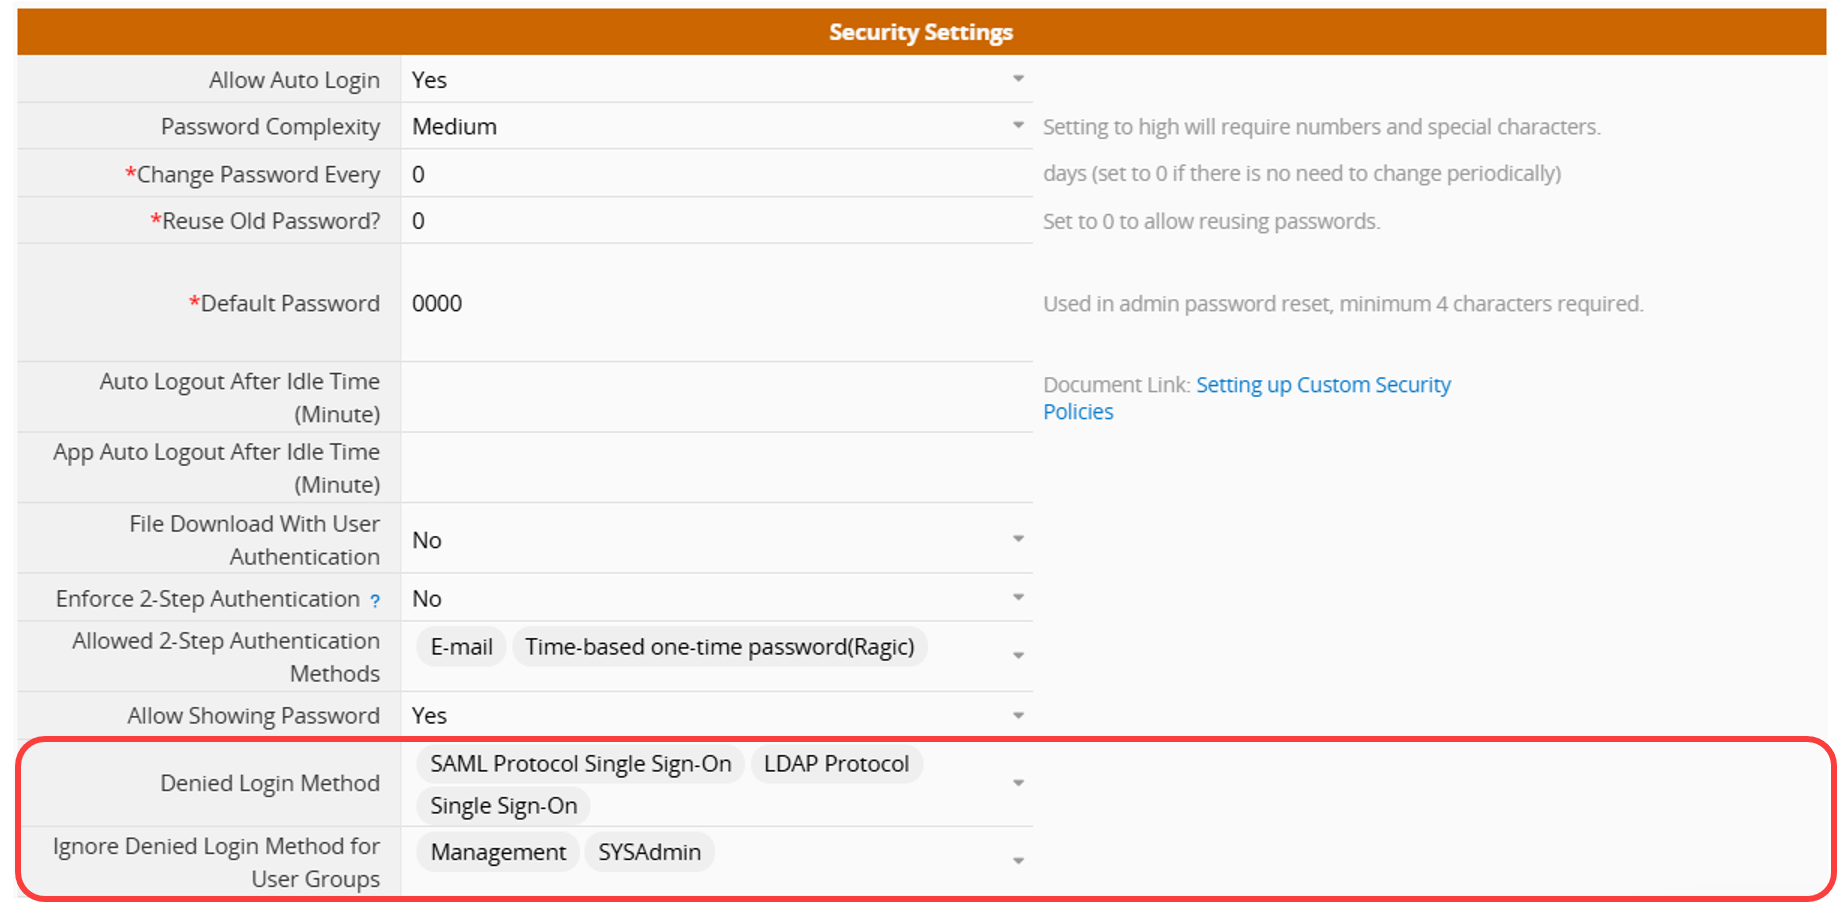
You can set up custom security policies for your users.
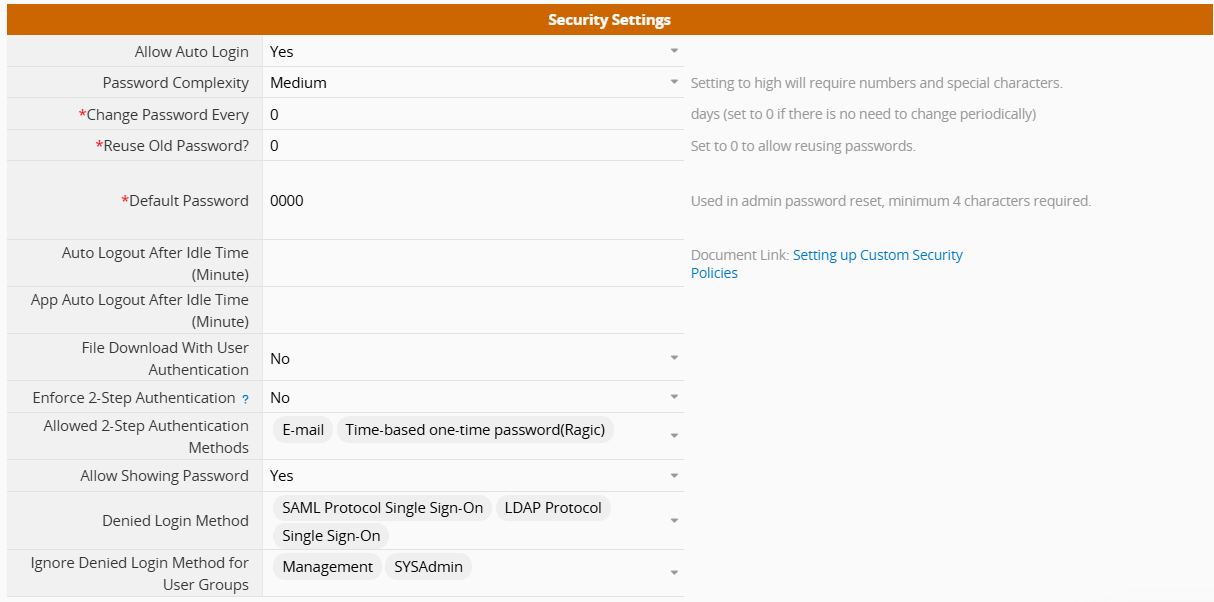
Configure whether to allow users who have previously logged into their Ragic account to be automatically logged in when accessing the database again.
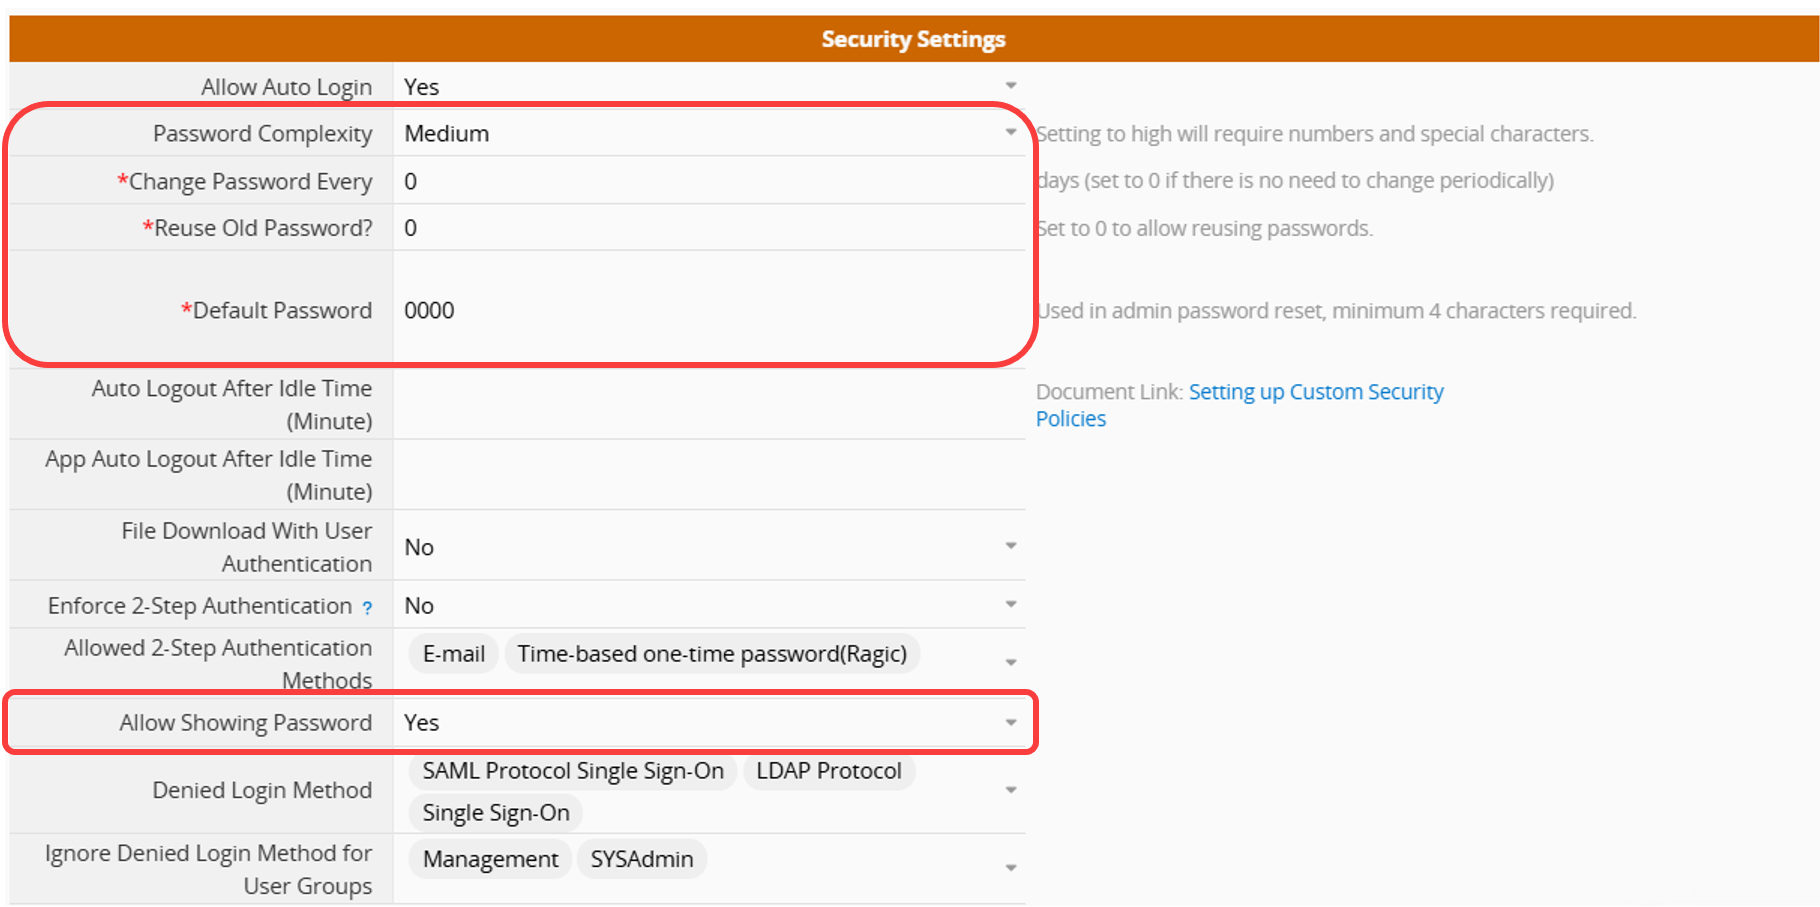
Password Complexity:
Setting the password complexity to "High" will require passwords to use a combination of letters and numbers, including at least one uppercase and one lowercase letter.
If you select "Medium", the password only needs to be at least 8 characters long. "Medium" is the system's default option.
Change Password Every __ Days:
Once this setting is configured, users will be reminded to change their passwords based on the number of days you specify. If there is no need for your users to change their passwords periodically, enter "0" in this field.
Reuse Old Password?:
Input number only.
Set to 0 to allow your users to reuse passwords that they have used before.
Set to 1 to allow your users to reuse passwords except for previous passwords.
Set to 2 to allow your users to reuse passwords except for the previous two passwords.
And so on.
Default Password:
When the Admin resets a user's password, the value in this field will become the user's default password. You can change it if needed.
Allow Showing Password:
Setting it to No, users will not be able to see passwords through the "Eye" icon.
You can set this for both the web and the app. Ragic will automatically log the user out after the specified idle time. If not required, set it to '0' or leave the field blank.
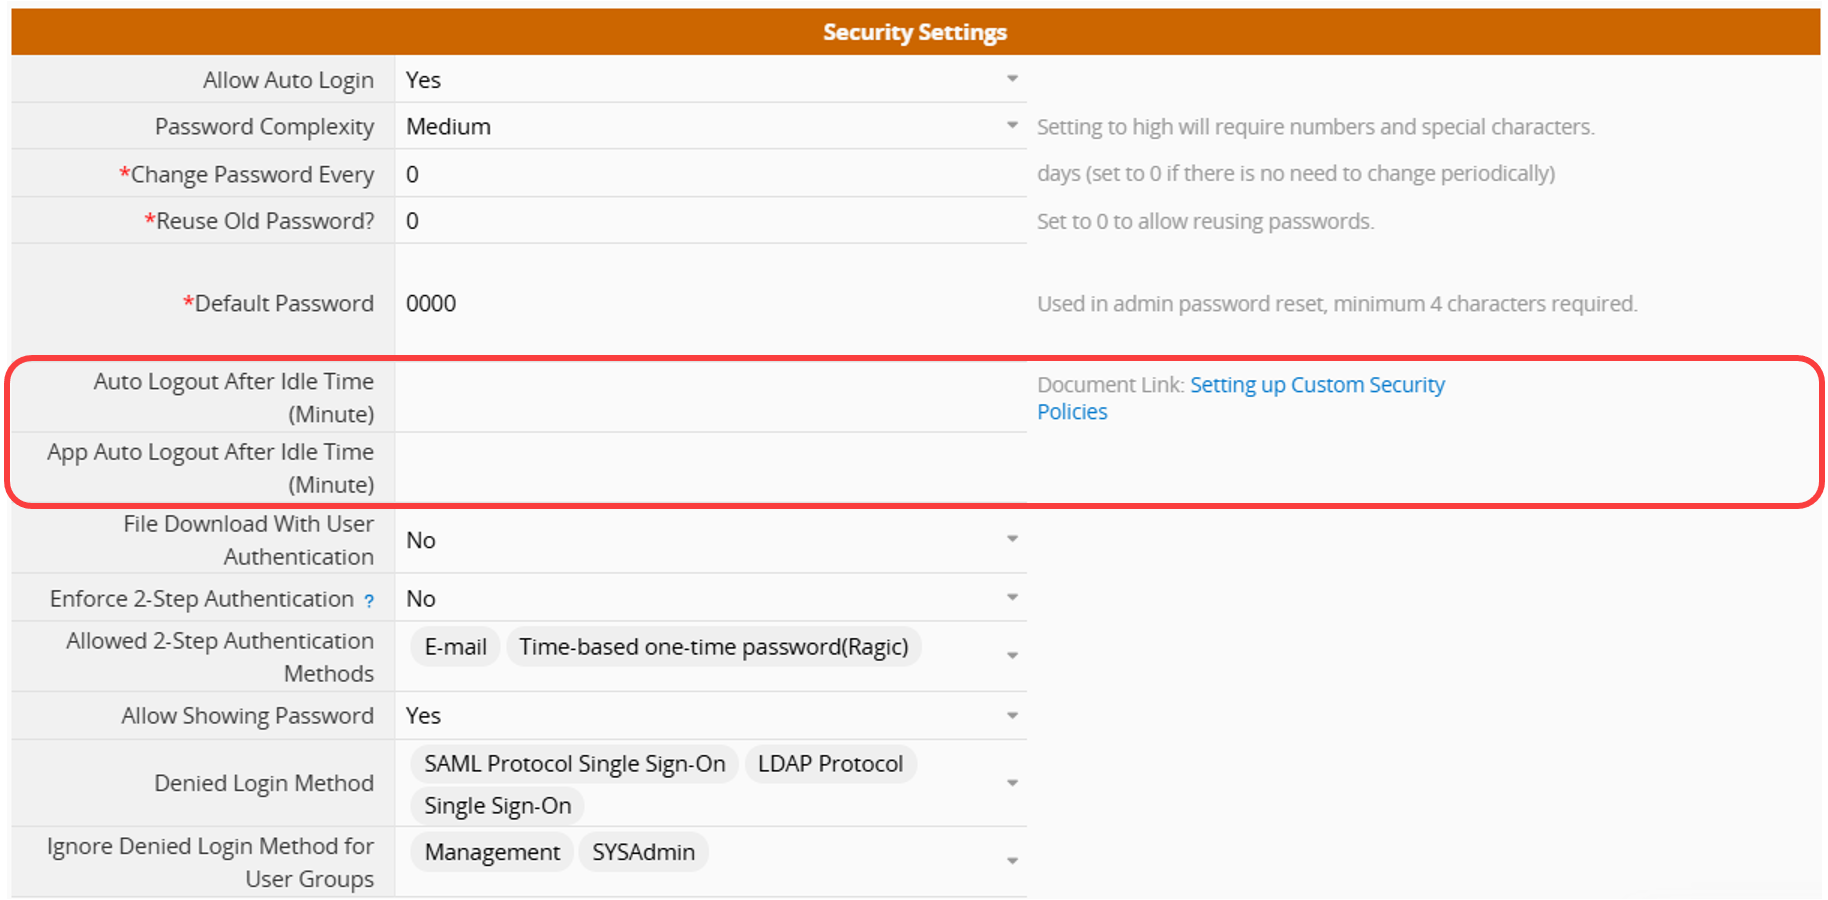
When the system reaches the specified idle time, a prompt will appear, notifying the user of automatic logout in 10 seconds. Performing any action within this period will prevent logout.
When set to "Yes", the system will verify users' access rights to the original records and download URLs for all File Upload and Image Upload fields across all sheets in the database.
Without access rights to the original record, users cannot access data through the URL.
If users have access rights to the original record, they must log in before downloading the file.
Additionally, with this setting as "Yes", forwarding an email with the file download link to a third-party recipient will cause it to expire.
This setting only affects files uploaded via the File Upload field. If files are uploaded through Comments, anyone with the file URL can download it without access rights. Therefore, if confidentiality is required, please use the File Upload field.
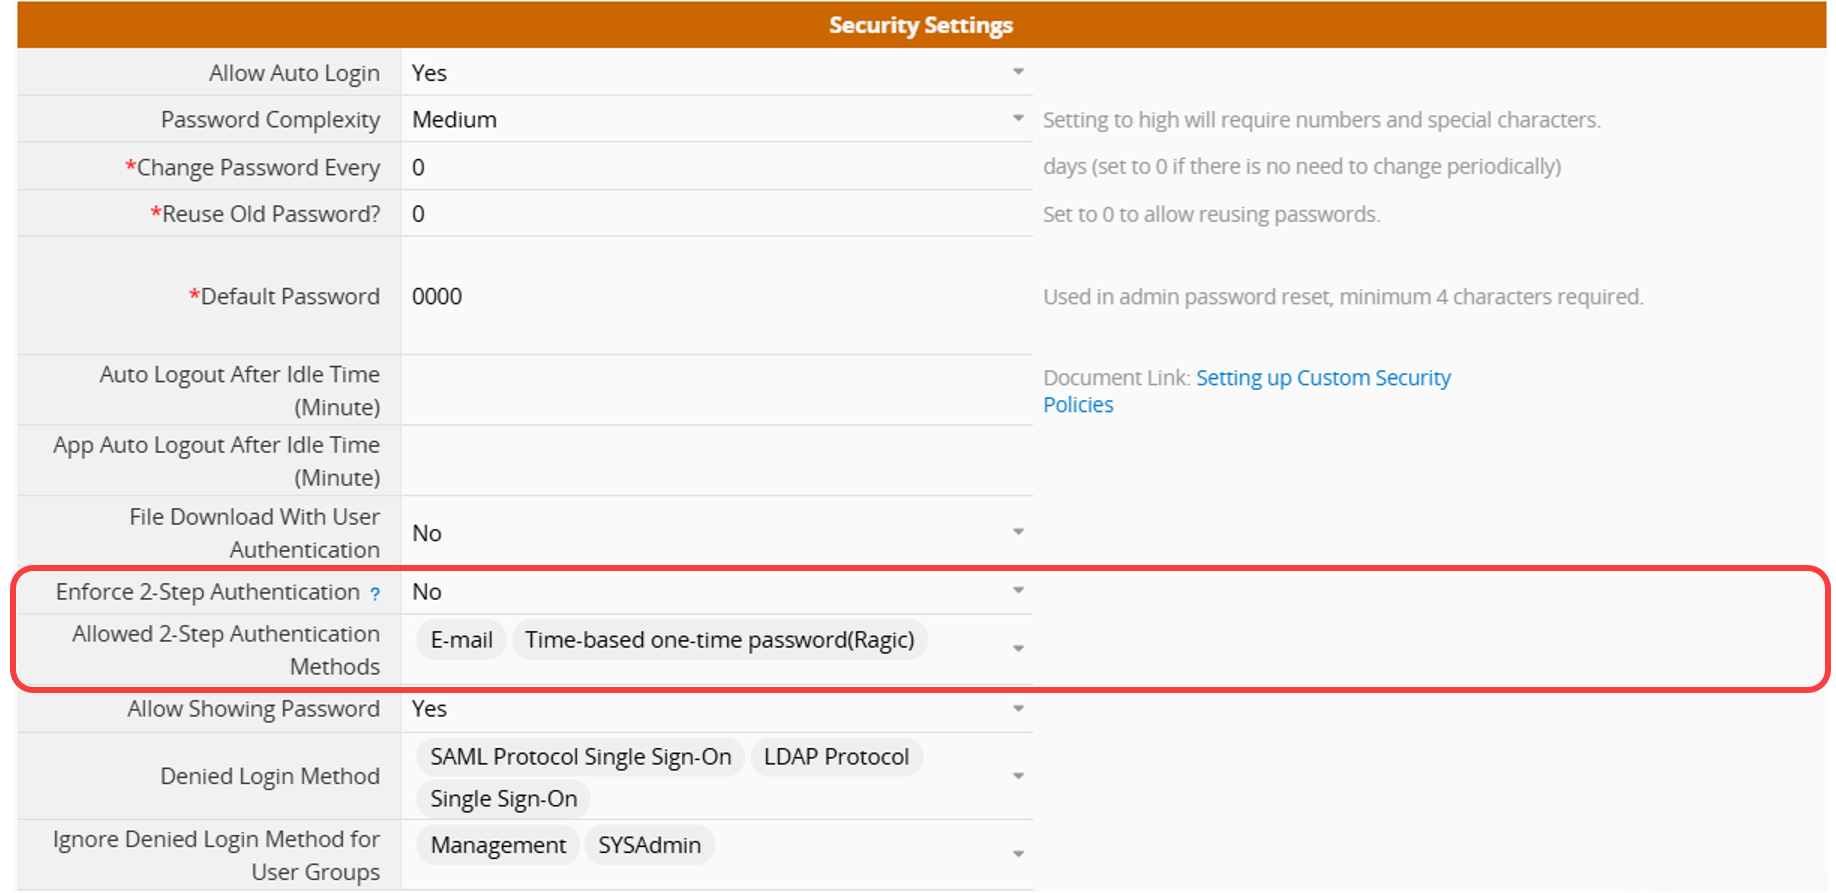
Enforce 2-Step Authentication:
Setting it to Yes will enable two-step authentication for all users, and they won't be able to turn it off by themselves.
Allowed 2-Step Authentication Methods:
The setting enables users to select their preferred authentication methods in their Personal Settings. Options include obtaining a time-based one-time password (TOTP) through the Ragic app or a third-party app or receiving the authentication code via email.
Note: These are the new authentication methods. Some databases may still display the old authentication method. Please choose one or both new methods mentioned above.
Denied Login Method:
Check the options to prohibit users from logging in through these methods.
Ignore Denied Login Method for User Groups:
Selected groups will no longer be constrained by the Denied Login Methods.
In the Account Settings, you can adjust the following items:
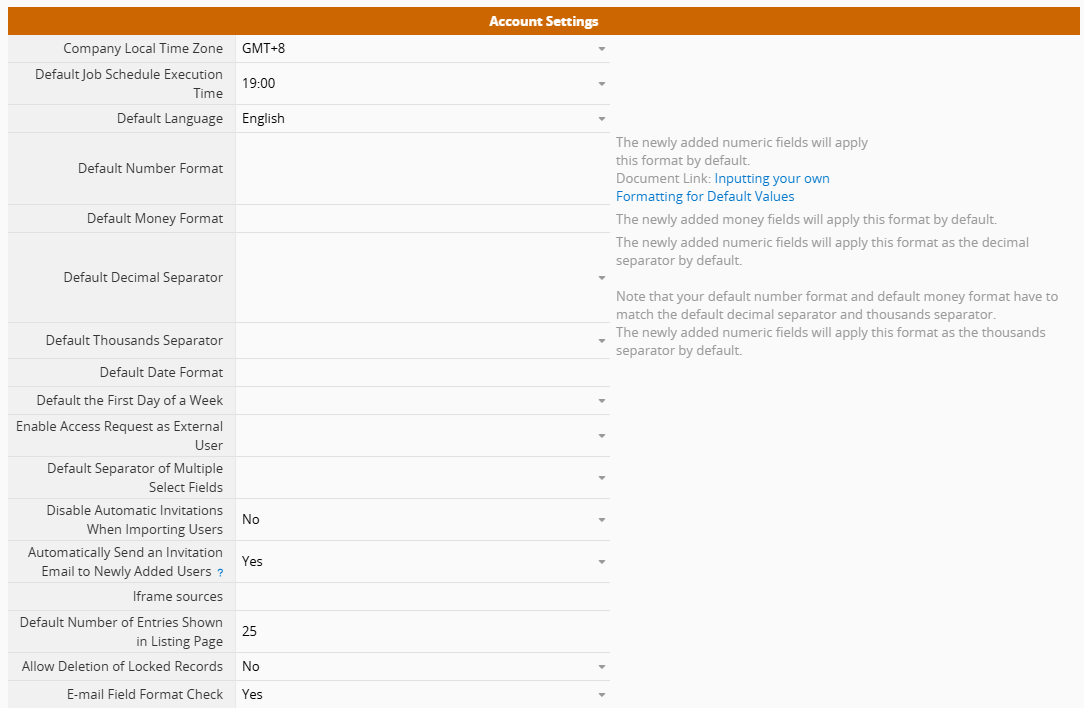
Company Local Time Zone: The default time zone is determined by the browser time zone of the user who registers this database account.
Default Job Schedule Execution Time: The default execution time (system default is 19:00 based on the Company Local Time Zone) for the features below: Reminder, Daily Workflow, Periodic Import from URL, Schedule Report, and Automatic Archiving. To set different execution times for each feature, please adjust the settings in Job Schedules.
Default Language: The default interface language.
Default Number and Money Format: The newly added numeric fields and money fields will apply these formats by default. You can still modify the format for each field afterward in the Design Mode.
Default Decimal and Thousands Separator: The system default separators are . (decimal) and , (thousands). You can customize the default separators here.
Default Date Format: It will apply to the Date field's format, Comment, Change History, Approval, etc.
Default the First Day of the Week: The system defaults "Sunday" as the first day of the week. If you wish to set another day as the first day of the week (like Monday), you may change the settings here. However, this function is only supported on the display format on the date picker, but not on calendar reports, scheduling reports, or the on the left sidebar related to defining "this week" and "last week".
Default Separator of Multiple Fields: The default separator for Multiple Select fields.
Enable Access Request as External User: Set whether to allow external users to apply for access.
Disable Automatic Invitations When Importing Users: Set whether to automatically send invitation emails when importing users.
Automatically Send an Invitation Email to Newly Added Users: Configure whether to automatically send an invitation email when adding a new user. This setting applies only to users created through manual entry, record import, or API integration.
iframe sources: When using iframe to embed content into Ragic, you can fill in the domain of the embedding source here to avoid the iframe content being blocked by the system and cannot being displayed.
You can refer to this article for example formatting types.
Default Number of Entries Shown in Listing Page: To set the default number of entries displayed on the Listing Page, but it cannot be less than 25.
Users can also adjust the display number through the Preferences settings in their Personal Settings.
Allow Deletion of Locked Records: The default setting is No. Deleting locked records, whether as single or multiple entries, or through the API, will be blocked.
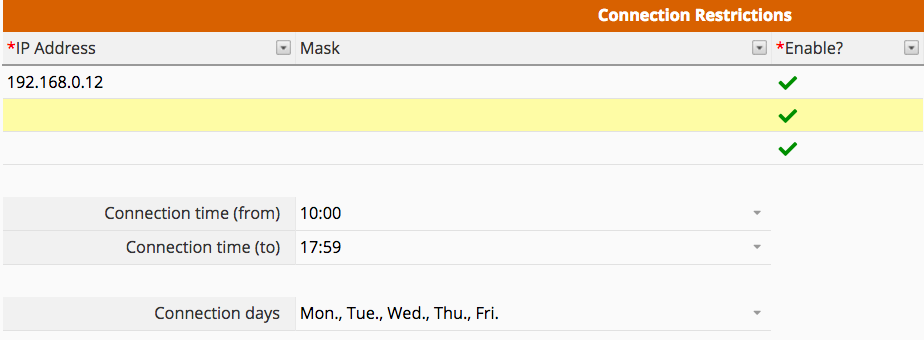
You can set the IP Address, Mask, connection time, and connection days for the database. Once the restrictions are set, users can access this database only if they meet the restrictions. This setting applies to all users except for SYSAdmins, and individual customization is not possible.
If you want the system mail sent from and reply to your own mail server, you can configure the SMTP server in this setting.
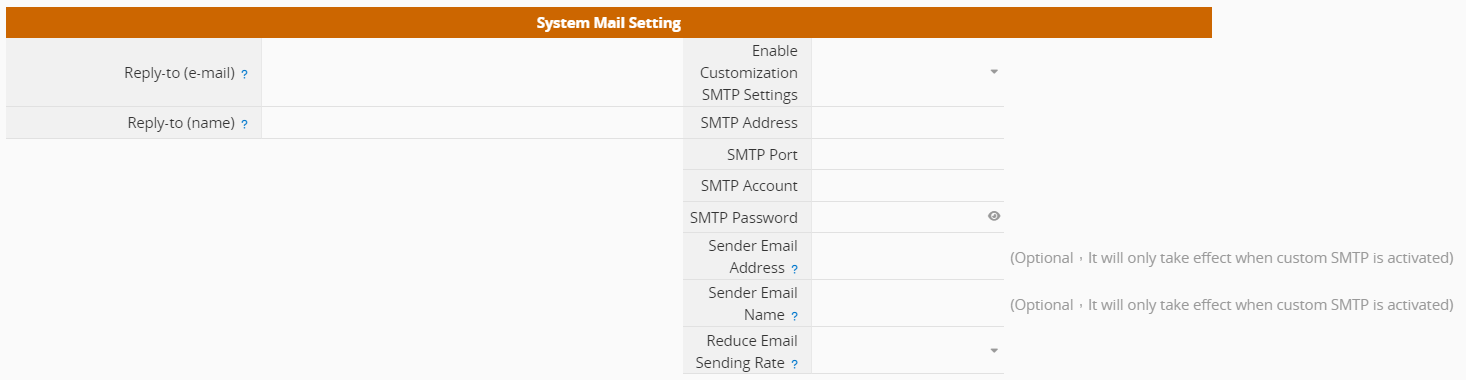
After configuring, emails sent using Send Custom Email, Email This Entry, and Reminders will be through your SMTP server.
However, if you reply from a record's email thread, it will be sent from the record's email address.
If there are errors in SMTP settings (Incorrect account, password, port, etc.), mailing issues will happen. You may download the Mail Log of your database in DB Maintenance to see if there are any mailing issues.
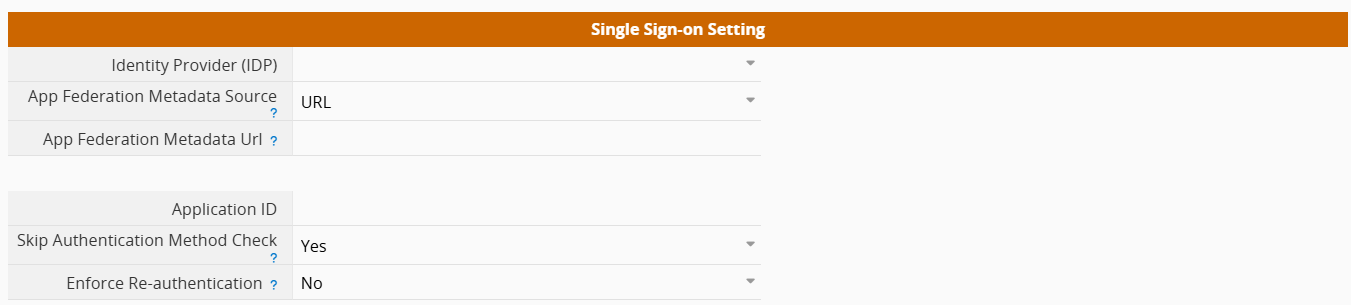
If you have applied single-sign-on integration settings, you would have to select your identity provider (IDP). You would also have to copy the app federation metadata URL and the application ID from your identity provider to the respective Ragic fields here.