HVAC Management: Boost your HVAC Business Productivity with the Free Ragic Template

If you are running an HVAC company or working as an independent HVAC contractor, this template is for you!
We know that working with HVAC systems (heating, ventilation, and air conditioning) will always keep your technicians busy conducting regular inspections, identifying potential issues, and maintaining the system’s efficiency. However, extreme weather conditions may cause the systems to fail which results in demand for more manpower during the cold of winter or extreme heat of summer. Your team will often have new problems to solve, new clients and new work locations every day. Our template can help your administrative team boost the process of registering, scheduling, and tracking HVAC inspections during those high demand seasons and all year round.
Whether your business provides services for residential, commercial, or industrial buildings, regular inspections and emergency repairs are always expected, and it is important that the work is completed without delay to ensure the safety and comfort of the client’s property.
We know daily tasks will often vary, sometimes you may find yourself with lots of administrative work such as scheduling and assigning the upcoming inspections, and if you still don't have a system to manage your HVAC projects, you may want to give our template a try. It’s free!
With the Ragic Template you can:
1. Track job progress and technician’s performance. You can create reports to see job statuses, upcoming inspections and see which technicians are completing the most jobs.
2. Manage clients’ profiles. Happy clients will likely come back to you if they need help in the future and you can save time by simply confirming or editing the existing data instead manually adding it again.
3. Manage work assignments. Filter your technicians’ profiles based on skills or experience before assigning jobs.
4. Provide quotes and invoices. When equipment is purchased, create a quote, and confirm it with the client, process the payment and automatically update the quantity available in your inventory.
If you have registered for a Ragic account, you can install our HVAC Inspections Management template from your home page.
Get Started
Our template includes 7 sheets in which you can record the whole inspections process.
- Clients
- Technicians
- Inventory
- HVAC Jobs
- Inspection Assignments
- Quotes
- Invoices
After installing the template, you can start by adding your clients’ and your technicians’ profiles in the respective sheets. When you receive a call from a client requesting an inspection, you will be able to pull data from the clients and technicians sheets when creating and assigning the inspections.
In your inventory sheet, add the equipment, tools and supplies that you might sell to your clients when needed. After the first inspection is completed, your technician will determine if anything needs to be replaced in the next inspection and can select the correct device from the inventory sheet.
Before the next inspection is done, your onsite team can create a quote and confirm if the client would like to proceed, if confirmed, then your agent will create an invoice and process the payment. Once the payment is approved and the invoice is paid, the agent can schedule the next inspection for equipment replacement.
Let’s review each sheet structure in more detail to learn how to use them.
Clients
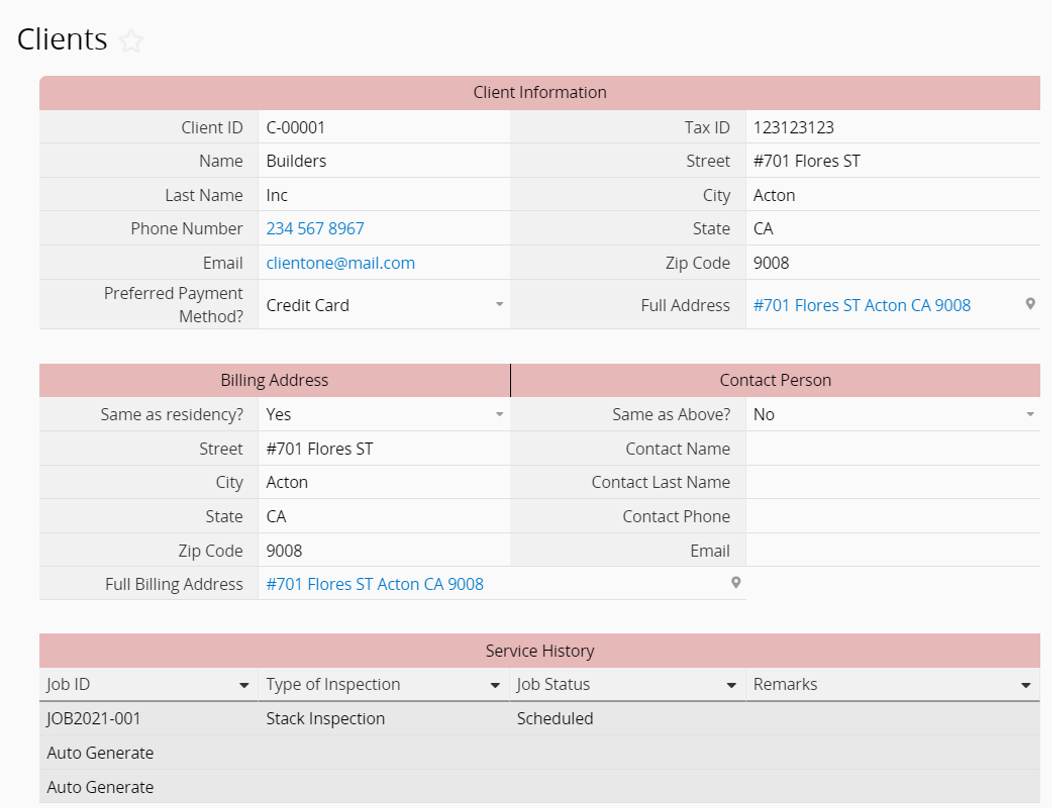
In this sheet, you can manage your client’s information. When you add a new client, a unique ID will be automatically generated for the client in the field Client ID. Whenever your clients call to request an inspection, you can search their profiles by searching for their Client ID when creating an HVAC Job. If your clients are business owners, you can add their tax ID number in the TAX ID field.
In the subtable Service History, you will see the list of jobs performed on the client’s property. To see more details about each job and the number of inspections, you can hover over the Job ID and a fly-in sheet will appear on the right side of your screen.
Technicians
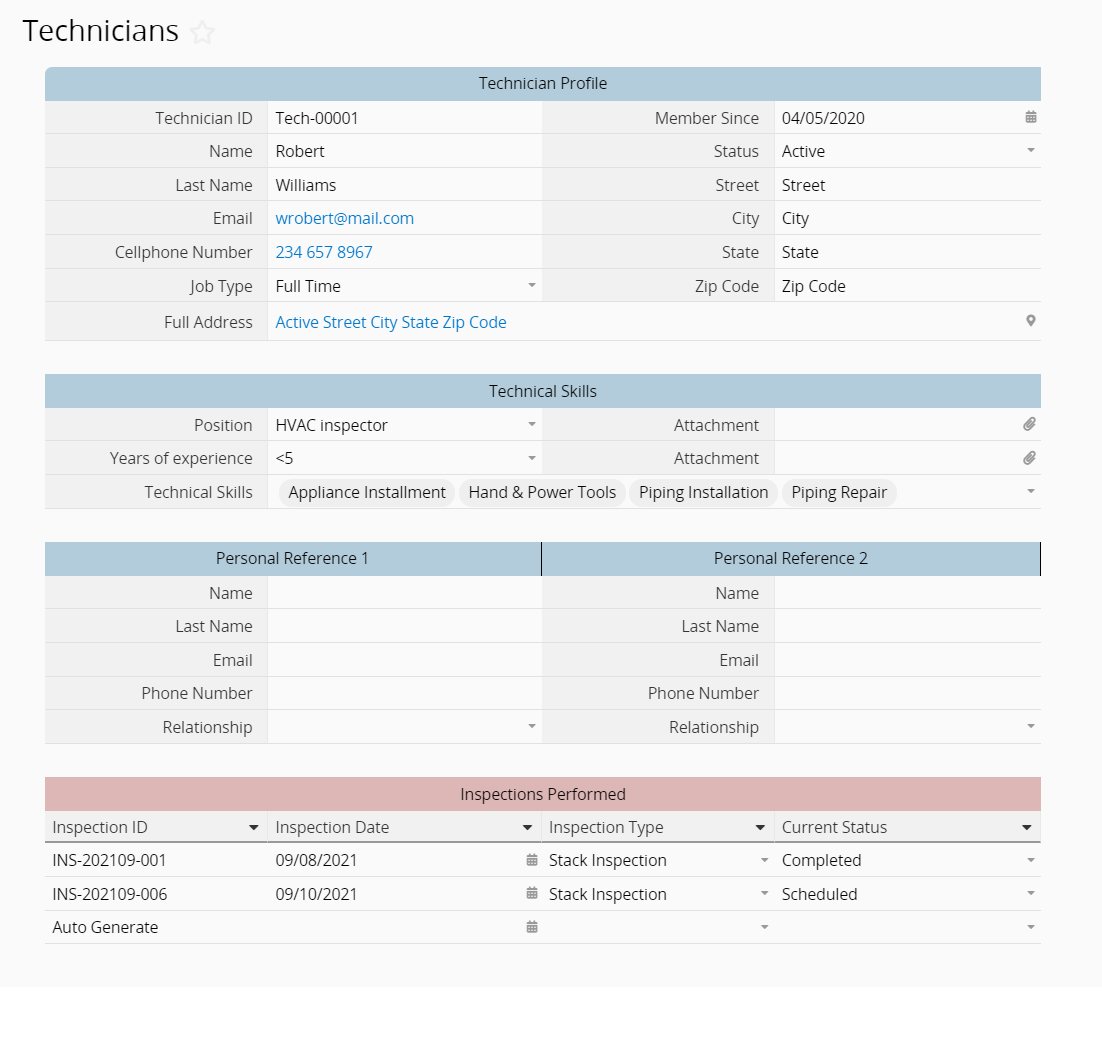
Use this sheet to store your technicians’ profiles. Including their personal contact details, technical skills and personal references if required. If your technicians are required to present any kind of certification or diploma, you can attach the files in the Attachment fields under the Technical Skills section.
The field Technician ID will automatically generate a unique ID for each of your technicians added to this sheet, and when creating an Inspection Assignment, you can search the technician by searching their ID number.
At the bottom, you’ll see the subtable Inspections Performed, here you can find the list of inspections conducted by the technician, and if you would like to see more details about each inspection, hover over the inspection ID and a fly-in sheet will display the inspection sheet on the right side.
Inventory
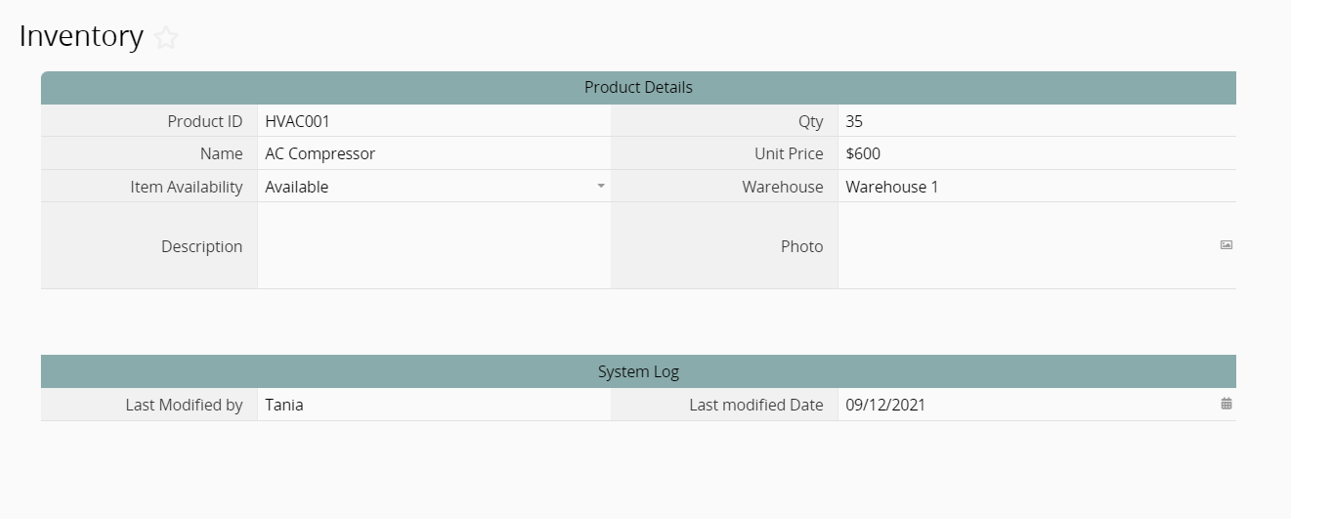
Since some jobs will require equipment replacement, you can keep track of your equipment inventory by adding them to this sheet. The field Qty will be updated every time an invoice is paid, so you can keep the quantity of available equipment up to date.
HVAC Jobs
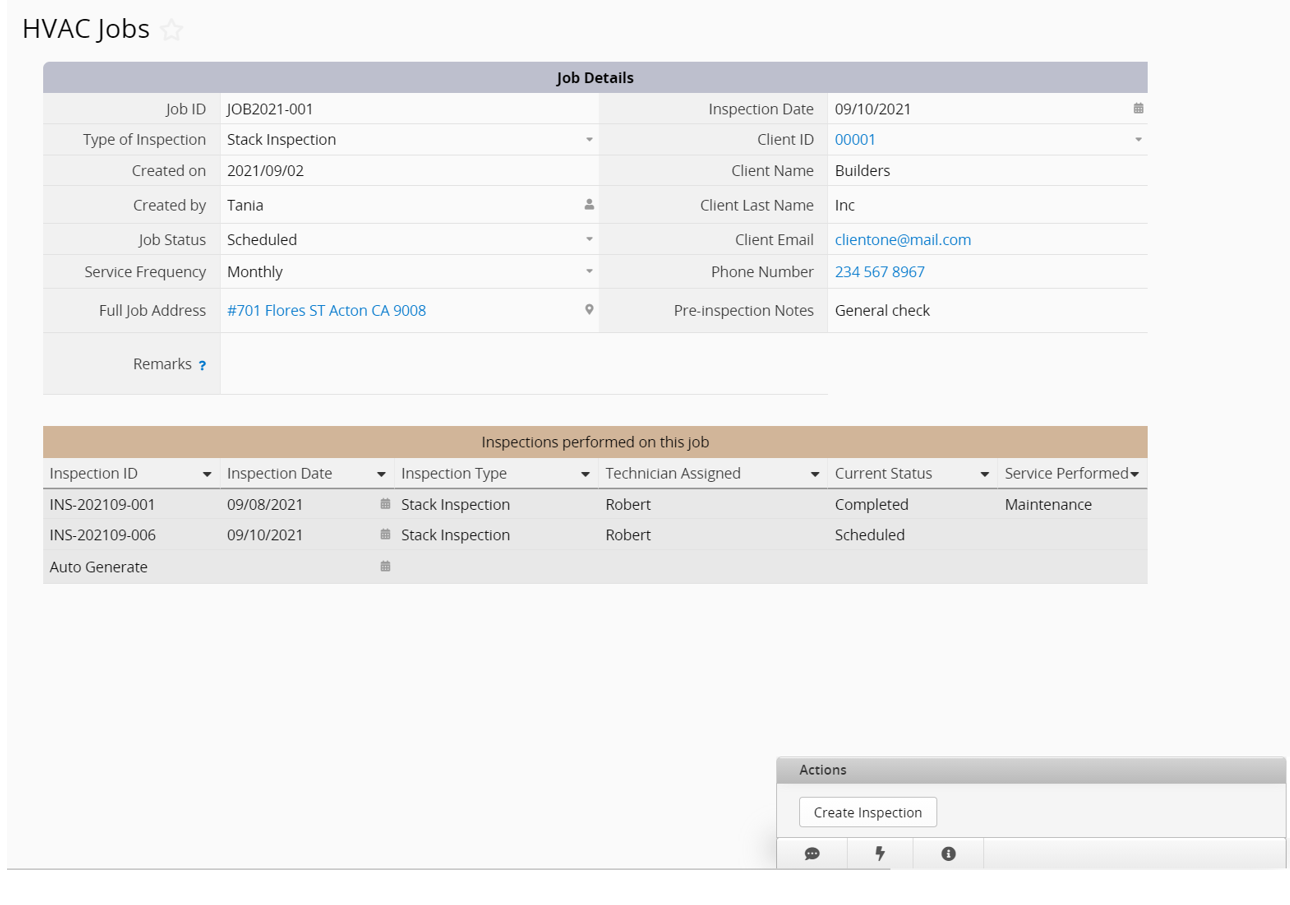
Although most inspections will usually be conducted with a previously agreed frequency, whether this is annual or bi-annual depending on your clients’ needs, sometimes they might contact you and report issues in their HVAC system, and they will require a professional technician to inspect their property. If you handle inquiries from first-time customers, make sure to gather their information and add it to the Clients sheet before creating the HVAC Job.
Use the HVAC Jobs sheet to record the details of the issue reported, fill out the client’s information by loading their profile. This sheet will record all jobs that you can later assign to your technicians depending on their schedule and skills.
If an existing HVAC Job status is “Action Required”, this means that a follow-up inspection needs to be scheduled, find the last inspection conducted on that job and refer to the Post-Inspection Notes.
Inspection Assignments
On this sheet, you will create the inspections and assign them to your technicians.
The inspection assignments sheet has two sections: the pre-inspection details shown in red and the post-inspection notes in green.
Pre-inspection details
The job details entered previously such as client’s data, inspection type and inspection date, will be automatically filled out. Note that fields will be grayed out, indicating that their values are read-only, except for the Inspection Date field which can be modified if the client decides to change the date while confirming the inspection. The date selected will be automatically updated in the HVAC Job once the inspection is saved.
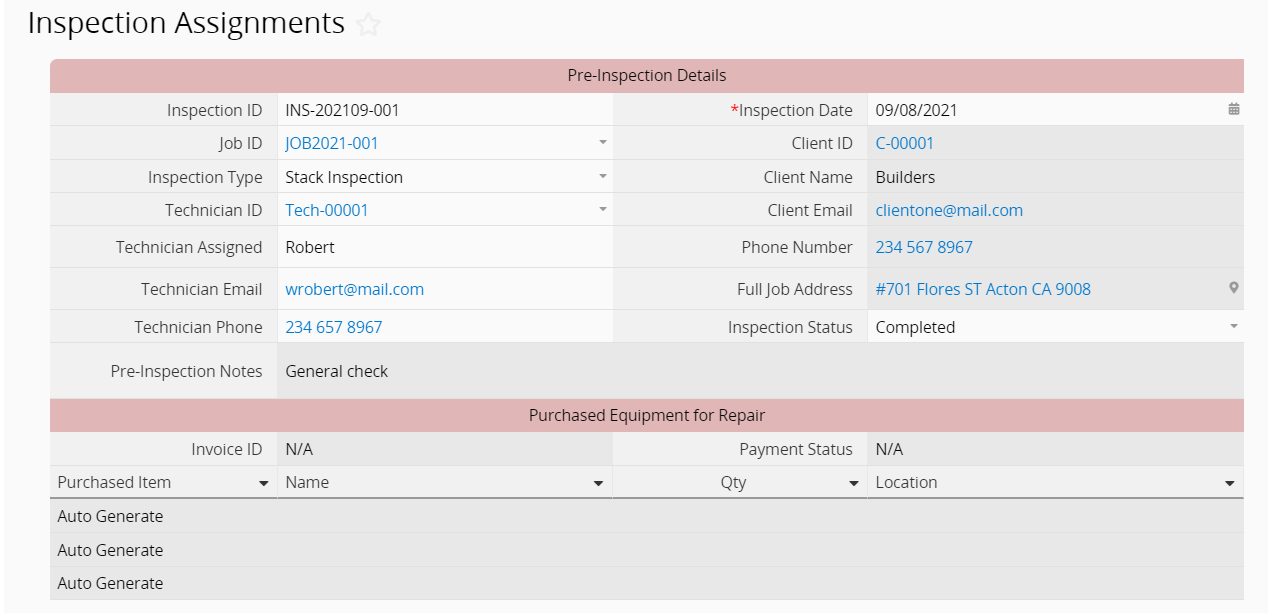
If you are creating the first inspection for a job, the subtable “Purchased Equipment for Repair” will be empty, since this would be filled out only if the client has purchased equipment for repair after a previous inspection.
After assigning a technician for the inspection, you can click on the action button on the lower right corner “Notify technician”, so your technician will receive an email with the details about the inspection.

Post-inspection notes
After the first inspection is completed, your technician can fill out the post-inspection basic details and determine if the job has been completed or if a follow-up inspection and equipment are required.
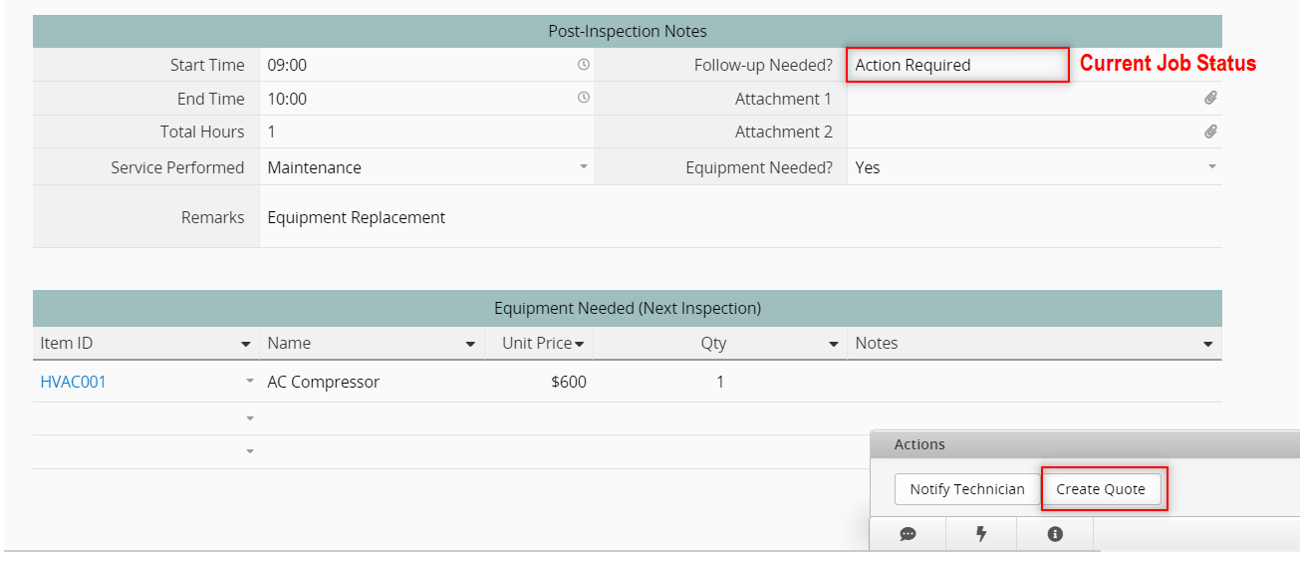
The subtable Equipment Needed is linked to your inventory sheet, the technicians can select any equipment you’re your inventory and list it here.
The field Follow-up Needed will update the current job status in the HVAC Jobs sheet. The notes added in the Remarks field will be updated in the corresponding field in the HVAC Job sheet. This will keep the job details up to date when new inspections are created.
If the post inspections section indicates “Action Required” and Equipment is Needed for replacement, proceed to create a Quote for the client by clicking on the action button Create Quote.
Quotes
The Quotes will be created from the Inspection Assignments sheet. The field Quote ID is a unique value that will be generated using the value Job ID and the equipment will be automatically added in the subtable Items.
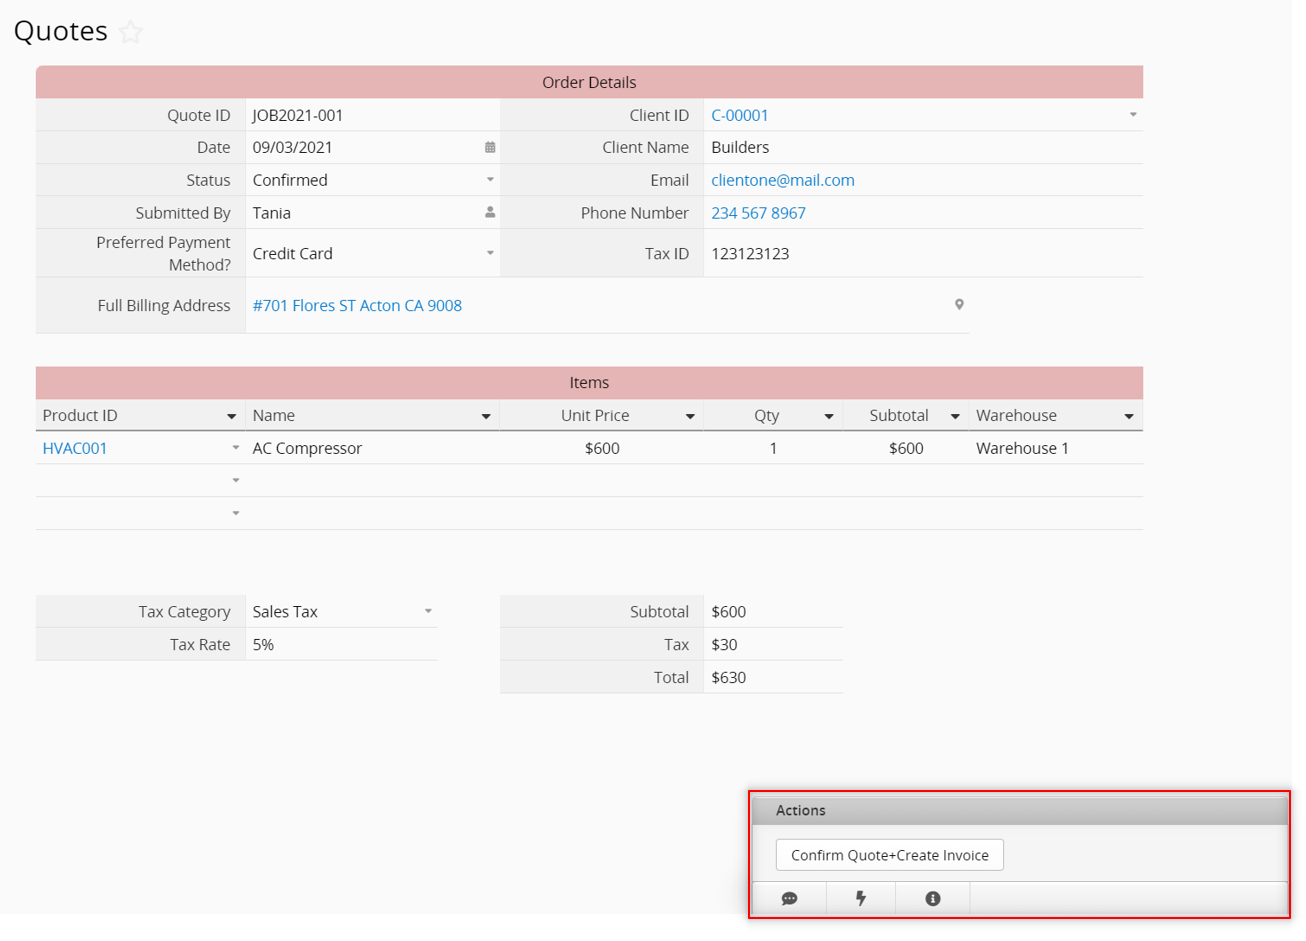
Select the client information by filling out the Client ID field, and after confirming that the client wants to process the payment, click on the action button Confirm Quote + Create Invoice. When executing this button, the Quote status will be automatically set to Confirmed and the invoice will be created in the Invoices sheet.
Invoices
The invoices will be created with most details from the Quote, but this is where you will register if the client made the payment or not. Note that the field Job ID has a red star indicating that it must not be empty, and you must select the Job to which the invoice is related. The Job ID field should have the same ID as Quote ID.
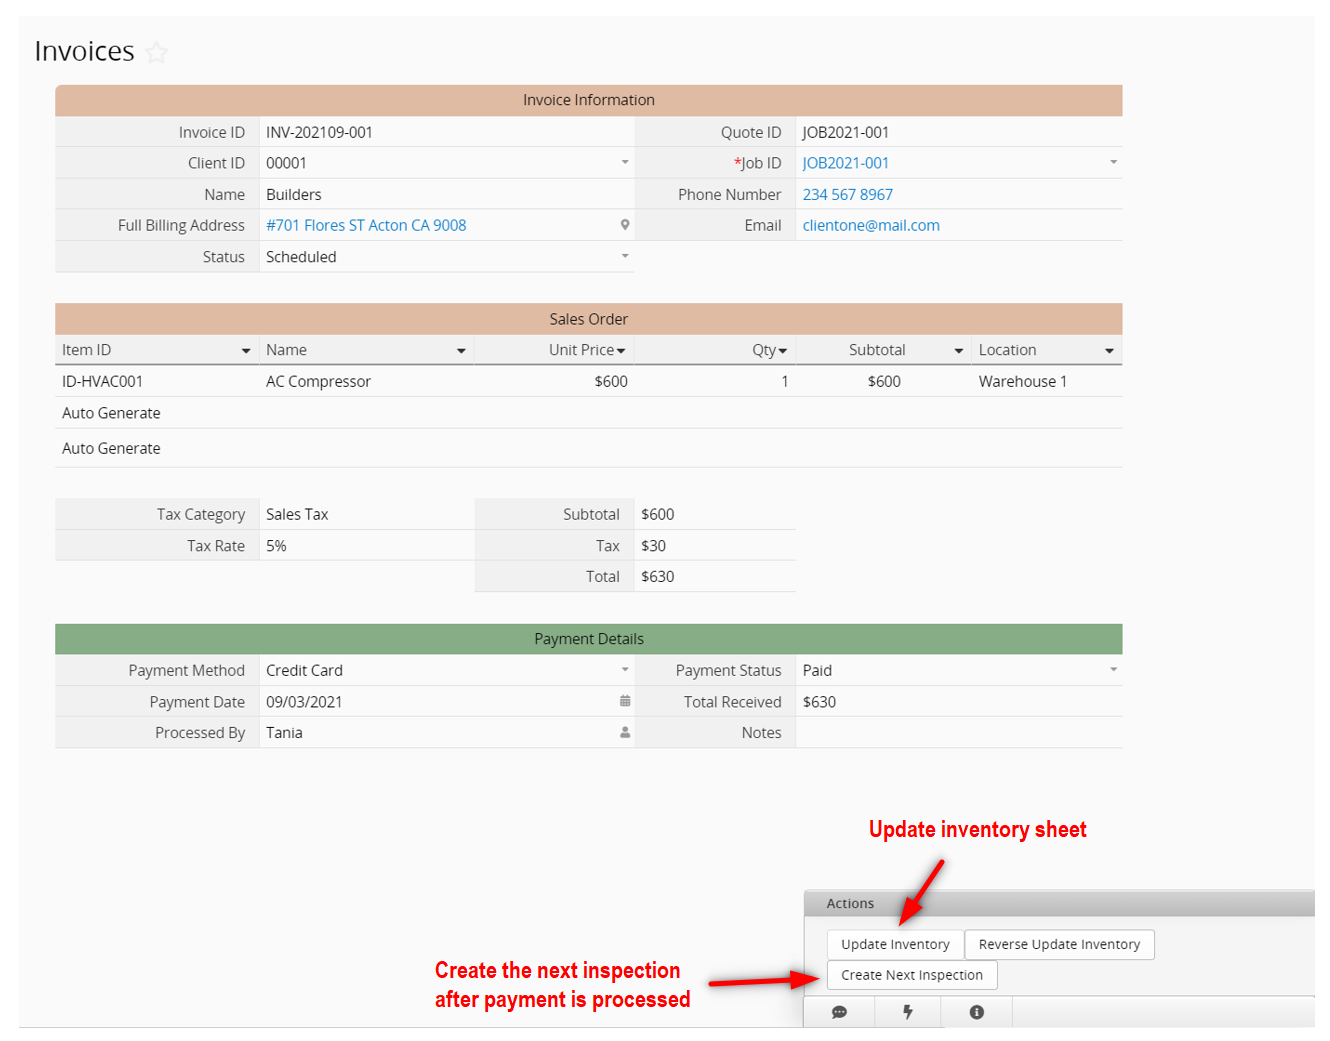
Once the payment has been set to Paid status, you can click on the action button Update Inventory to update the quantity of equipment available. Finally, you can schedule the next inspection for installing the just paid equipment. Click on the button Create Next Inspection to schedule the next inspection.
Customizations
You can set up email Reminders to your clients about their upcoming inspection a few days before the scheduled date.
Send Mass SMS to your clients’ phone numbers to follow up on their inspections or quote confirmation (available for Professional plan or any plan above).
Add call recordings to your HVAC Jobs sheet or Inspection Assignments sheet. You can do this by either uploading audio files to a File Upload field or creating a Free Text field and adding the link to specific call in your call center phone system.
If you have registered for a Ragic account, you can install our HVAC Inspections Management template from your home page.
カテゴリ: Applications > Templates


