Ragic's free inventory management template allows you to record the quantities of different products stored in each warehouse and efficiently manage the processes of receiving, dispatching, and transferring inventory. To make your workflow easier, you can turn your Warehouse, Product, and Inventory IDs into barcodes. This way, you won’t have to manually match or enter those IDs when filling out Incoming Stock, Outgoing Stock, or Transfer Sheet. You can just scan the barcode to replace the manual entry process.
These are the following fields that can be turned into barcodes:
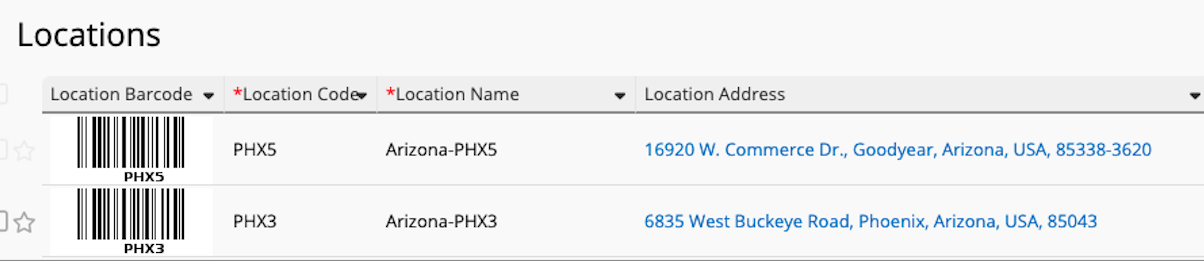
① The “Location Code” field in the "Locations" sheet.
This is a code to each warehouse. For example, Arizona Warehouse is coded as PHX3.
② The “Product No.” field in the "Inventory" sheet.
For example, the code for a Pen Cap is P-00007, and for Needle Material is P-00006.
③ The “Inventory No.” field in the "Location Balance" sheet
This ID combines the “Location Code” and “Product No.” to identify which product is stored in which warehouse. For example, a Pen Cap stored in Arizona Warehouse would have the “Inventory No.” PHX3-P-00007.
Here's how you can generate a barcode for these fields, using “Location Code” as an example:
In the “Locations” sheet, create a “Location Barcode” field. Set the field type as Barcode field and apply a formula referring to the “Location Code” field.
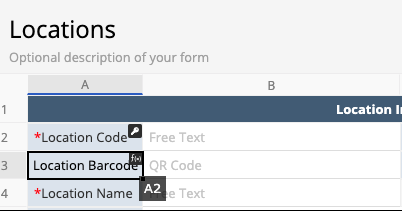
After saving the design, execute Formula Recalculation and you will see the barcode for each entry.
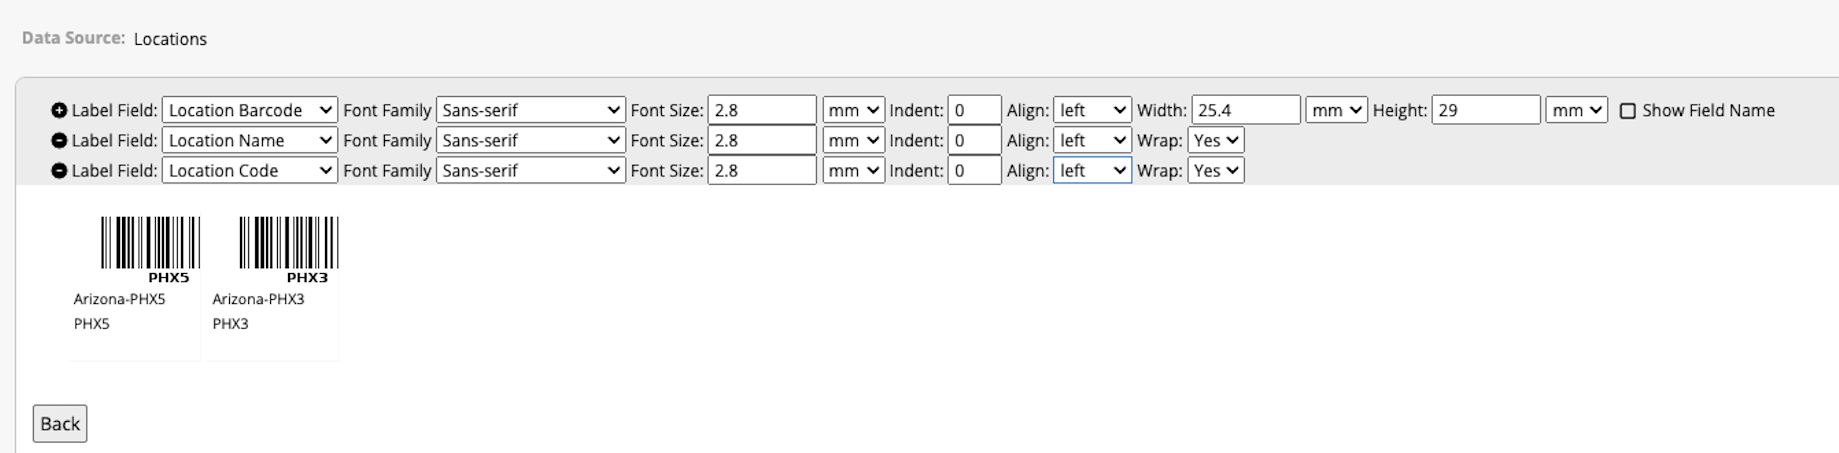
And then you can print all these barcodes with Label Maker.
With the same method, you can create barcodes for the “Product No.” field in the "Inventory" sheet and “Inventory No.” field in the "Location Balance" sheet.
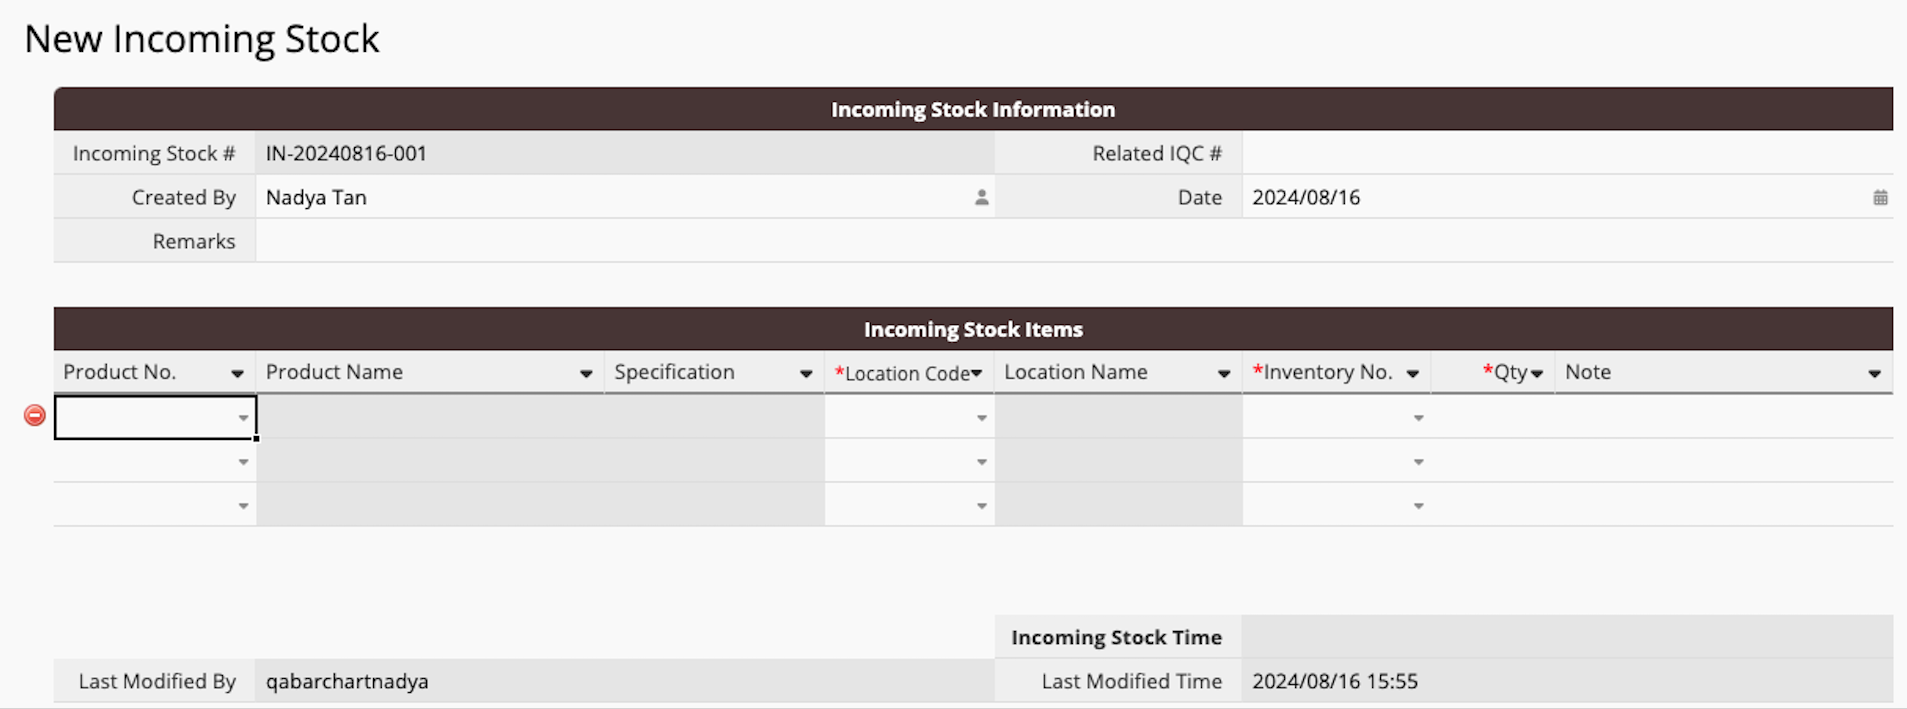
If you are using a computer to fill out an “Incoming Stock” sheet, you can connect your barcode scanner to the computer. When the cursor is in the field where you need to enter a value, as in the example below, scanning the 'P00007' barcode will automatically fill 'P00007' into the 'Product No.' field and load information about the Pen Cap.
If you are using your phone to fill out the “Outgoing Stock” sheet, when filling out the Outgoing Items, expand the Outgoing Items Subtable and add an entry for the product. Tap the “Product No.” field, and a barcode icon will appear (left image below). Tap the icon to open the camera and scan the barcode (right image below).
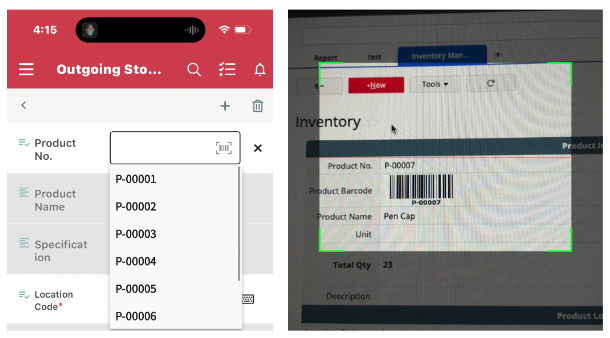
Once you scan the barcode, the "Product No." field will automatically be populated with the barcode value. This works the same way for Location Code and Inventory No.
Important note: Scanning the barcode only replaces the action of entering the value. While you can use the Link and Load feature to automatically load pre-registered product information, it doesn’t replace the task of manually entering the inventory quantity. You’ll still need to input the quantity based on the actual situation after scanning the barcode.
If you have any other ideas for using barcodes with the Inventory Management Template, just drop us a message at support@ragic.com! Let us know the process you're aiming for, and we’ll be happy to offer more design suggestions.

