“Where is the portable mic that was last used by Rachel for the livestream?”
“I need the HDMI! Where is the HDMI?!”
“Where is the whiteboard from the last event?”
In many organizations or teams, it's common to share things like electronic equipment for meetings, event props, and company cars to save costs. Relying on your memory or just asking around works fine for smaller teams. But as the team grows, keeping track of everything gets tricky. Equipment Management Template makes it super easy to see who has what, so nothing goes missing and everything is accounted for without any hassle.
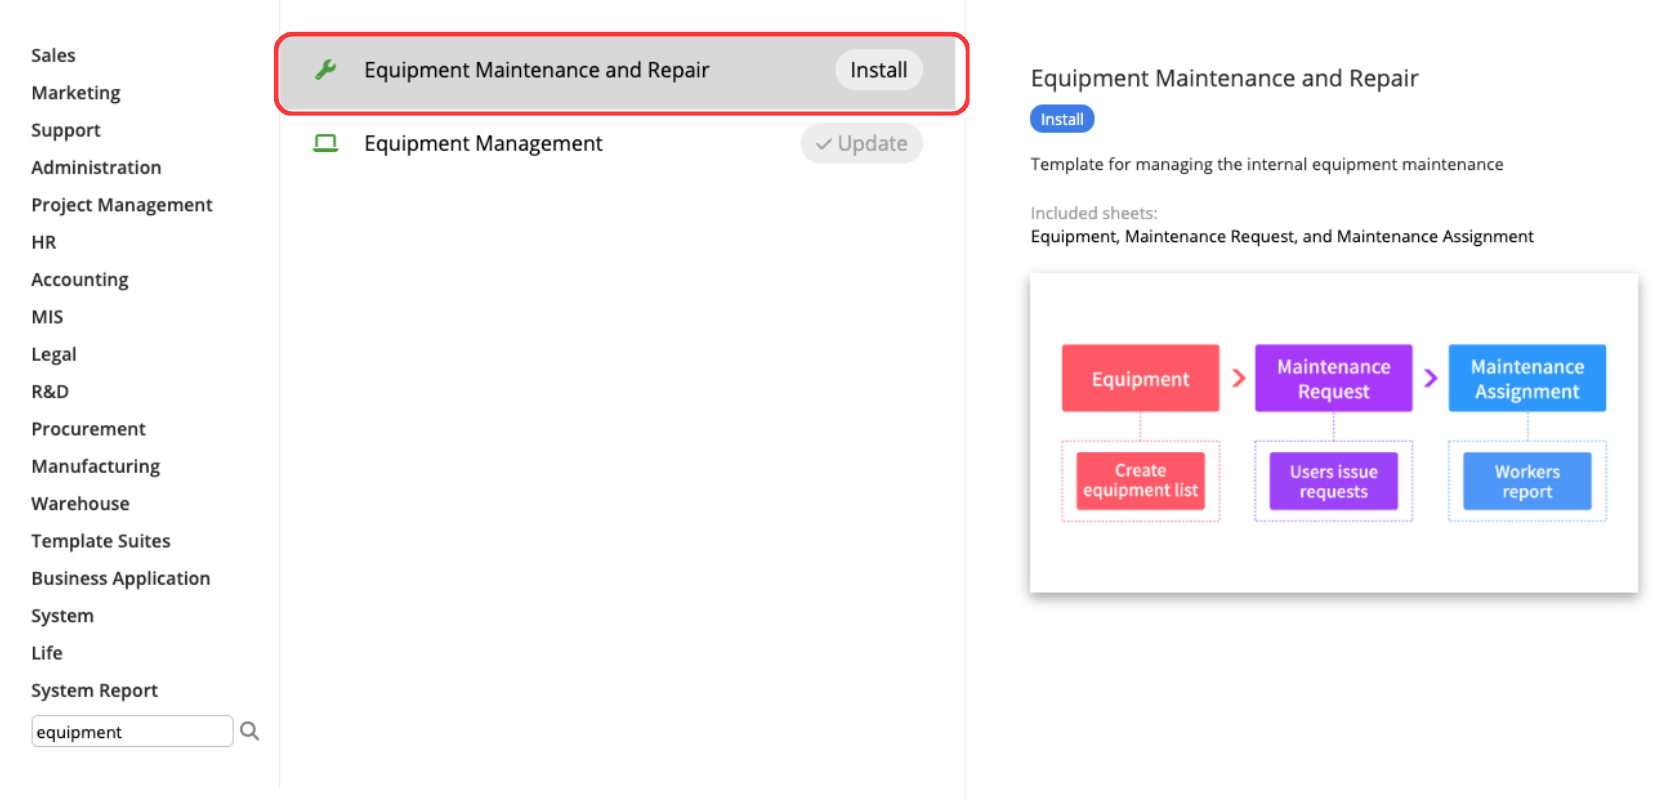
If you don't have a Ragic account, register now and download the "Equipment Management Template" (no charges will apply without your consent). For existing users, the template can be found under the Administration section in our Template Library.
Let's get started with setting up your equipment management system!
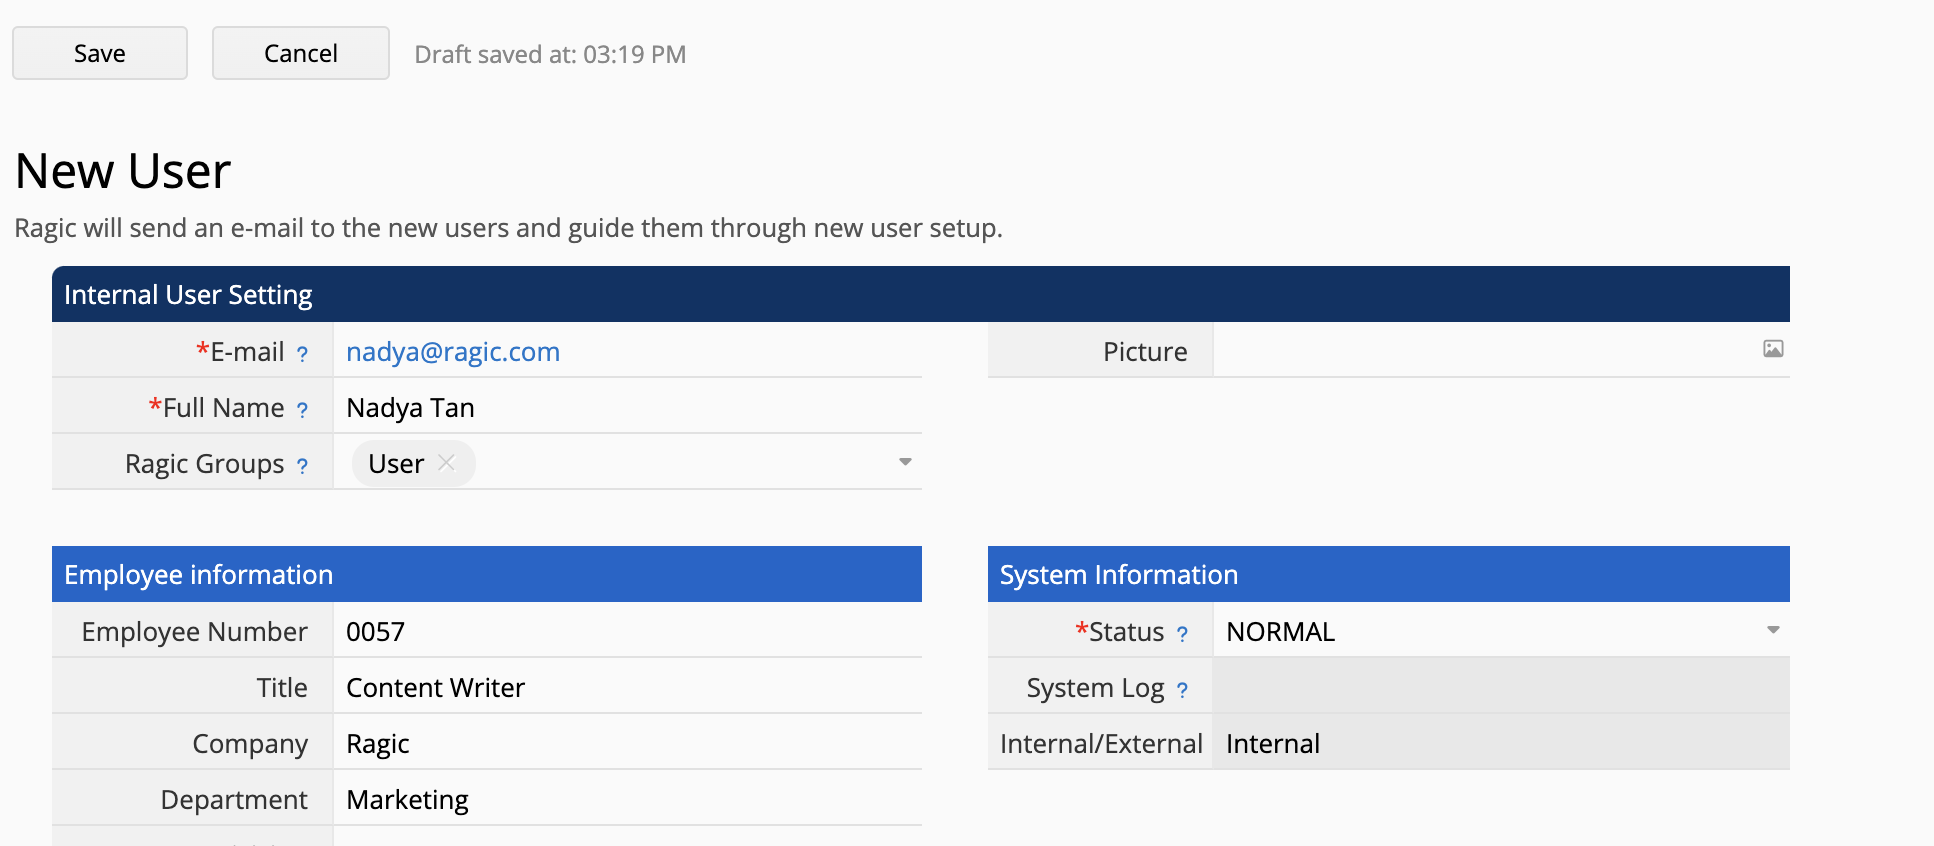
Before using the template, make sure to register all employees in the system's user sheet. In the "Equipment Checkout" sheet, users who may borrow equipment will select themselves as the person checking out the equipment. This step is crucial for tracking the accountability of each item.
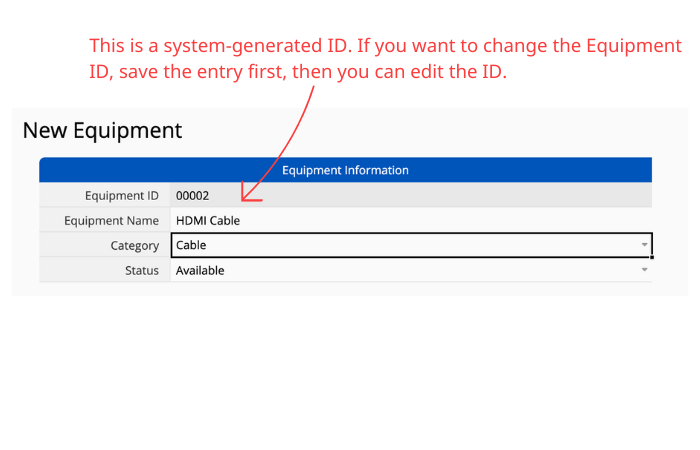
It is important to note that in the equipment list, each entry represents one piece of equipment. Therefore, if you have more than one of the same product that is available for checkout, you will need to create multiple entries for each equipment. For example, if you have 2 whiteboards that are similar. You will have two entries for the same exact whiteboard.
After registering all the users and all the equipment, we can start using the template!
When a colleague needs to borrow equipment, they can add a new entry in the "Equipment Checkout" sheet by clicking the red "+New" button.
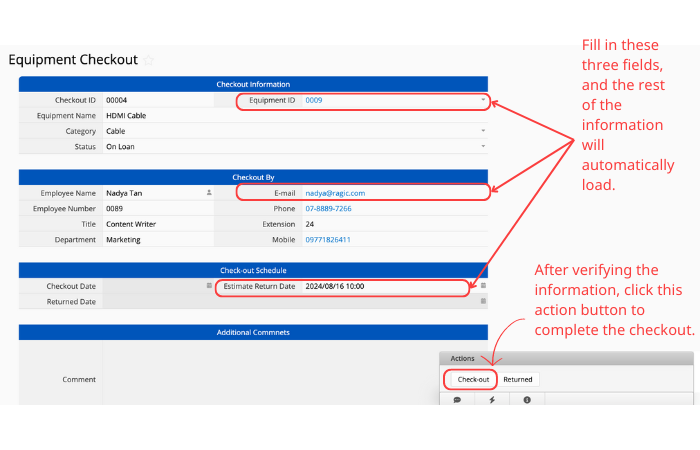
Most fields in this sheet are already linked to other sheets to automatically load relevant information. So, they'll only need to fill in the fields marked in the above picture. After verifying the details, click the "Check-out" action button to complete the checkout. The system will automatically update the equipment's status in the "Equipment" sheet to "Unavailable" and fill in the "Checkout Date" field with the current time.
When a colleague wants to return borrowed equipment, they can go to their "Equipment Checkout" sheet and click the "Returned" action button.
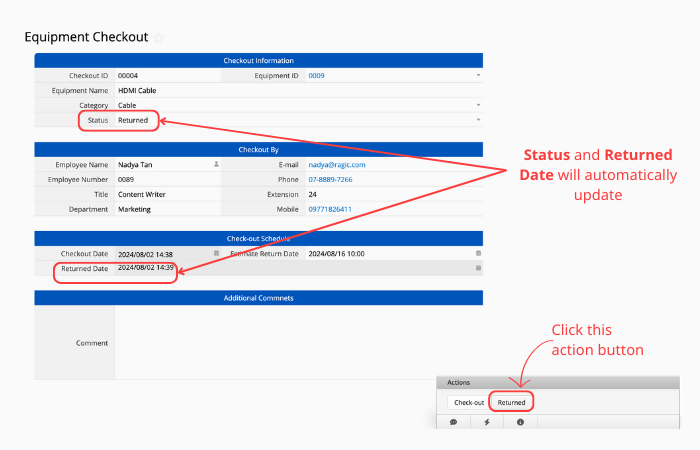
The system will then automatically update the equipment's status to "Available" and fill in the "Return Date" field with the current time.
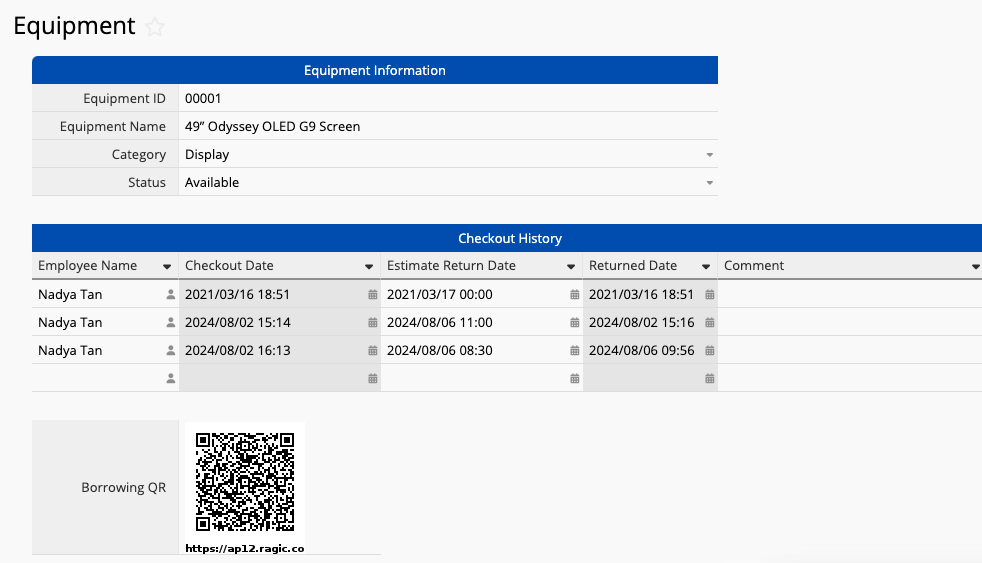
If you go back to your “Equipment” sheet, you'll see that the system has automatically summarized the checkout record in the "Checkout History" subtable.

If a colleague wants to reserve equipment, they can easily see the Estimated Return Date from the subtable.
That’s the whole process for using this template—surprisingly simple, right? Now, let's look at some advanced tips to help you manage your equipment more efficiently.
As the number of equipment records grows, tracking unreturned items can get tricky. To make it easier, use the left sidebar to filter the "Status" field to "Unavailable" and save it as a Shared View.
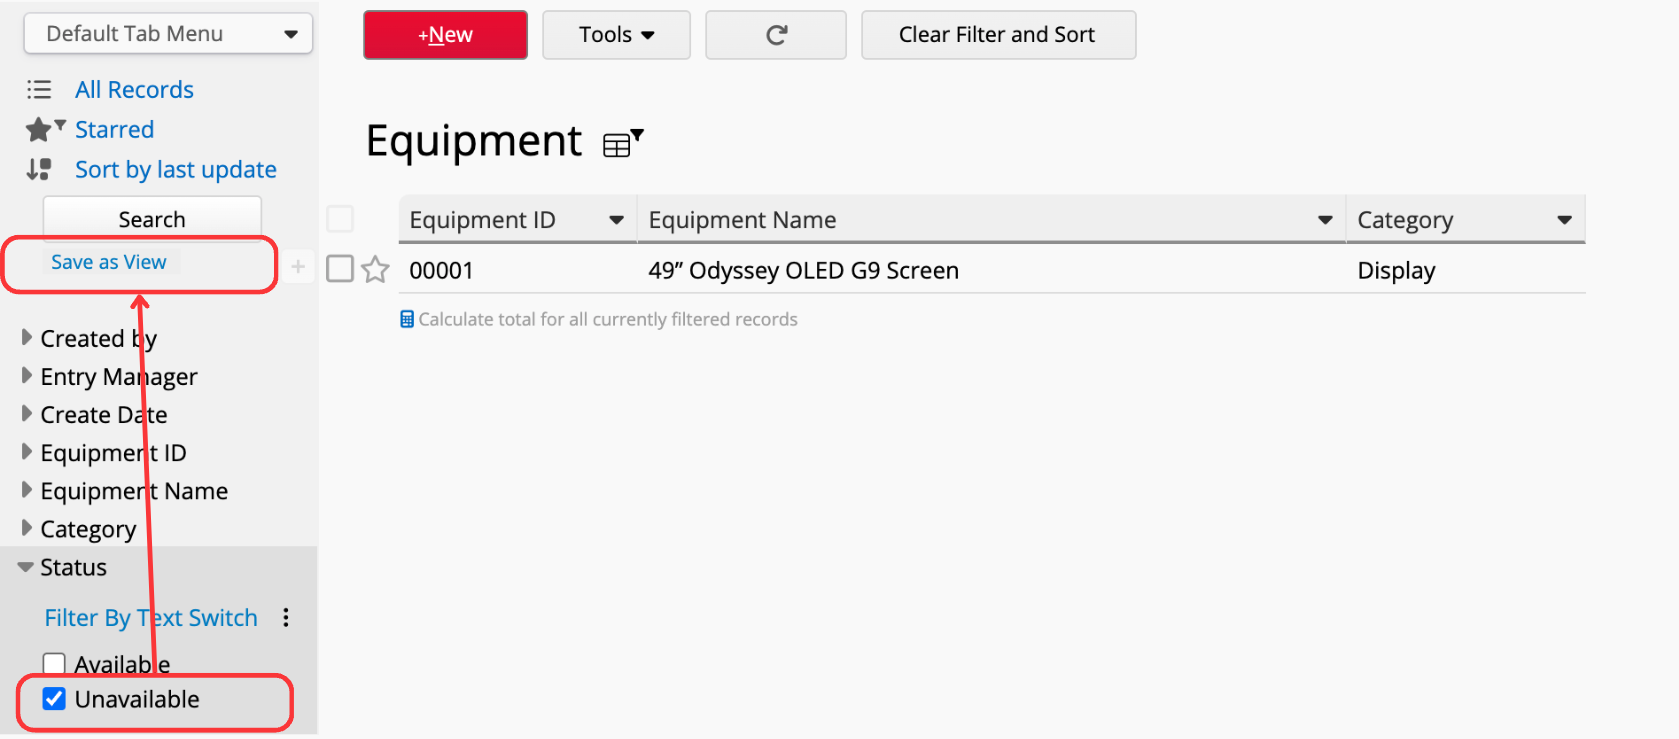
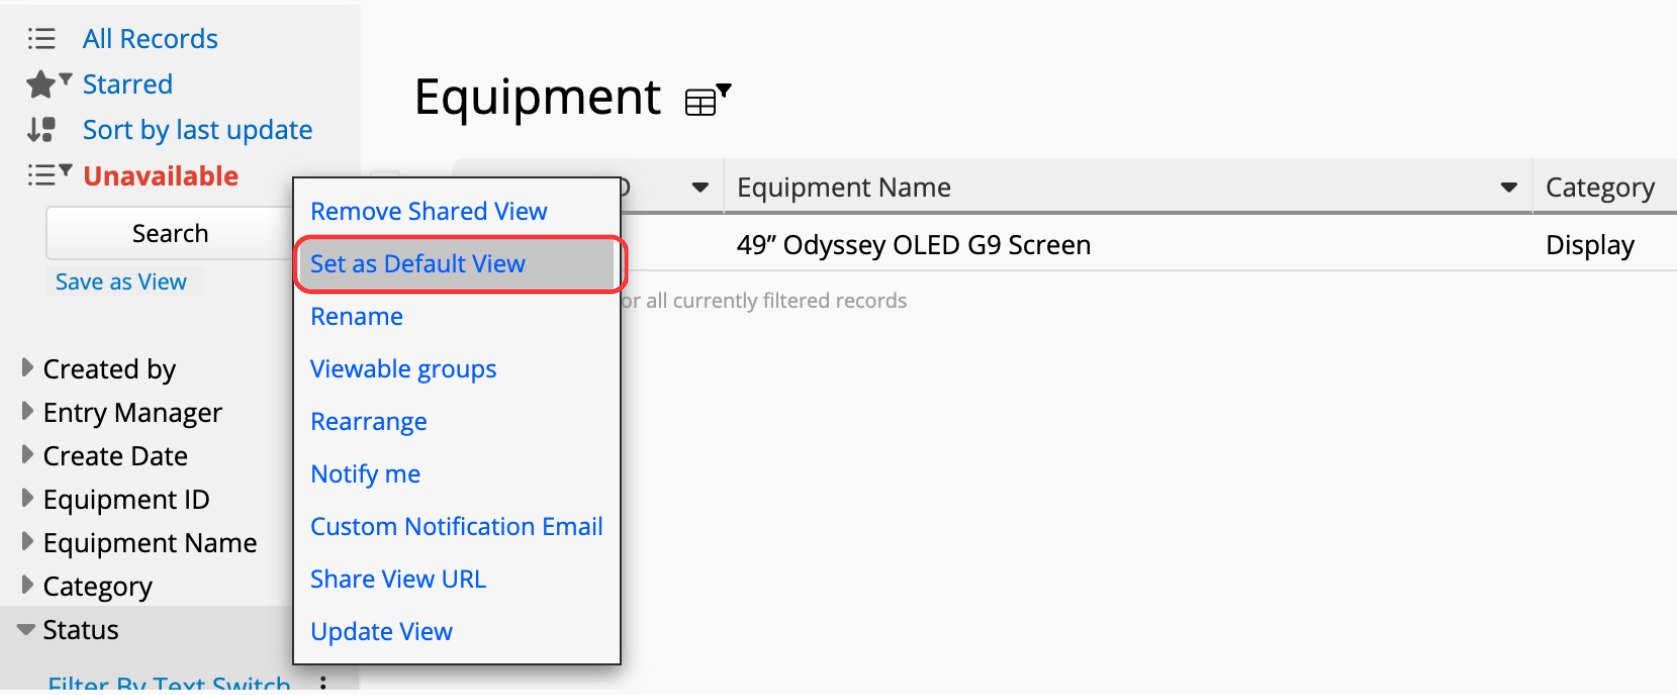
Then, set this as the Default View, so whenever you open the sheet, it automatically shows the unreturned equipment.
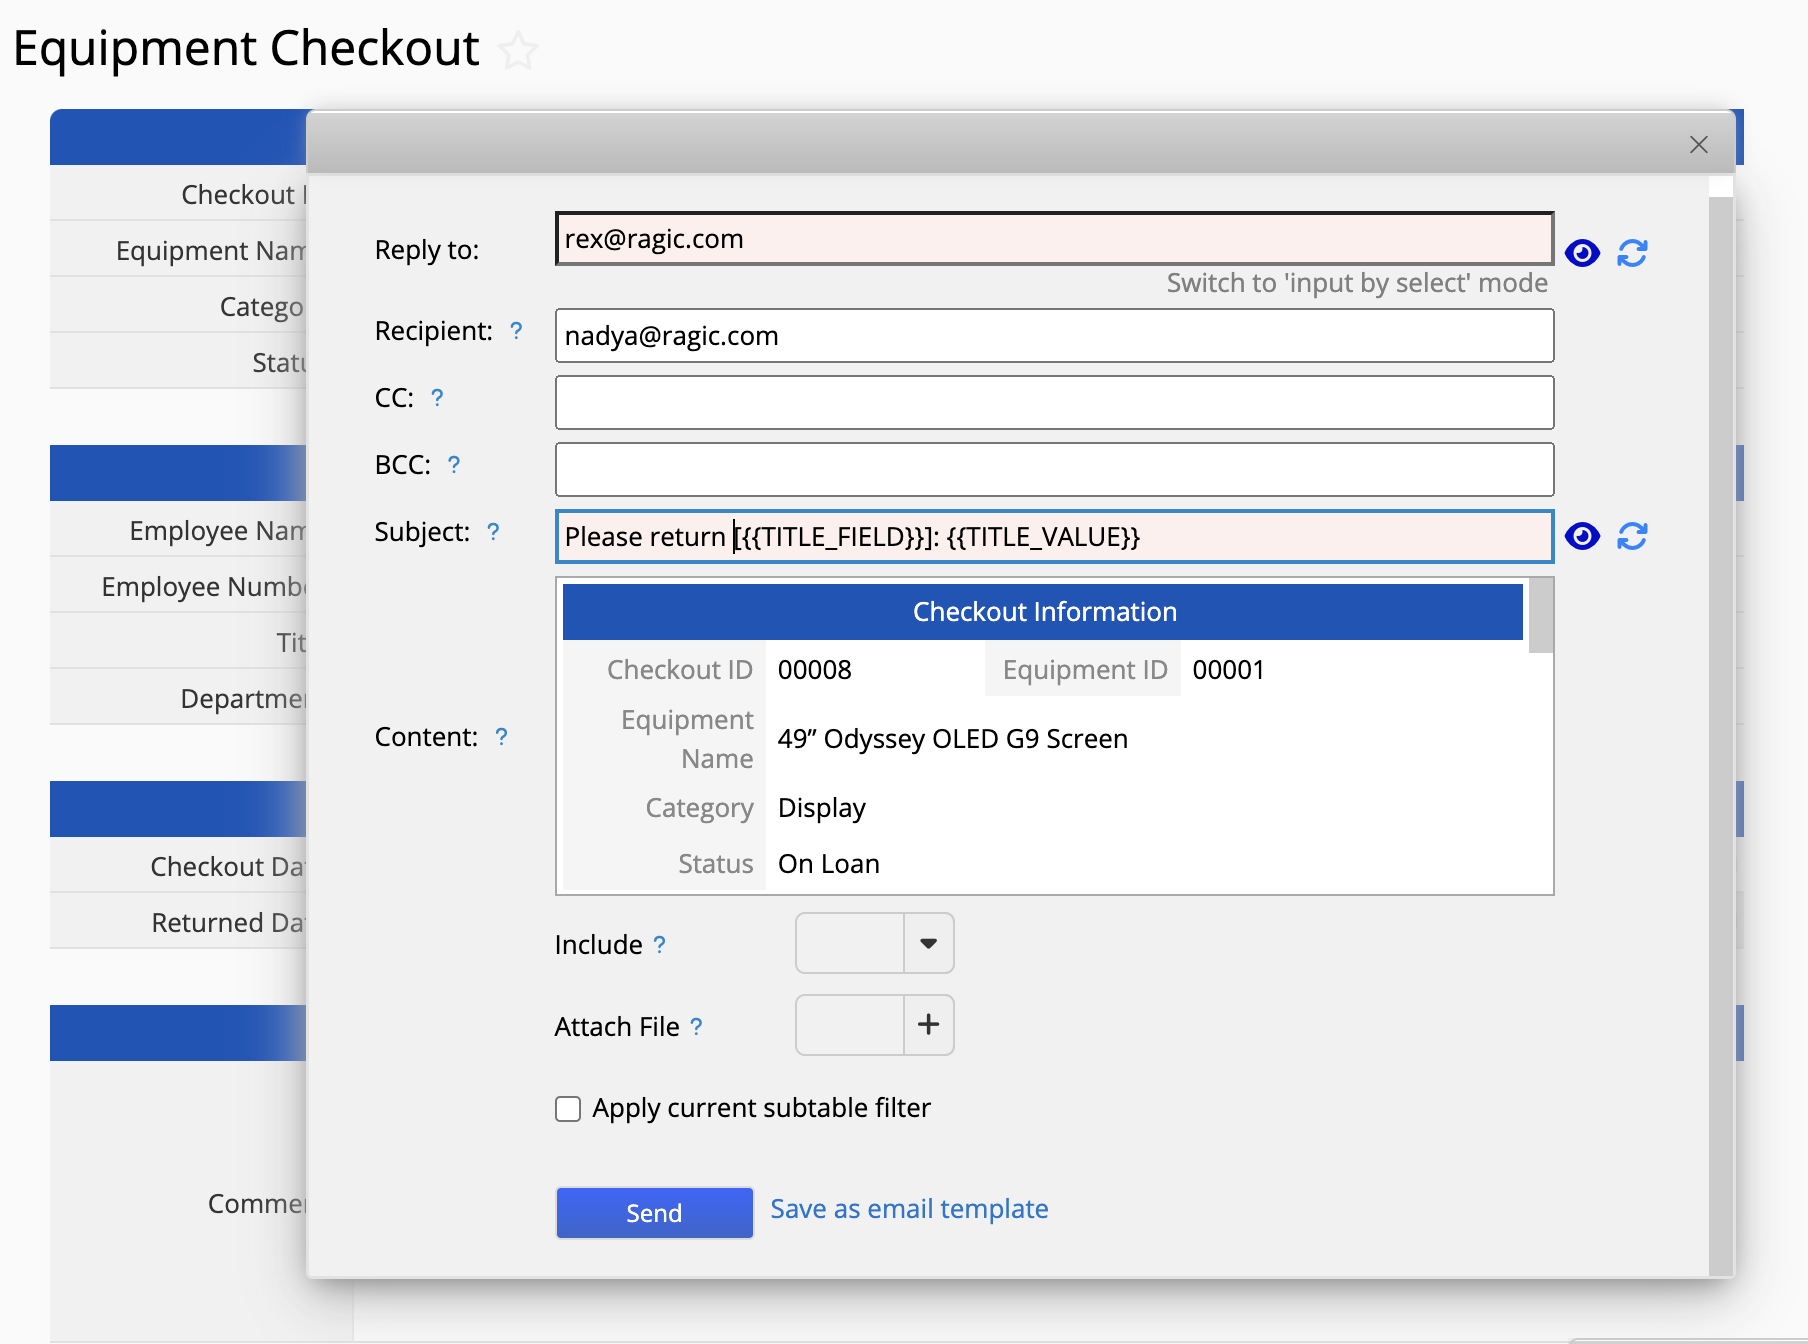
The template will automatically send a reminder email one day before the "Estimate Return Date" to let users know their checkout is about to expire. You can also manually send a reminder to give them a nudge to return the item.
Most Equipment ID consists of a mix of uppercase, lowercase letters and numbers, which is pretty tedious to type manually when you want to log your “Equipment Checkout” sheet. Plus, if the equipment is heavy or hard to move, bringing it to the person in charge for logging isn’t practical. One of the solution is you can create barcode for equipment checkouts:
Step 1: Create a borrowing QRcode with QRcode field in “Equipment” sheet
Step 2: Use string formula to generate the barcode for borrowing
"https://ap12.ragic.com/VENDAeq/ragicadministration/10001?pfv2000014="+A2+"&new"
- https://ap12.ragic.com/VENDAeq/ragicadministration/10001? - Change this to your Equipment Checkout Sheet URL
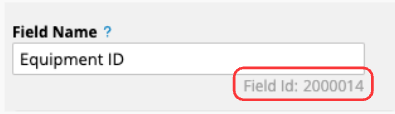
- pfv2000014 - pfv means prefill value. Change 2000014 to the Field ID of your Equipment ID in your “Equipment Checkout” sheet.
Step 3: Execute Formula Recalculation
Once completed, each record will have a unique borrowing barcode:
Step 4: Use Label Maker to print out the barcode and stick it to your equipment.
After completing the steps above, you can use your phone's camera or a barcode scanner to scan the QR code. You will automatically be directed to the “Equipment Checkout” sheet with the relevant equipment details already filled in. Simply enter the borrower's information and click "Check-out" action button to complete the process.

When a colleague wants to return equipment, you can also create a QR code to streamline the process. Here's the tutorial to do so. This barcode can be sent to the colleague via email. So when returning, they can easily locate the corresponding checkout sheet.
Not only can you manage equipment borrowing and returning with Ragic, but you can also handle maintenance and repairs. Together, these templates offer full-cycle equipment management for your organization.
If you have any questions or suggestions about this template, contact us at support@ragic.com.

